BuddyPress#Overview
WP Fusion automatically syncs your BuddyPress members with leading CRMs and marketing automation tools, and allows you to apply tags in your CRM based on member activity, as well as personalize the member experience using tags and automations in your CRM.
WP Fusion also supports the BuddyBoss Platform with the same features. For information on WP Fusion』s integration with BuddyBoss-specific functionality, see the BuddyBoss documentation.
#Syncing custom fields
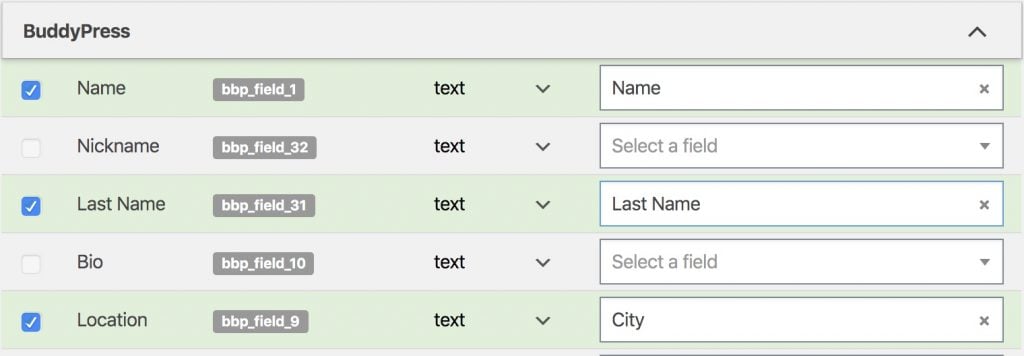
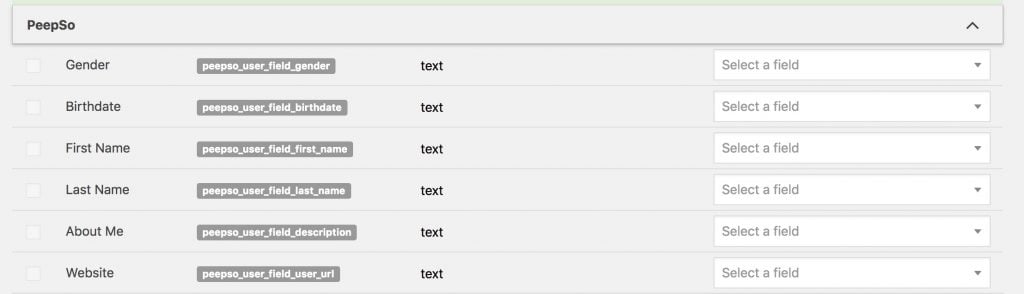
Any custom fields created with the BuddyPress XProfile fields editor will show up under the Contact Fields tab in the WP Fusion settings, and you can map them to any field in your CRM. Once selected, any updates to the user』s profile will automatically be synced.
#Groups
#Groups auto enrollment

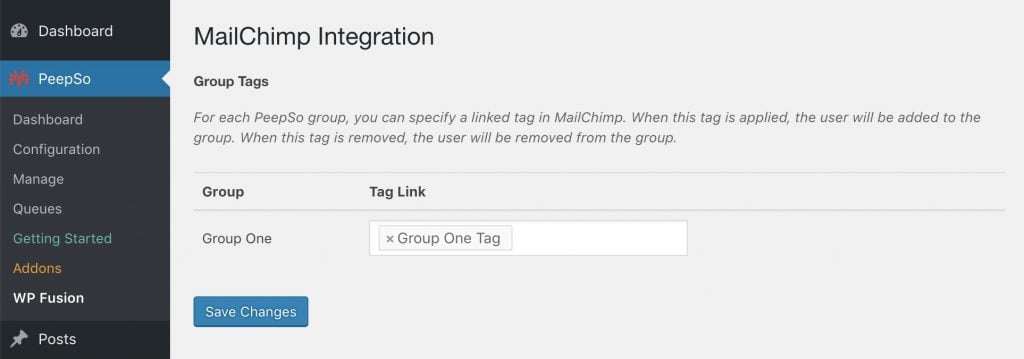
WP Fusion includes support for BuddyPress Groups. You can specify a tag to be 「linked」 to this group. When the user is added to the group, the tag will be applied. When the user is removed from the group, the tag will be removed.
Likewise, applying this tag to a user in your CRM or from another integration will automatically add the user to the group. Removing the tag in your CRM (or if the user doesn』t have the tag) will remove the user from the group.
Note: If a user removes themself from a group, this will also remove the linked tag (to prevent them from being immediately re-enrolled). For this reason it』s recommended to use a unique tag for groups auto-enrollment, so that the member doesn』t lose access to other content if they leave the group.
#Group organizer auto-assignment
In addition to auto-enrolling group members, WP Fusion also has the ability to auto-assign group organizers based on a user』s tags in your CRM.
When the tag specified in the Link with Tag – Group Organizer setting is applied to a contact in your CRM, the user will be added to the group and promoted to organizer.
When the tag is removed, the user will be demoted from organizer to a regular member.
As well, setting a user as organizer of the group will automatically apply the linked tag in your CRM, and removing a user from the organizer role will also automatically remove the linked tag.
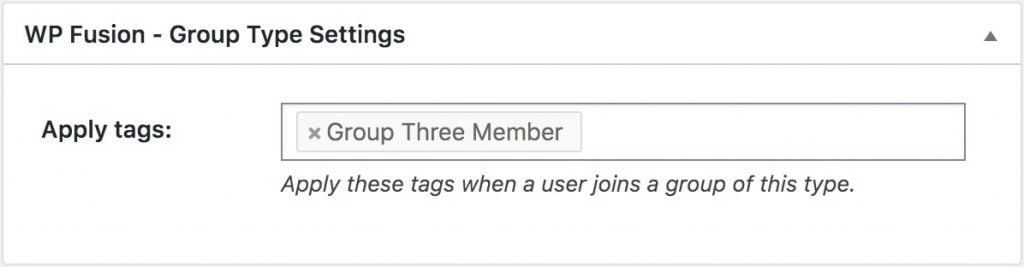
#Group types
WP Fusion includes an option to apply tags when users are added to a group of a certain group type. This setting is found when editing any group type.
#Profiles
#Profile tab visibility
Using the BuddyPress User Profile Tabs Creator plugin you can add custom profile tabs to your BuddyPress or BuddyBoss user profiles.
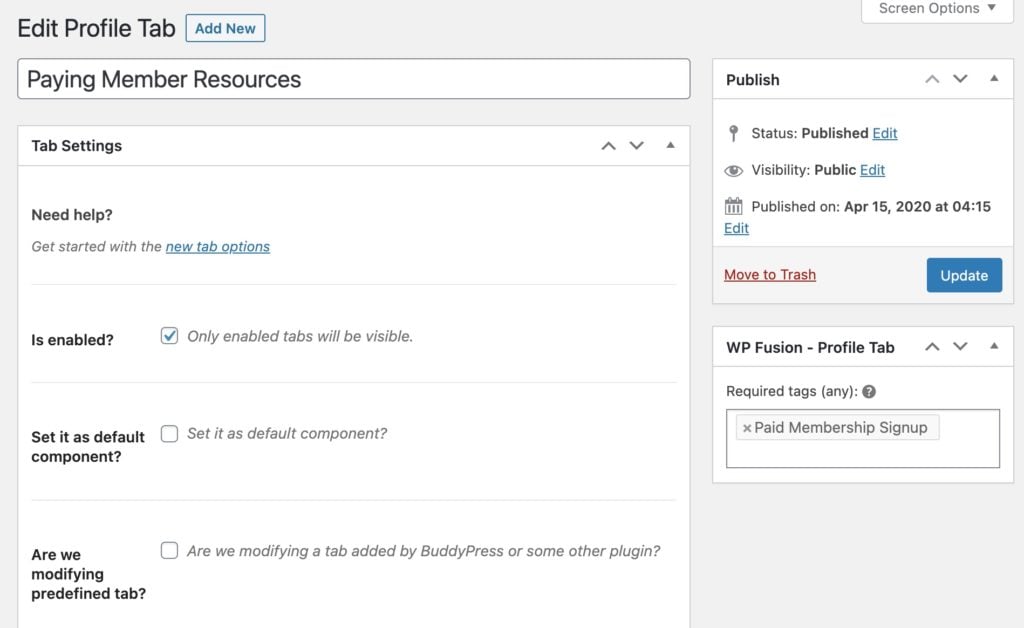
WP Fusion includes an integration to allow you to customize profile tab visibility based on a member』s tags in your CRM.
To enable this, select one or more tags from the Required tags (any) input in the WP Fusion – Profile Tab meta box in the sidebar when editing any profile tab.
Once enabled, the user must have at least one of the specified tags to be able to see the profile tab. If they do not have any of the tags, the profile tab will be hidden.
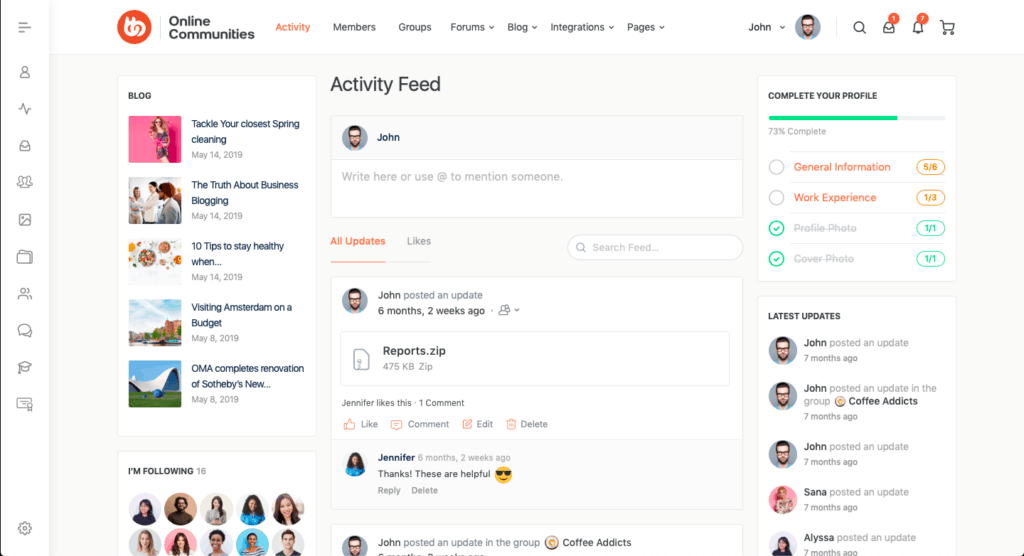
#Activity Feeds
BuddyPress has an option to display an activity feed of content on your site, such as forum activity, new courses / lessons published, and group activity.
It』s important to keep in mind that content that』s protected by WP Fusion can still add an entry to the activity feed. For example a new lesson in a restricted course could still show up in a user』s feed.
You can prevent this by enabling the Filter Queries setting, which will cause WP Fusion to personalize the activity feed based on the current user』s tags.
However, keep in mind that this requires significant extra resources in order to check the access rules for every item in the activity feed.
If you』re concerned about performance, it would be better to leave Filter Queries off, and consider limiting the kinds of items that can appear in the activity feed in the BuddyPress settings, or protecting the Activity page itself.
#General settings
Under Settings » WP Fusion » Integrations » BuddyPress you』ll find the global settings for the BuddyPress integration.

The options are
Defer Until Activation: By default WP Fusion will sync new users to your connected CRM when they register an account on your site. When Defer Until Activation is checked, WP Fusion will not send any data to your CRM until new users are approved (either by an administrator or via email activation).
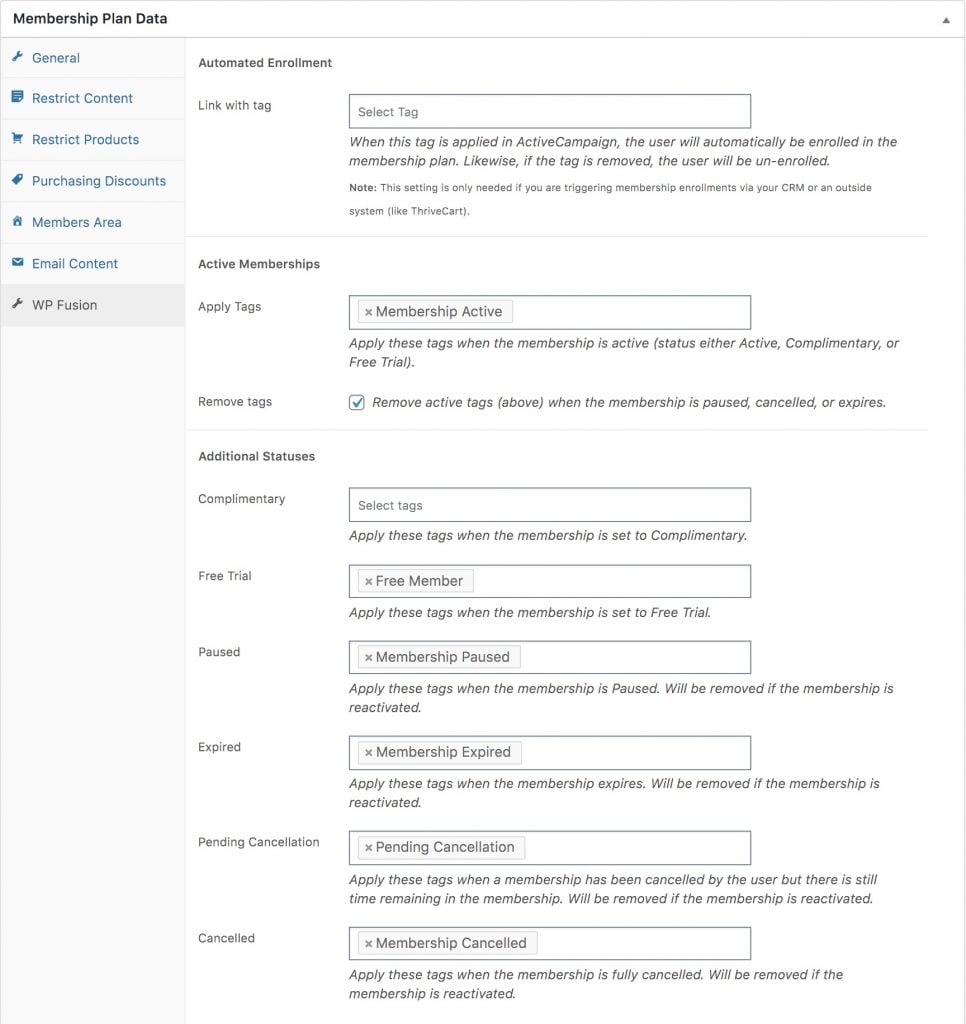
Apply Tags – Profile Complete: If you』re using the BuddyBoss profile completion widget, you can specify tags here to be applied in your CRM when a user』s profile reaches 100% complete.
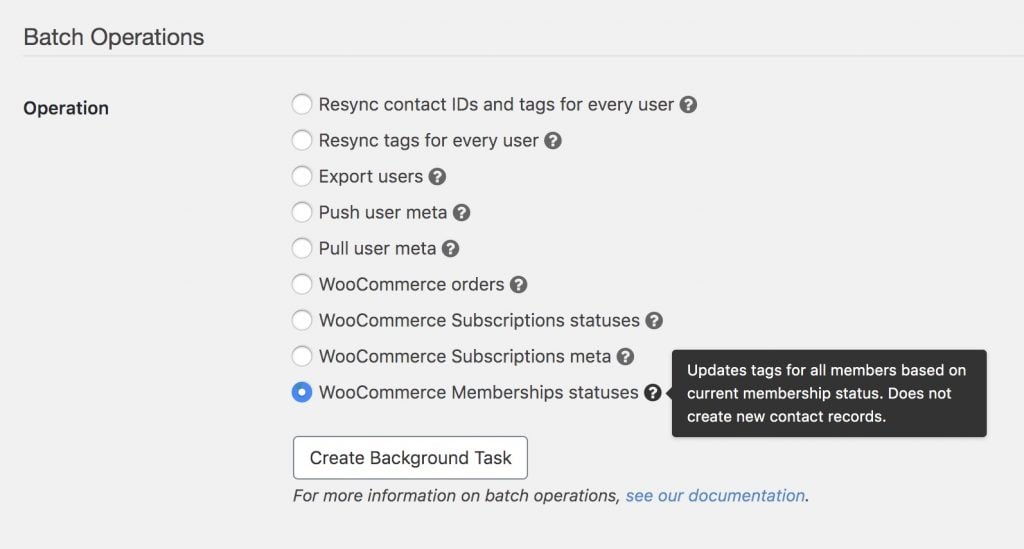
#Batch operations
WP Fusion includes two batch processing tool for BuddyPress and BuddyBoss, under Settings » WP Fusion » Advanced » Batch Operations.
These are helpful when you』re setting up WP Fusion on an existing membership site and need to export current Group and Profile Type information to your CRM.
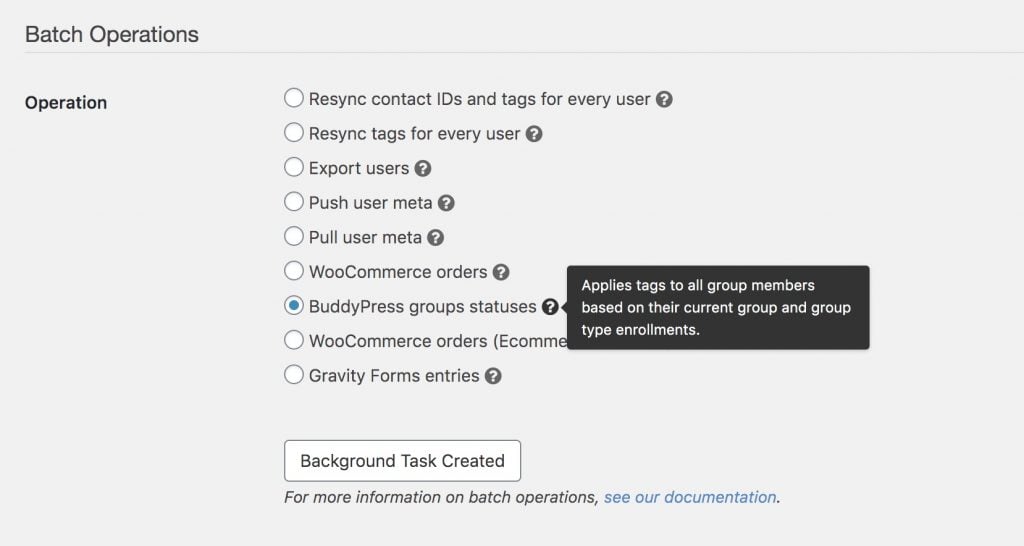
The two available operations are:
BuddyPress groups statuses: For each user on your site WP Fusion will apply tags based on the user』s current group (and group type) memberships, using the settings you』ve configured on each group. This does not trigger any automated group enrollments or un-enrollments.
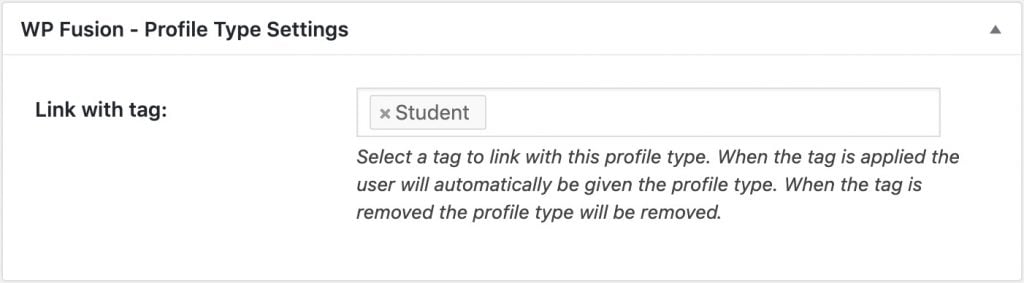
BuddyBoss profile type statuses: For each user on your site WP Fusion will apply tags based on the user』s current profile type assignments, using the settings you』ve configured on each profile type. This does not trigger any automated group enrollments or un-enrollments.
#Updating roles
You can set or update a user』s BuddyPress role via a webhook from your CRM. WP Fusion requires the BuddyPress internal role value to be passed for the ?role= parameter in your webhook. Below are the values for the default BuddyPress roles
Participant: bbp_participant
Moderator: bbp_moderator
Blocked: bbp_blocked
Spectator: bbp_spectator
Keymaster: bbp_keymaster
#Was this helpful?
Let us know if you liked the post. That』s the only way we can improve.
Yes
No


 The PilotPress partner center page in WordPress
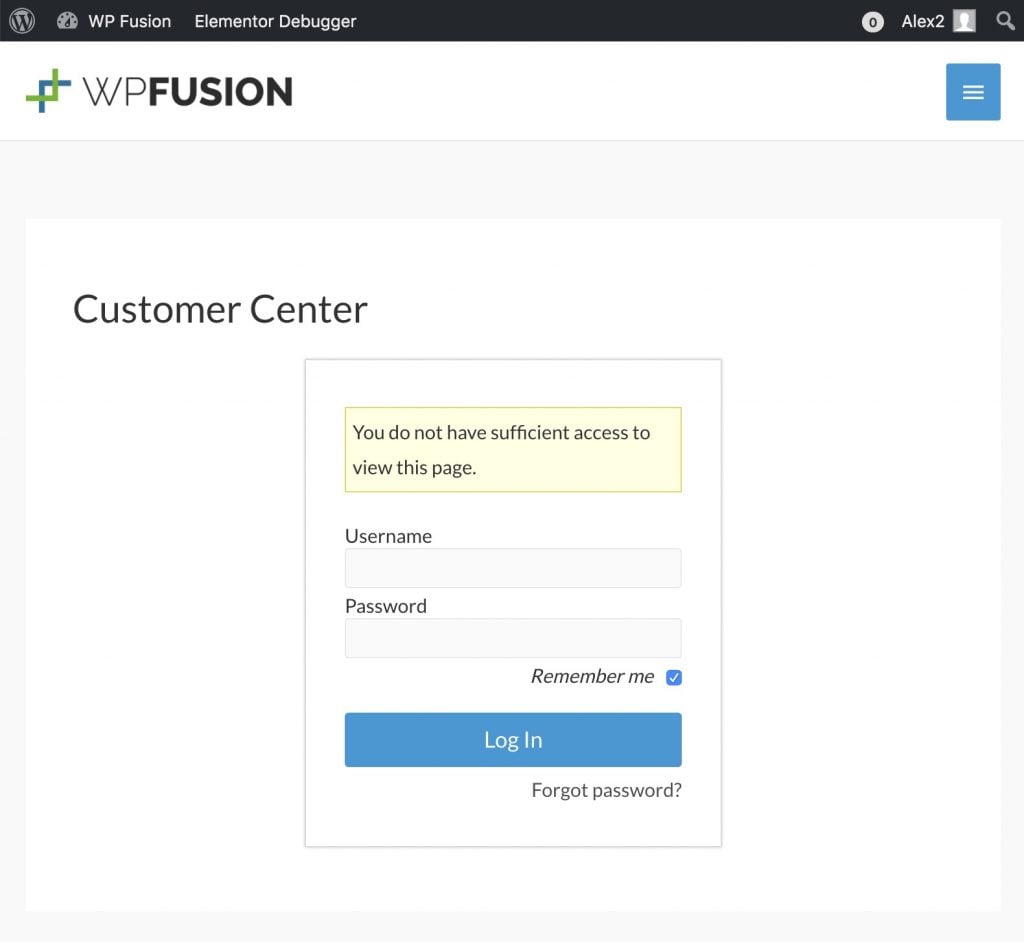 A user who logs into WordPress via another plugin may needs to log in again with their Ontraport credentials to access the PilotPress Customer Center
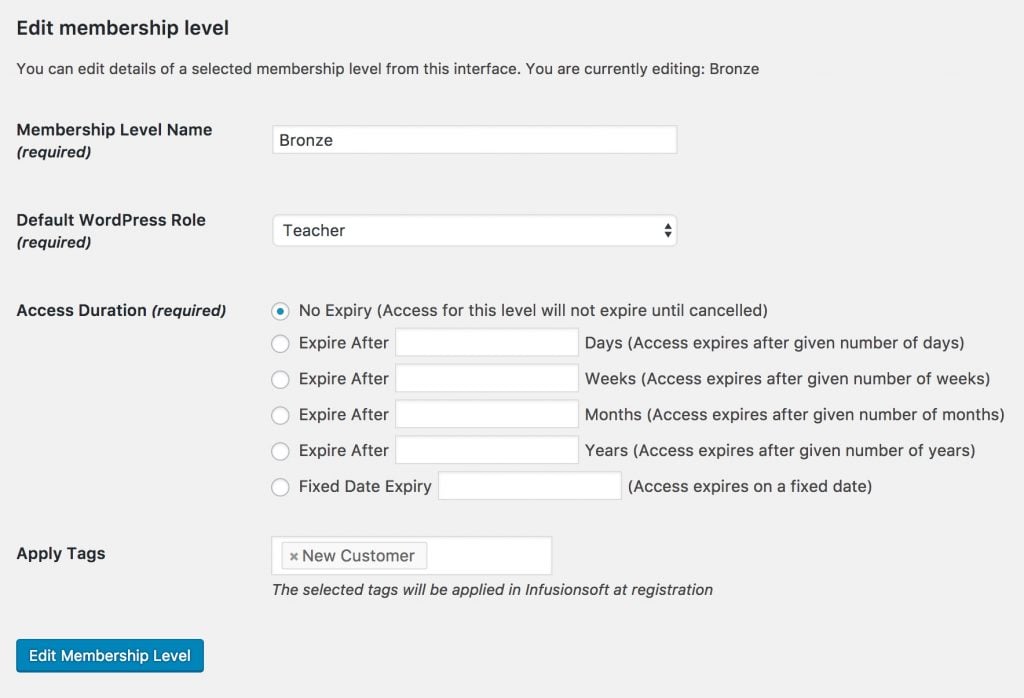
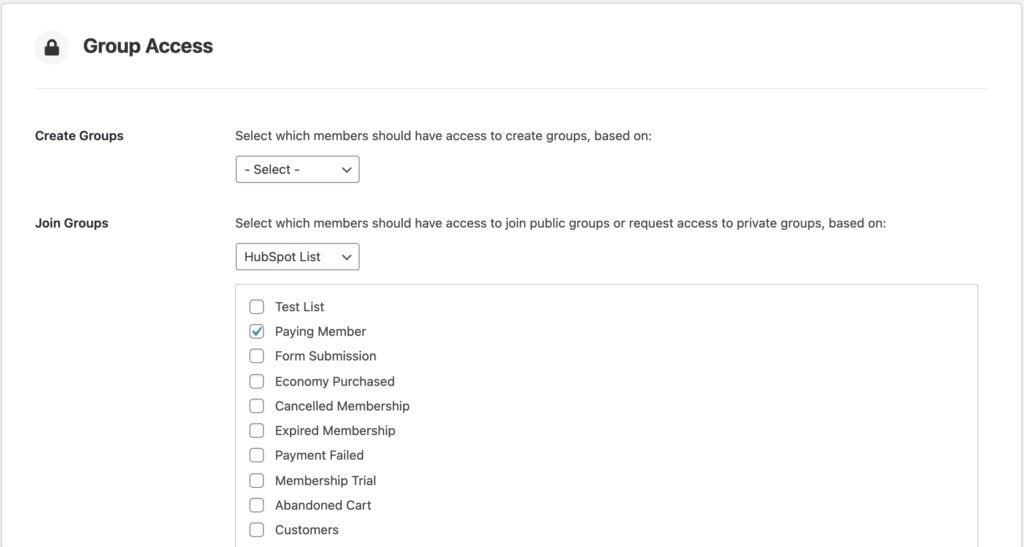 In this example, only users who are on the HubSpot list Paying Member can join social groups.
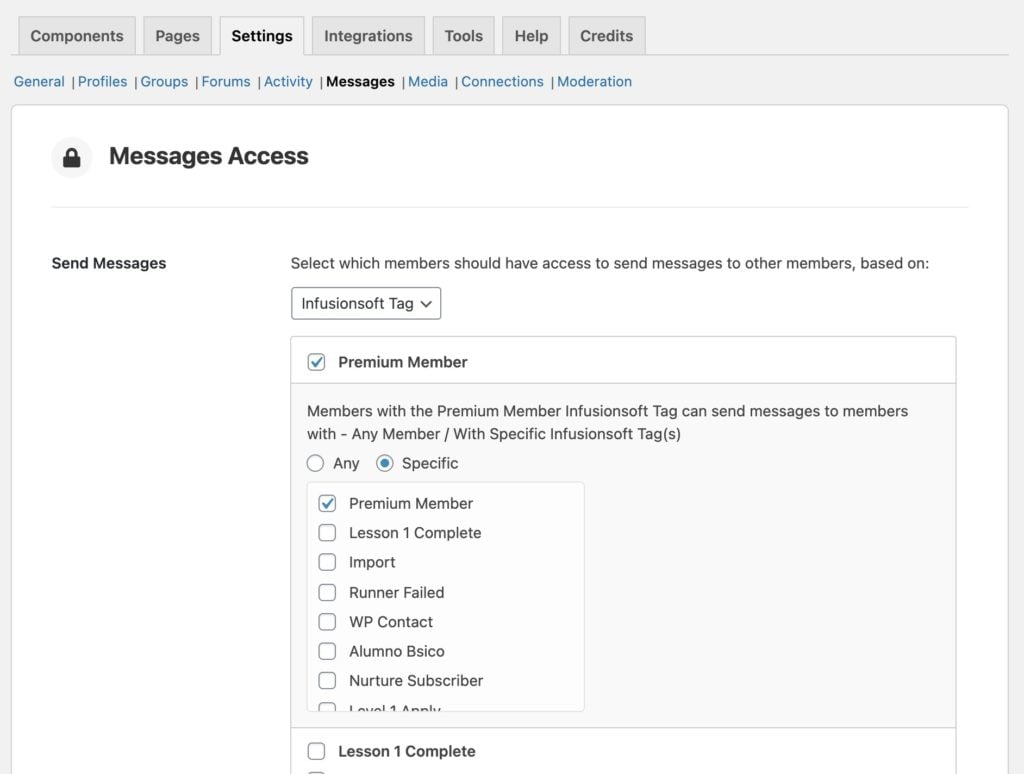 In this example, only members with the Infusionsoft tag Premium Member can send private messages.
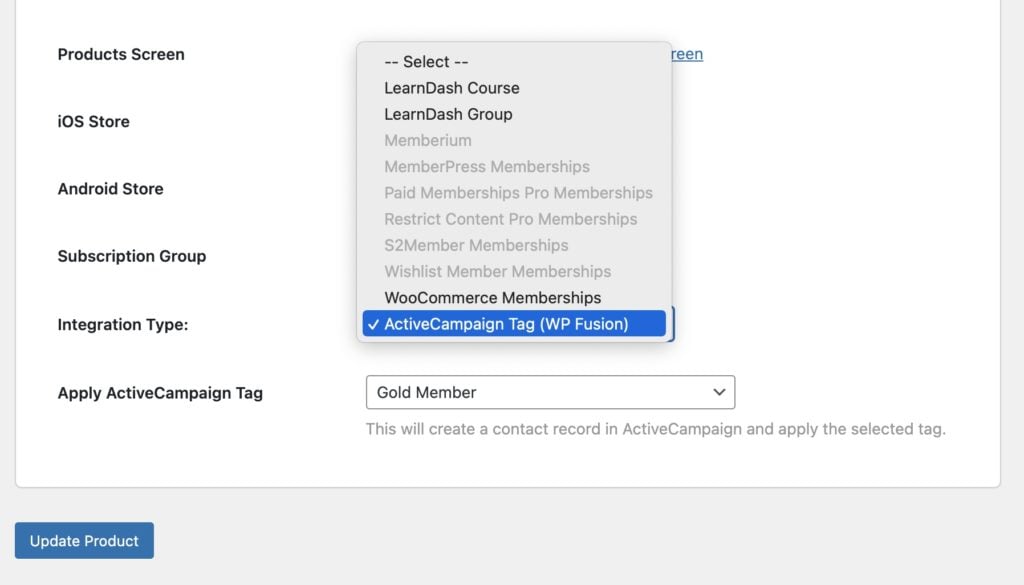 WP Fusion』s BuddyBoss app integration allows you to sync in-app purchase data with your CRM or marketing automation tool.