Paid Memberships Pro#Overview
WP Fusion works with Paid Membership Pro to add customers to your CRM when they purchase a membership, and auto-enroll members when tags are applied in your CRM.
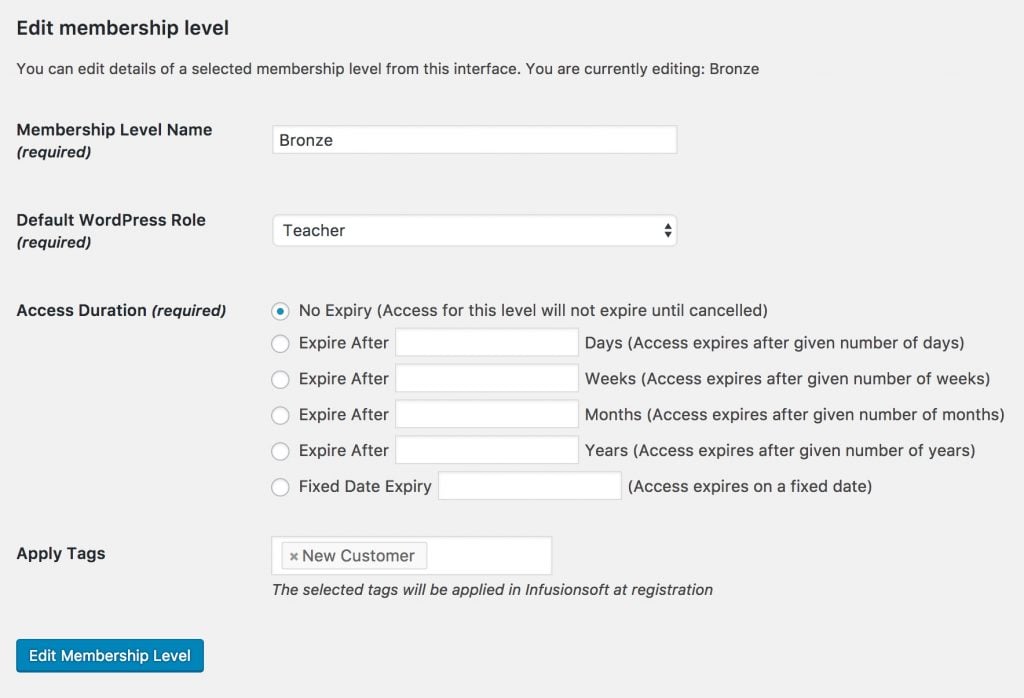
WP Fusion adds several settings to Paid Memberships Pro, which you can see while editing any membership level.
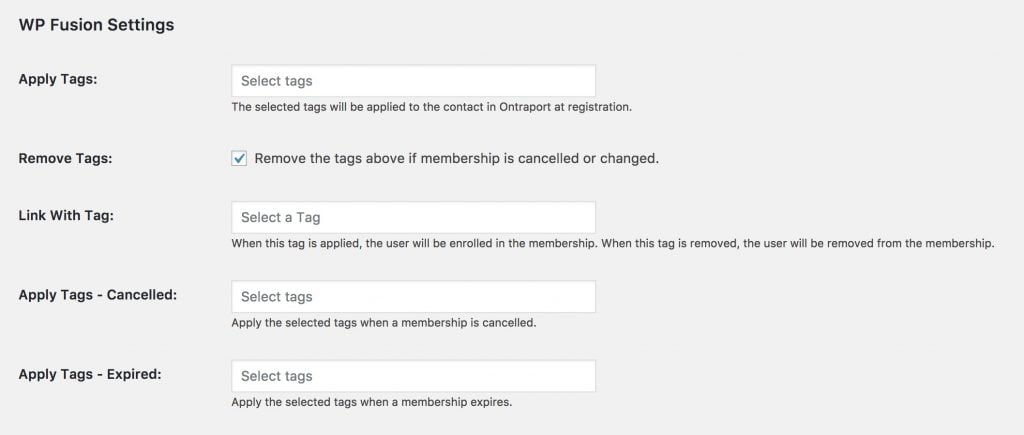
#Tagging
You can apply tags based on the level of membership purchased, as well as optionally apply tags when a membership is cancelled or the period expires. There are several options:
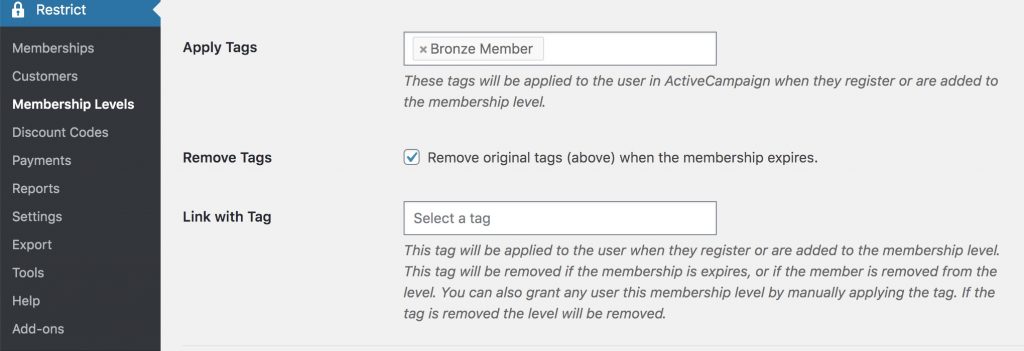
Apply Tags: When the customer purchases a membership, these tags will be applied in your CRM. This is the default behavior.
Remove Tags: If the membership is cancelled, expires, or changed, the tags specified in Apply Tags can automatically be removed.
Link with Tag: Most sites won』t require this, but it is available as an option for those that need it. This setting allows you to select a tag that becomes linked with the membership level. If this tag is applied to a contact, for example via a webhook, they will be automatically enrolled in the membership. Likewise if this tag is removed, they will be removed from the membership. This lets you automate individual users』 membership levels using sequences in your CRM in conjunction with webhooks / HTTP Posts.
Linked tags will also be applied and removed if a user is added to / removed from a membership.
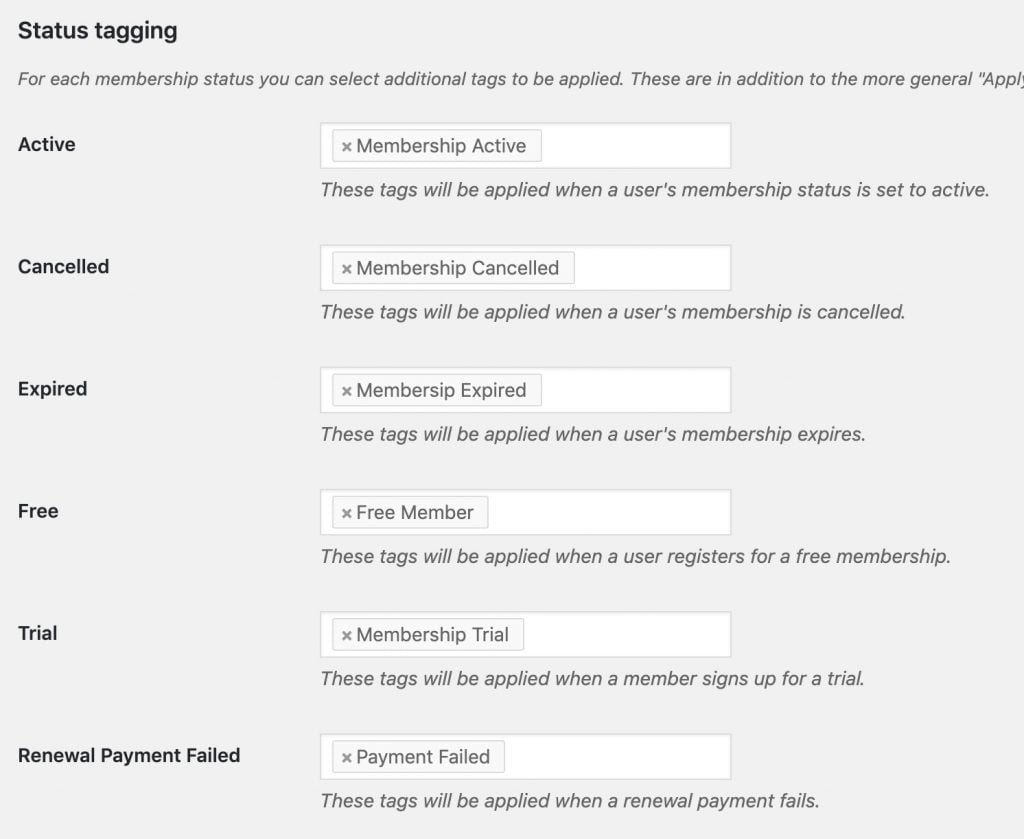
Apply Tags – Cancelled: These tags will be applied if a membership is cancelled.
Apply Tags – Expired: For memberships with expiration dates, this option lets you apply tags when a membership expires, allowing you to trigger additional renewal followup automations.
Apply Tags – Payment Failed: For subscription memberships, you can specify tags to be applied when a recurring payment fails. These tags will be removed if a successful payment is received.
#Cancel on Next Payment Date
By default when someone clicks Cancel on a Paid Memberships Pro subscription, their membership will be immediately cancelled and the Apply Tags – Cancelled tags will be applied— even if there is time left before their next renewal payment would have been charged.
If you』re using the Cancel on Next Payment Date addon, the behavior is different. When someone clicks cancel, they will remain active in the membership until the date of their next scheduled payment date, at which time their access will be revoked.
When the Cancel on Next Payment Date addon is active, you』ll see a new setting when editing a membership level, Apply Tags – Pending Cancellation.
These tags will be applied in your CRM as soon as a member clicks Cancel on their membership. Then, when the member』s access actually expires, the Apply Tags – Expired tags will be applied.
#Approvals
When the Approvals addon is active, an additional field pmpro_approval will be available for sync, and will be listed in the Contact Fields list.
When active, the approval status (either 「pending」 or 「approved」) will be synced to your CRM when a member registers, changes membership level, or when their approval status is changed.
In addition, you can set this field to value 「approved」 in your CRM, and the member will be approved in Paid Memberships Pro.
This allows you to manage member approvals by editing contact records in your CRM, or even to automate approvals using an automation or workflow.
#Syncing Member Data
WP Fusion can sync member data provided at checkout to custom fields in your CRM, such as address and phone number. These fields can be enabled at Settings » WP Fusion » Contact Fields » Paid Memberships Pro.
If you』re using the Paid Memberships Pro Register Helper Add On to add custom fields to your registration form, these will also automatically be detected and can be enabled for sync from the Contact Fields list in the WP Fusion settings.
#Additional Meta Fields
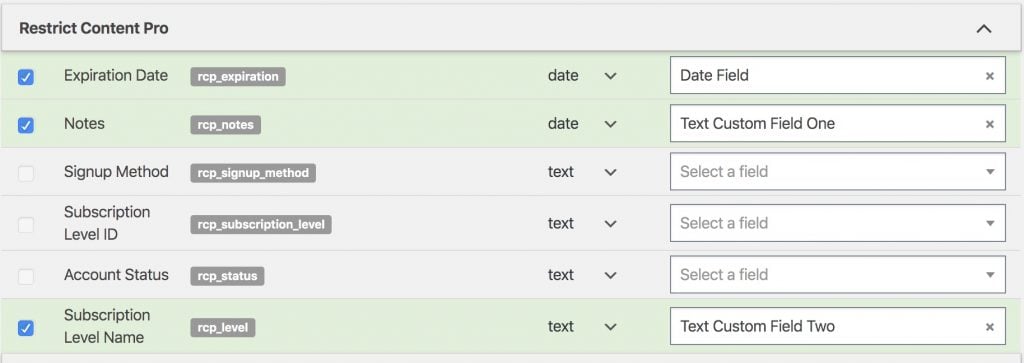
WP Fusion allows you to sync certain internal Paid Memberships Pro fields that aren』t normally available as part of the WordPress user record. Under the Paid Memberships Pro section in the Contact Fields tab, you』ll see a few options.

Membership Level indicates the title of the member』s current membership level
Membership Status will either be 「active」 or 「inactive」 depending on their status
Payment Method is synced at checkout and indicates the payment gateway or payment method used to make a purchase
Start Date is the date the membership started
Expiration Date is the date of expiration for the membership (if it has an expiry date). You can use this in in conjunction with date-based triggers in your CRM to automate renewal reminders
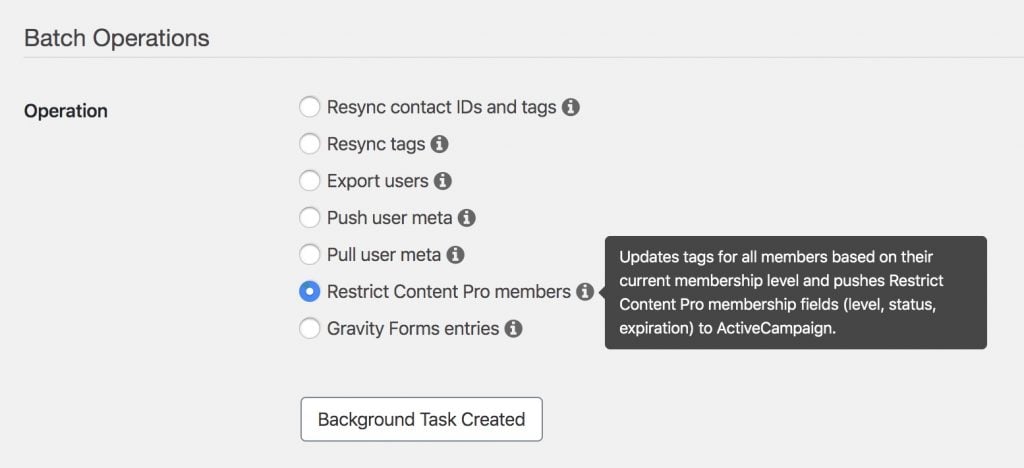
#Batch Operations
For members who registered for your site before you set up WP Fusion, we include a two batch operations tools to bring those historical members up to date.
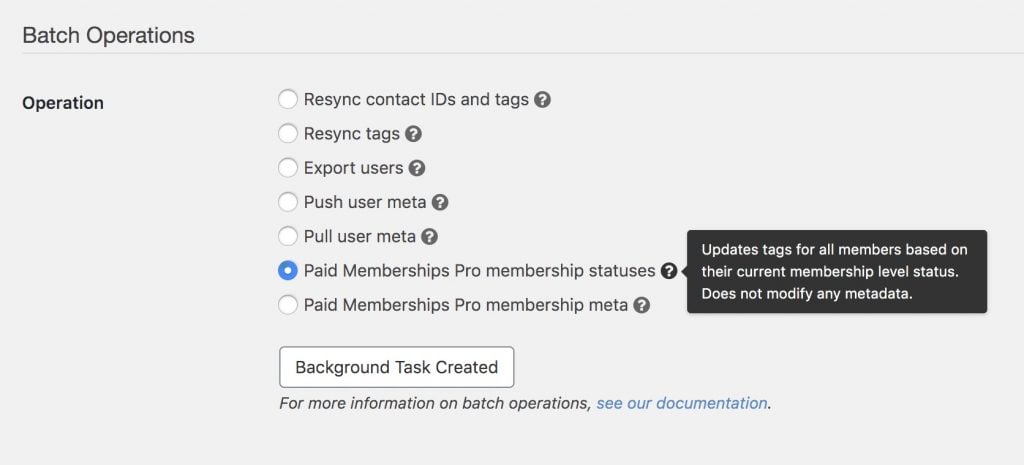
The two options are:
Paid Memberships Pro membership statuses: This operation will go through all the members on your site and get each member』s most recent status at each membership level (including cancelled and expired members). It will then apply any tags you』ve configured for that membership level.
Paid Memberships Pro membership meta: This operation will query all the members on your site, and for each it will sync any enabled meta fields for that user』s most recent membership, such as Start Date, Expiration Date, Membership Level, and Status. This operation does not modify any tags.
Keep in mind this process can take some time to complete on sites with a large number of members. You can leave the page and come back later to check on the status.
#Was this helpful?
Let us know if you liked the post. That』s the only way we can improve.
Yes
No


 The PilotPress partner center page in WordPress
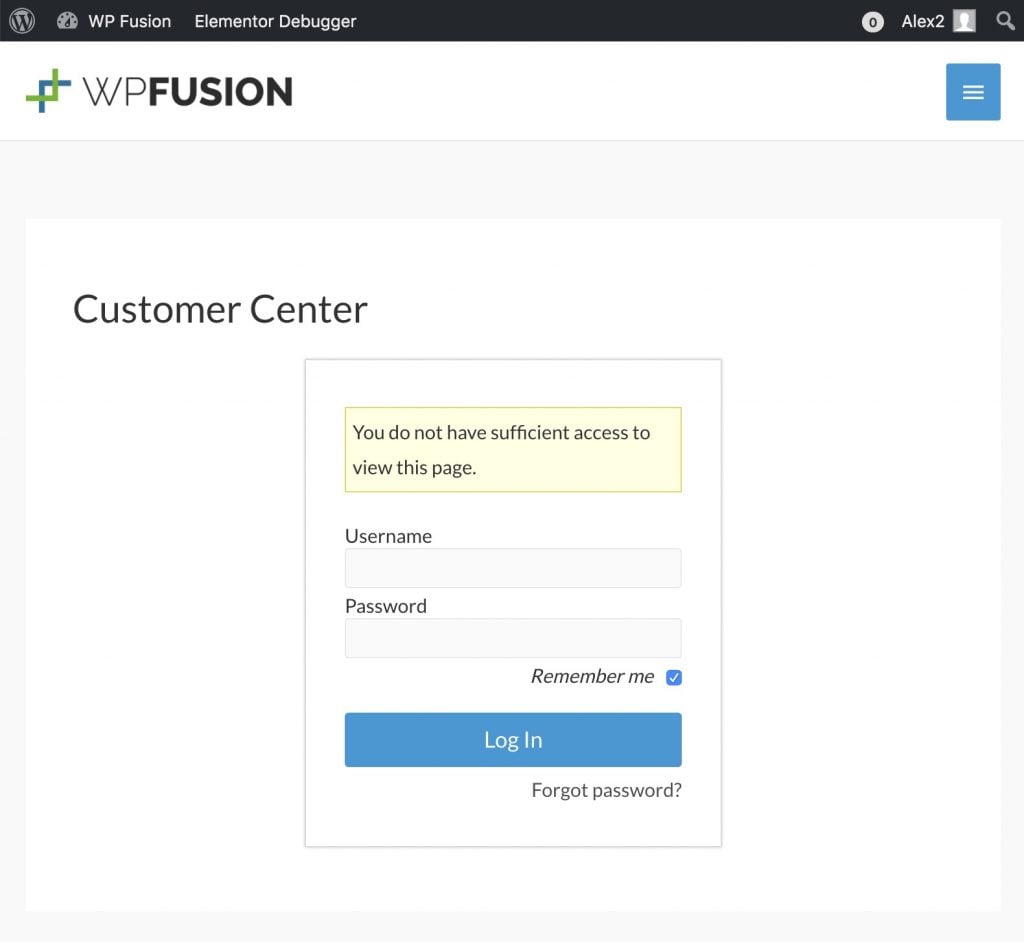 A user who logs into WordPress via another plugin may needs to log in again with their Ontraport credentials to access the PilotPress Customer Center
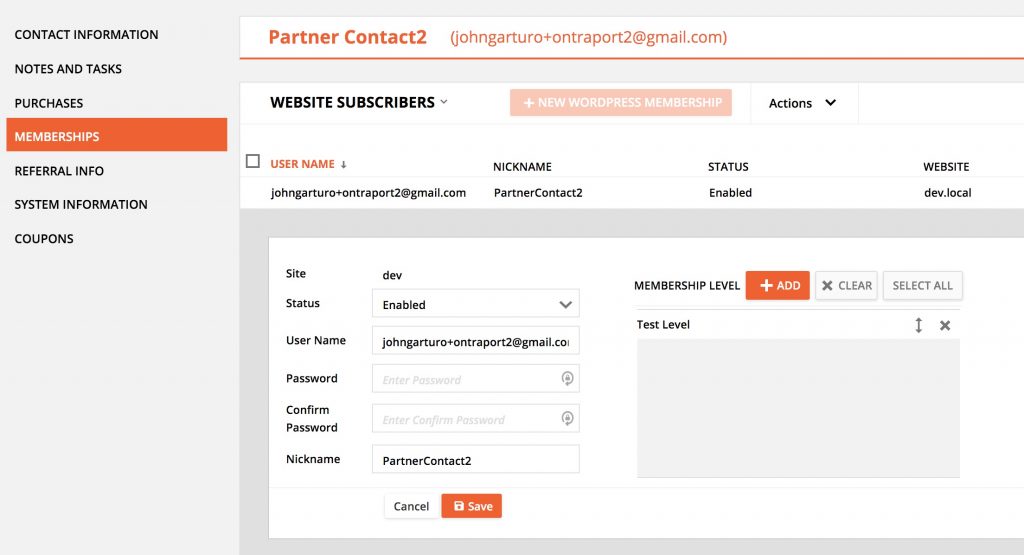
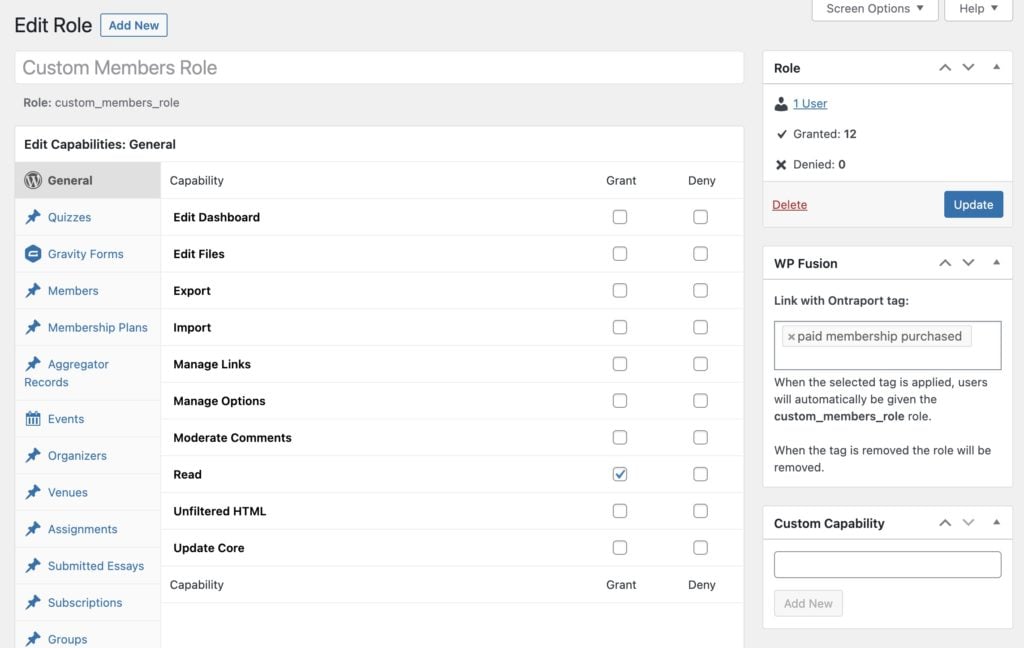
 In this screenshot a user has been imported via an Ontraport webhook and automatically assigned the role Custom Members Role based on the tag 「paid membership purchased」