ActiveCampaign Webhooks#Overview
You can use webhooks in ActiveCampaign to send data back to your WordPress site using WP Fusion. Using webhooks you can create new users on your WordPress site based on automations in ActiveCampaign, or update existing users』 meta data and tags.
Note: As of March 2021, SiteGround』s anti-bot captcha system automatically blocks all incoming ActiveCampaign webhooks. If webhooks aren』t working on SiteGround, contact SiteGround support and ask for the bot protection to be turned off for your account.
Having trouble receiving webhooks? Check out our troubleshooting guide.
There are two ways to manage webhooks in ActiveCampaign, either via an Automation or in the Developer Settings.
#Automation Method
(Recommended) The automation method is best if you need to send a webhook to create or update a WordPress user as part of a specific process. For example:
Tag 「Website Access」 is added
Send webhook to create WordPress user
Send welcome email
Wait 3 days
Apply tag 「Unlock Course Two」
Send webhook to update tags
Using a webhook in an automation lets you easily visualize the entire automation flow, and see where individual contacts are in the process.
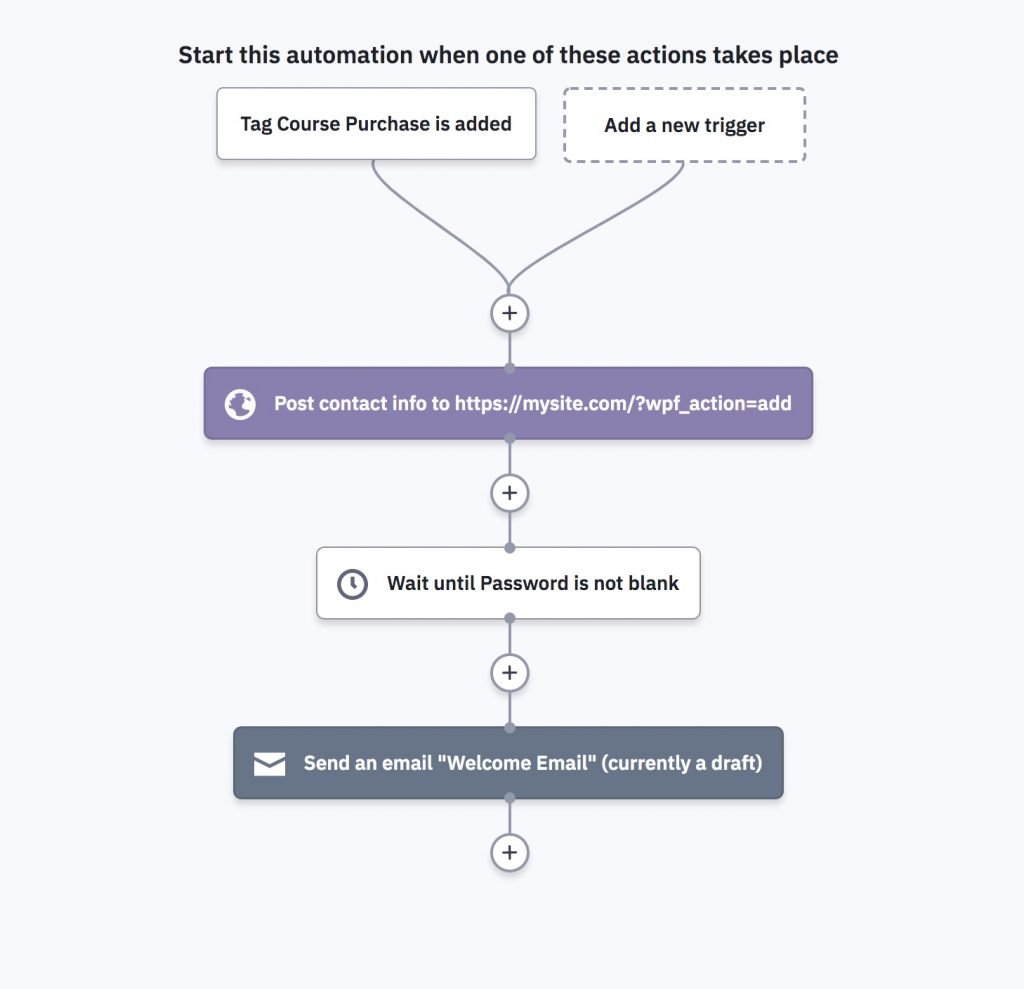
You』ll also be able to visualize where a single contact is in the automation, when the webhook was sent, and whether or not it was received successfully. Using webhooks in automations gives you a lot more control and better reporting than using Global Webhooks (see below).
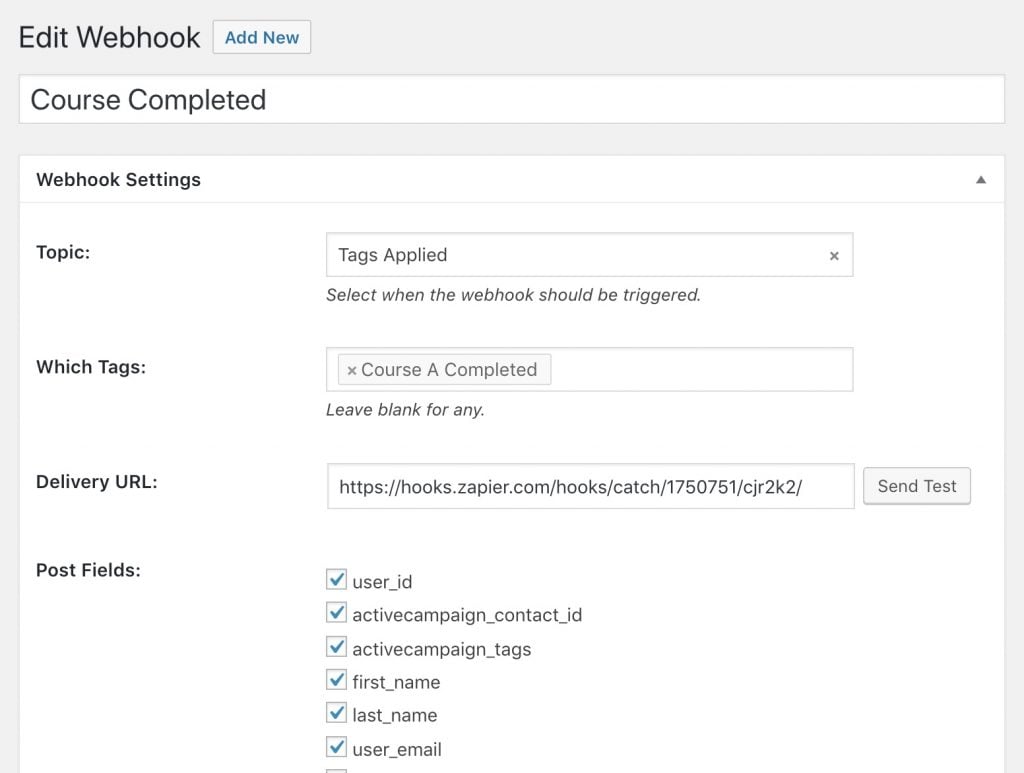
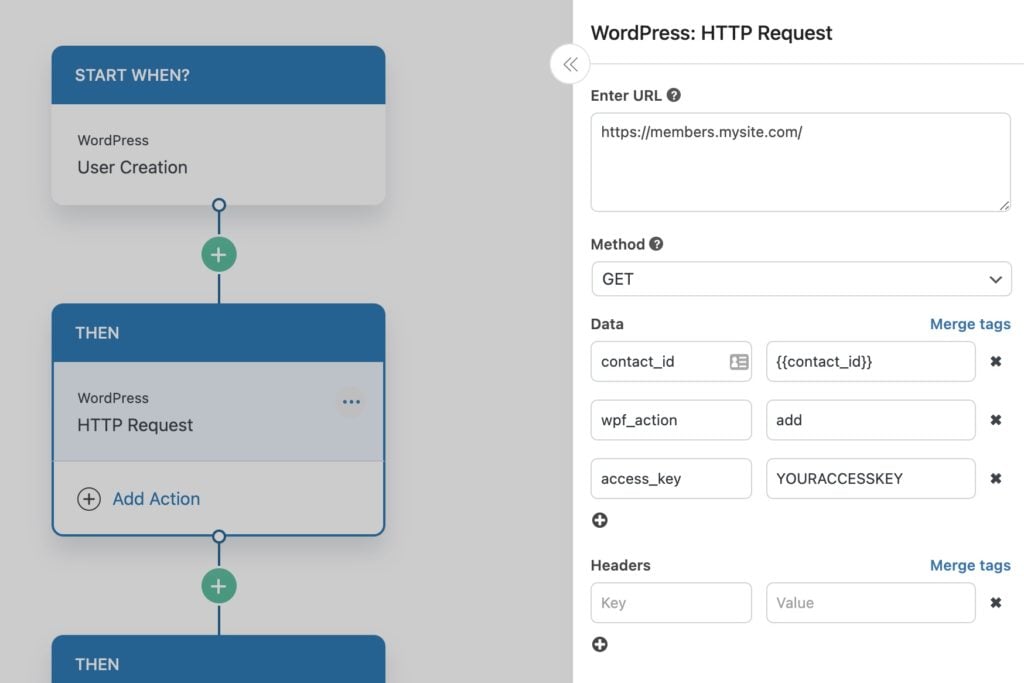
To use webhooks in automations first create an automation and add a webhook to it, like in the example above. You have three options for the webhook, update, update_tags and add (explained below). For each you will need to supply your access key, which can be obtained from the main panel in your WP Fusion settings.
When the contact reaches the webhook step in the automation ActiveCampain will notify WP Fusion to load the contact』s data from ActiveCampaign.
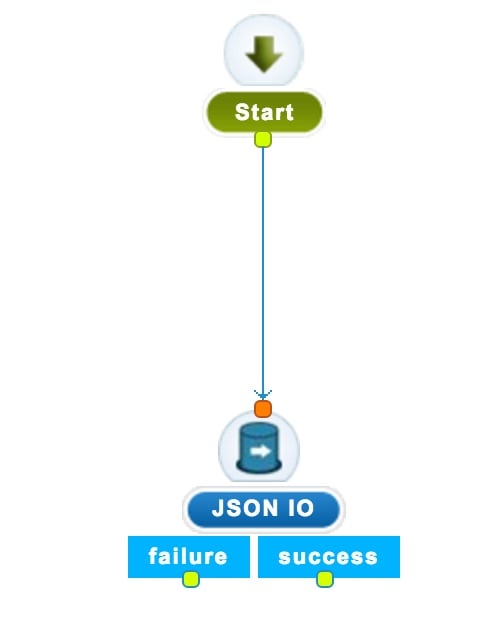
#A note on 「failed」 webhooks
When viewing automation reports you may see your webhooks being marked as 「failed」 by ActiveCampaign, like in the screenshot below.
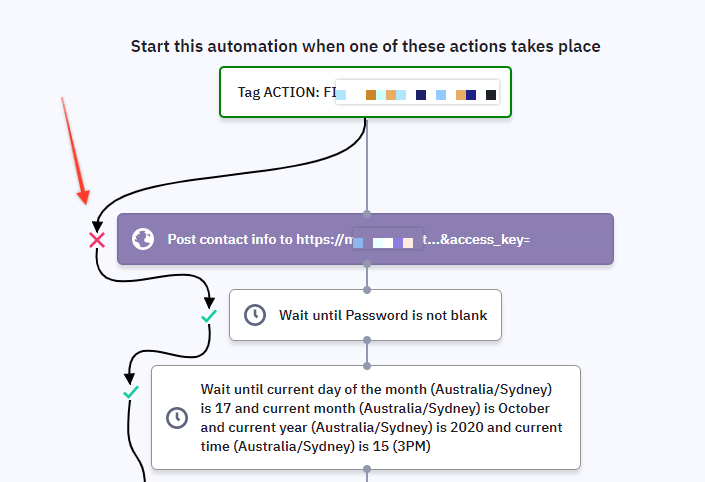
This does not necessarily mean that the webhook failed. ActiveCampaign will mark any webhook as failed if your server takes longer than 5 seconds to respond.
Since there』s a fair deal of processing involved in receiving a webhook (see some average timings here), it』s not uncommon for your server to take longer than 5 seconds, especially with shared hosting.
For a definitive answer as to whether the webhook was processed, you can check the WP Fusion logs.
If you』d prefer not to see the Failed symbol in the automation reports, you can also set your webhooks to run asynchronously.
This does not speed up the time required to process the webhook, or make webhooks more reliable, it just means that WP Fusion will immediately respond to ActiveCampaign that every webhook was successful, and then actually process the webhook a few seconds later.
#Developer Settings Method
(Advanced) You can also set up webhooks which are global to your account. This is best if you』re manually editing contact records in ActiveCampaign (outside of an automation) and need these changes synced to WordPress.
Note: It』s not recommended to set up global webhooks with the add method, as then every contact in ActiveCampaign will be given a WordPress user account.
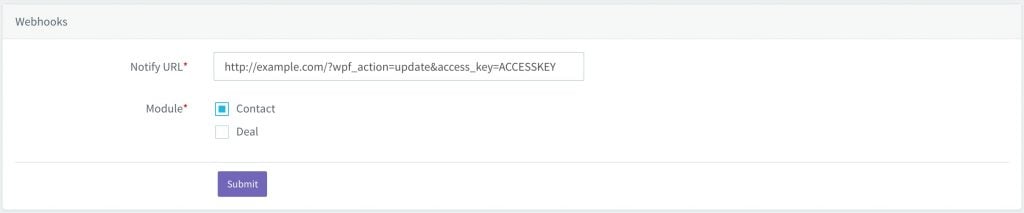
To set up a webhook navigate to Developer » Webhooks in your ActiveCampaign admin settings, and click Add to create a new webhook.

Under Type select the events that should trigger the webhook.
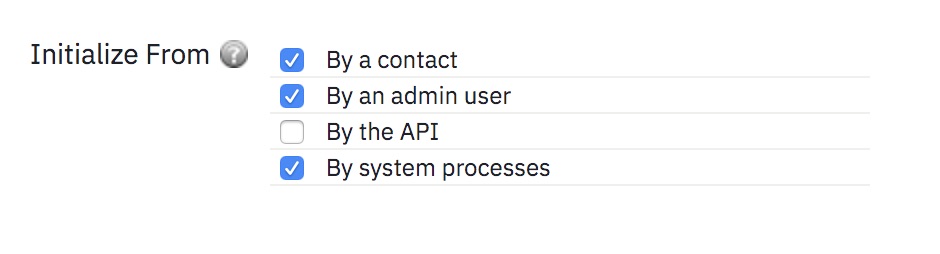
For Initialize From, select which types of events should trigger the webhook. ActiveCampaign has a description of the types here.
You shouldn』t enable By the API as this will send a webhook after WP Fusion sends an API call to apply a tag, which is redundant.
Note that, despite the descriptions in the ActiveCampaign help portal, we have tested and found that tags applied in automations will trigger a global webhook if it is set to By an admin user. If you』re experiencing unexpected webhooks or a high volume of webhooks, it』s recommended to disable that trigger.
Help us our by voting on this feature request with ActiveCampaign to create a webhook trigger specific to manual contact edits.
Keep in mind that, because these webhooks are global to your ActiveCampaign account, bulk editing contacts will trigger webhooks to be sent to your site for every edited contact, which may make your WordPress site temporarily unstable.
Note: If you』ve set up global webhooks with the update or update_tags method it』s not necessary to also include those same webhooks in automations.
#Webhook URL parameters
You can format your webhook URL in a few different ways to customize the behavior:
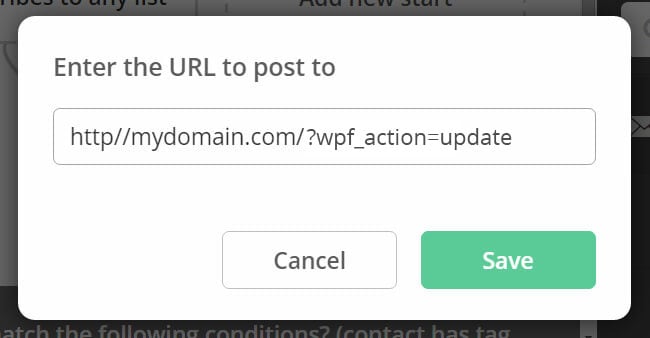
#To update a user』s tags
To update an existing WordPress user』s tags from the contact record, the URL for the webhook should look like the following:
http://mydomain.com/?wpf_action=update_tags&access_key=YOURACCESSKEY
#To update a user』s tags and meta data
To update a user』s tags and pull any new meta data from ActiveCampaign for that contact, the URL for the webhook should look like the following:
http://mydomain.com/?wpf_action=update&access_key=YOURACCESSKEY
#Create a new user
To create a new user, use the following URL:
http://mydomain.com/?wpf_action=add&access_key=YOURACCESSKEY
You can also specify additional parameters in user creation. For example, to send the user a welcome email containing a link to log in on your site, use the following:
http://mydomain.com/?wpf_action=add&access_key=YOURACCESSKEY&send_notification=true
You can also specify a specific user role to be assigned to the new user. For example, to set the new user to the 「customer」 role, use the following:
http://mydomain.com/?wpf_action=add&access_key=YOURACCESSKEY&role=customer
Note that you have to have registered a 「customer」 role on your site for this to work. By default users will be assigned the role of 「subscriber」.
The add method will update a user if an existing user already exists. It will not create a duplicate user.
Note: By default, user accounts will be created with their email address as the username and a randomly generated password. However, if you have created a custom username field and password field in your ActiveCampaign application, and enabled these fields in WP Fusion for sync with user_login and user_pass on your website, the new users will be given the usernames and passwords stored in their ActiveCampaign contact record.
#User passwords
New user accounts will be created with an automatically generated password. If you』d like to use this password in your email marketing, you can send the password back to ActiveCampaign after it has been generated.
In the Webhooks section of the General settings tab, check the box for Return Password, and select a field in ActiveCampaign where the password should be stored.
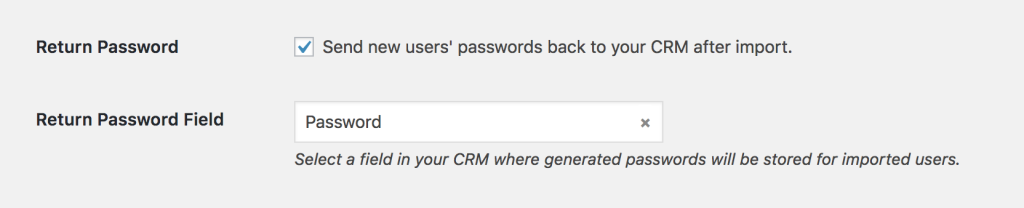
After a new user is created, their automatically generated password will now be saved back to their contact record, and you can use a merge field to include it in an email. The username will be the contact』s email address.
#Was this helpful?
Let us know if you liked the post. That』s the only way we can improve.
Yes
No