WooCommerce#Overview
WP Fusion integrates with WooCommerce to add customers to your CRM when they make a purchase on your site, and tag them based on products purchased.
You can also use WP Fusion to restrict access to products and product variations, as well as track coupon usage, and auto-apply coupons based on CRM tags.
With supported platforms, WP Fusion』s Enhanced Ecommerce addon can also sync revenue data, deals, and/or invoices from WooCommerce to your CRM』s ecommerce system.
And WP Fusion』s Abandoned Cart addon can track abandoned WooCommerce carts, allowing you to follow up with customers using automated sequences in your CRM.
Having trouble with WP Fusion』s WooCommerce integration? Check out our troubleshooting guide.
#Syncing customer data and custom fields
By default, when a customer checks out on your store, a new contact will be created in your CRM with their first name, last name, and email.
You can enable additional fields for sync from the Contact Fields tab in the WP Fusion settings.
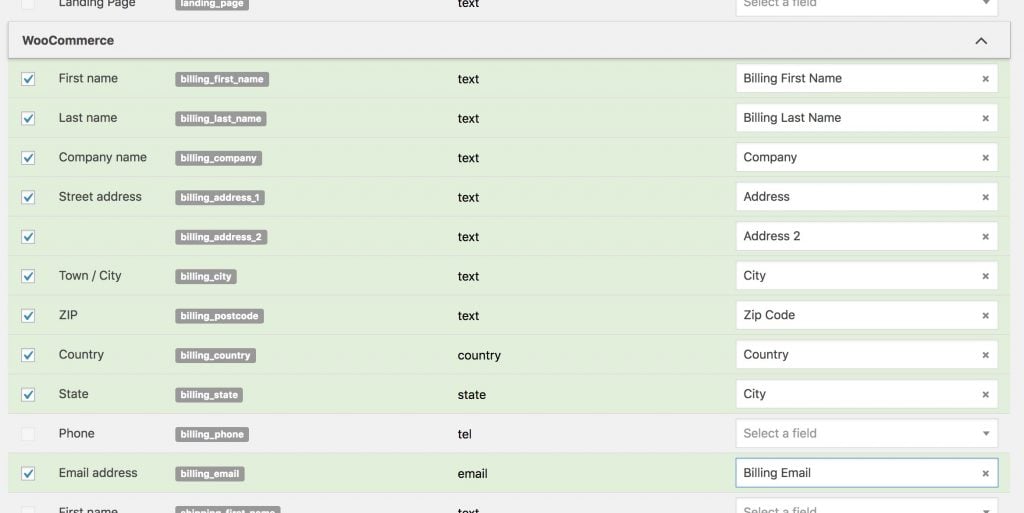
By default all of the billing and shipping fields will be available for sync. If you』re using a custom checkout field editor plugin such as WooCommerce Checkout Field Editor, those fields will also be displayed.
#Order fields
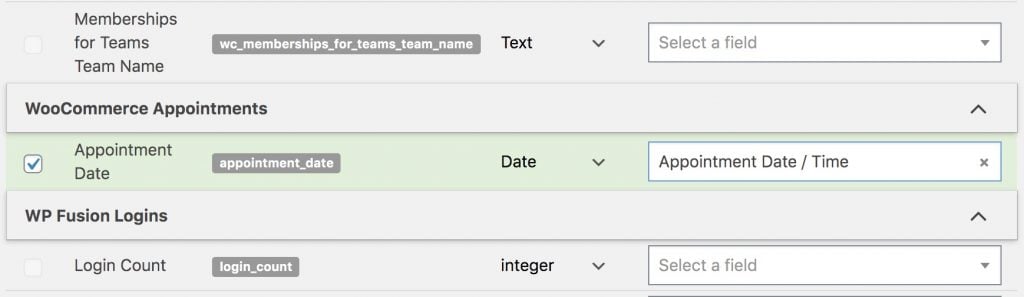
WP Fusion has the ability to sync some details about the customer』s most recent order to custom fields in your CRM. Those can be enabled under the WooCommerce Order heading in the contact fields list.
 WP Fusion supports syncing details about a customer』s most recent order to custom fields or properties in your CRM
The available fields are:
Last Order Total: The total order value
Order Notes: Any notes added by the customer to the order at checkout
Last Order Date: The date of the customer』s most recent order
Last Coupon Used: The coupon code used at checkout
Last Order ID: The ID of the order
Last Order Payment Method: The title of the payment method used, for example 「Stripe」, 「PayPal」
#Attribute Fields
If you』re selling variable products, WP Fusion also supports syncing selected attributes to custom fields in your CRM.
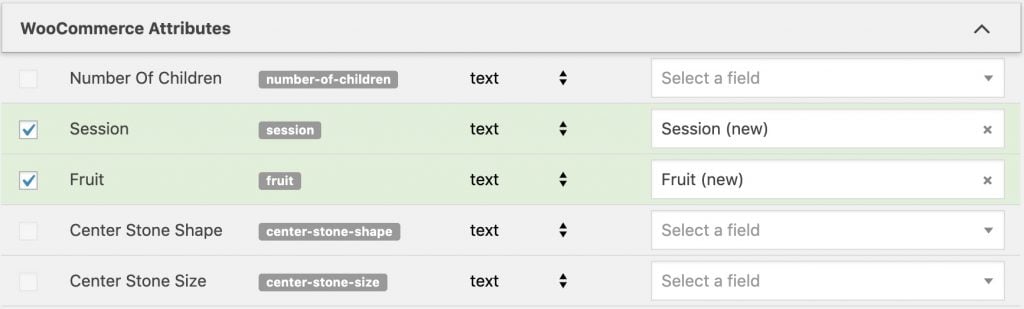
Under the WooCommerce Attributes header you』ll see all of the available attributes from your products. When a customer checks out the selected attribute will be stored in the corresponding custom field.
#General settings
WP Fusion has some general settings for WooCommerce. These can be found on the Integrations tab in the WP Fusion settings.
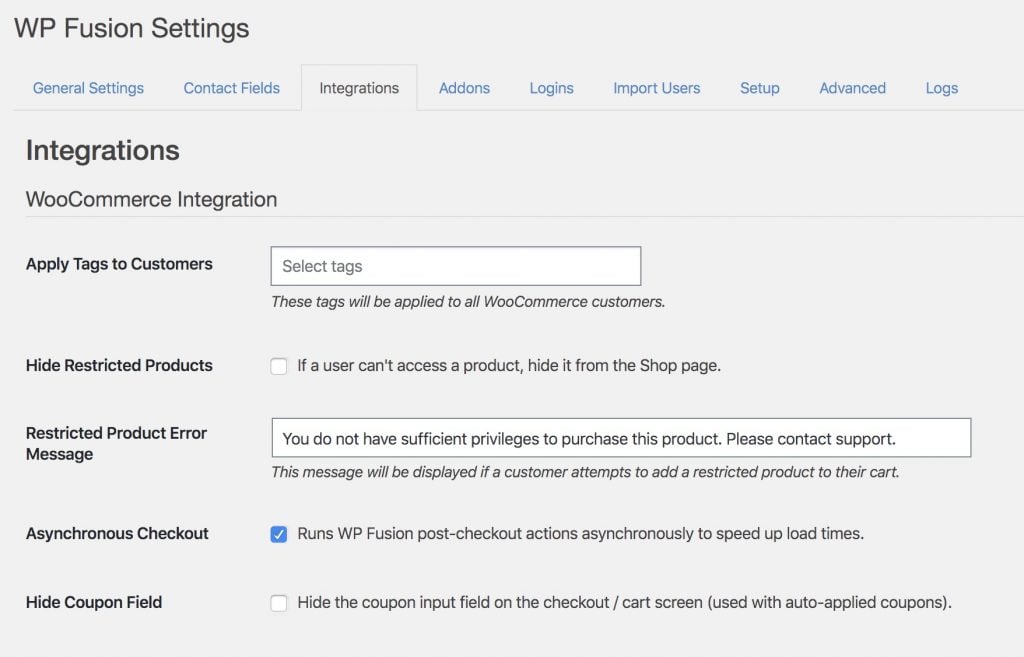
Those options are:
Apply Tags to Customers: The tags specified here will be applied to all WooCommerce customers, when an order is placed.
Hide Restricted Products: If you』ve configured access rules on an individual product, turning on this option lets you completely hide products from your store if the user doesn』t have the required tags.
Restricted Product Error Message: The message here will be displayed when someone tries to add a restricted product to their cart.
Asynchronous Checkout: When this is enabled WP Fusion runs WooCommerce order actions in the background, after the checkout has completed. This makes the checkout process faster, but it can sometimes have problems with caching or security plugins.
Hide Coupon Field: If you』re using automatic discounts, enabling this option lets you hide the coupon input field on the checkout.
Apply Tags – Left Review: The tags specified here will be applied when a user leaves a review on a product.
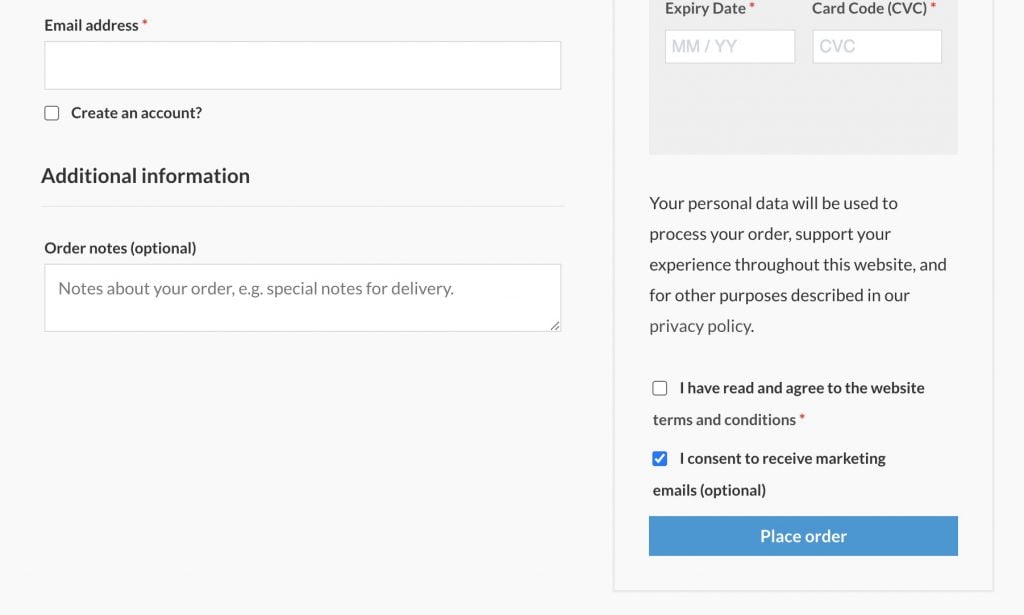
#Email Optins
WP Fusion includes an option to add an email optin checkbox to the WooCommerce checkout. This can be enabled by checking the box for Email Optin.

You can customize the message that』s displayed, as well as the tags that are applied when the checkbox is checked.
As an alternative to applying tags, you can also sync the value of the optin checkbox to a custom field in your CRM, by enabling the email_optin field for sync at Settings » WP Fusion » Contact Fields » WooCommerce Customer.
When enabled the optin checkbox will be displayed next to the Place Order button on the checkout.
For more control over the checkout fields, we recommend WooCommerce Checkout Field Editor.
#Automatic tagging
With some CRMs WP Fusion supports automatically generating and applying tags based on certain variables when someone makes a purchase in WooCommerce.
If your CRM supports this feature, these settings will appear on the Integrations tab in the WP Fusion settings:

The Tag Prefix will be appended to any of the automatically generated tags. This field also accepts the shortcode [status] to dynamically insert the status of the order.
For example if someone purchases a product Widget and the order status is Processing, you could set the Tag Prefix field to
Purchased – [status] –
This would apply the tag Purchased – Processing – Widget.
#Order status tagging
WP Fusion also includes an option where you can apply tags to a customer in your CRM when their order status changes in WooCommerce. For example if you manually mark an order as 「Shipped」, an automated email could be sent through your CRM to customers.
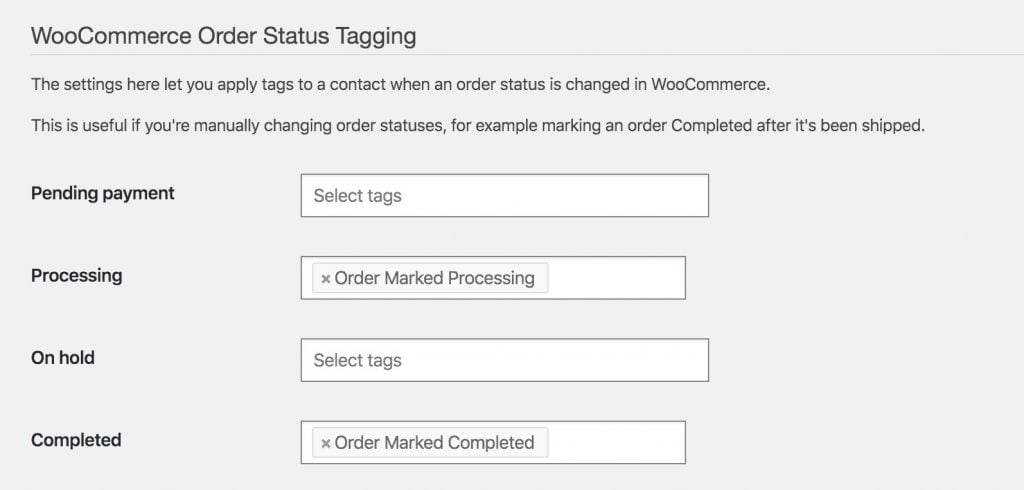
Warning: It is recommended not to sync Pending payment customers with your CRM. When this is enabled, WP Fusion needs to create a contact record and apply a tag as soon as the pending order is created in WooCommerce, and then update it and apply additional tags less than a second later when the payment is processed.
This slows down your checkout with many duplicate API calls and in most cases isn』t necessary.
A more performant method of tracking incomplete payments is to use Abandoned Cart Tracking.
#Order management
When editing any WooCommerce order in the admin, you will see a meta box indicating that order』s status with WP Fusion.
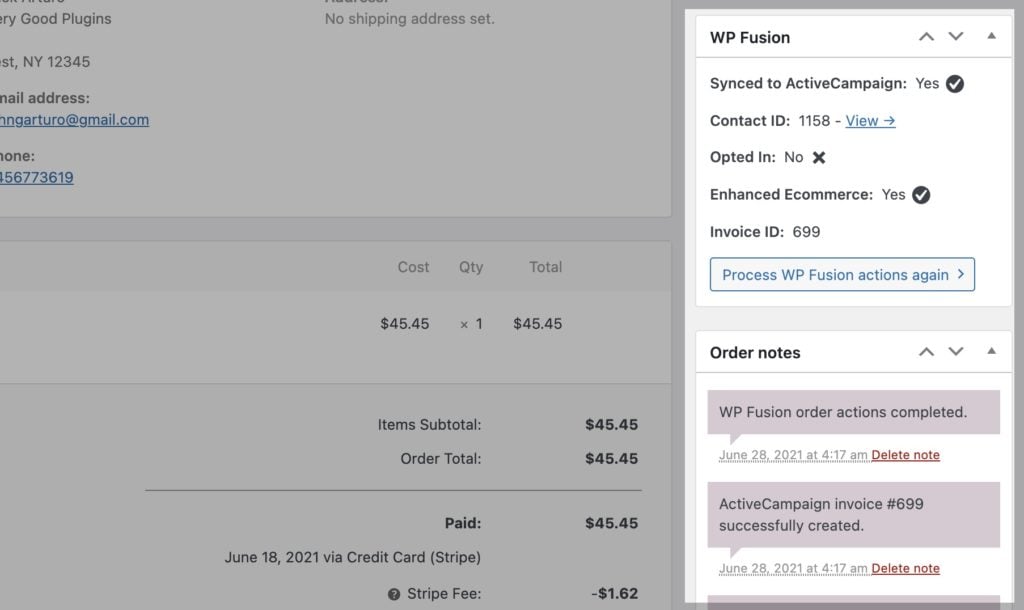
The meta box will show whether or not the order was processed by WP Fusion, and the customer』s contact ID in your CRM.
If you have email optins enabled, the customer』s optin status will be shown.
If you』re using the Enhanced Ecommerce addon you will also see the corresponding invoice ID (or order ID) in your CRM』s sales pipeline.
To manually process an order again (for example to fix an invalid field value), click the Process WP Fusion actions again button.
#Order notes
The order notes in the order sidebar will show when an order was processed by WP Fusion, and also any corresponding invoices created by the Enhanced Ecommerce addon. In cases where there were errors during checkout, these will also be recorded to the order notes, as well as the WP Fusion activity logs.
#Tagging customers
WP Fusion gives you a variety of ways to tag your WooCommerce customers in your CRM. The simplest method is to tag based on the product purchased, but you can also apply tags to all customers as a global setting, or based on product categories.
Note: Most CRMs that WP Fusion supports use 「tags」 to segment contact records, but the interfaces may vary depending on what your platform uses for segments. For example with HubSpot and Sendinblue you』ll see 「lists」, or with MailerLite you』ll see 「groups」. This is just a label difference and the end functionality is the same.
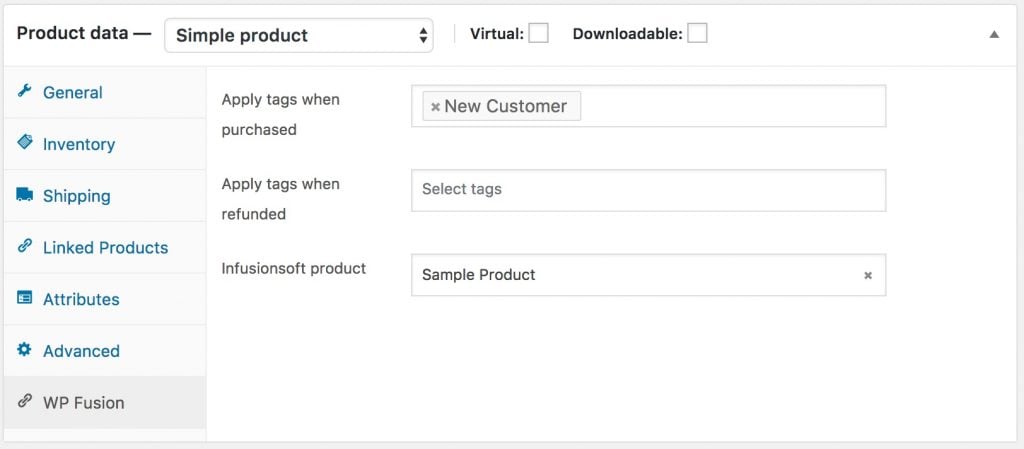
#Product setup
When WP Fusion is active, you』ll see a new tab on the WooCommerce product settings where you can specify tags to be applied when that product is purchased, refunded, or when an initial transaction fails.
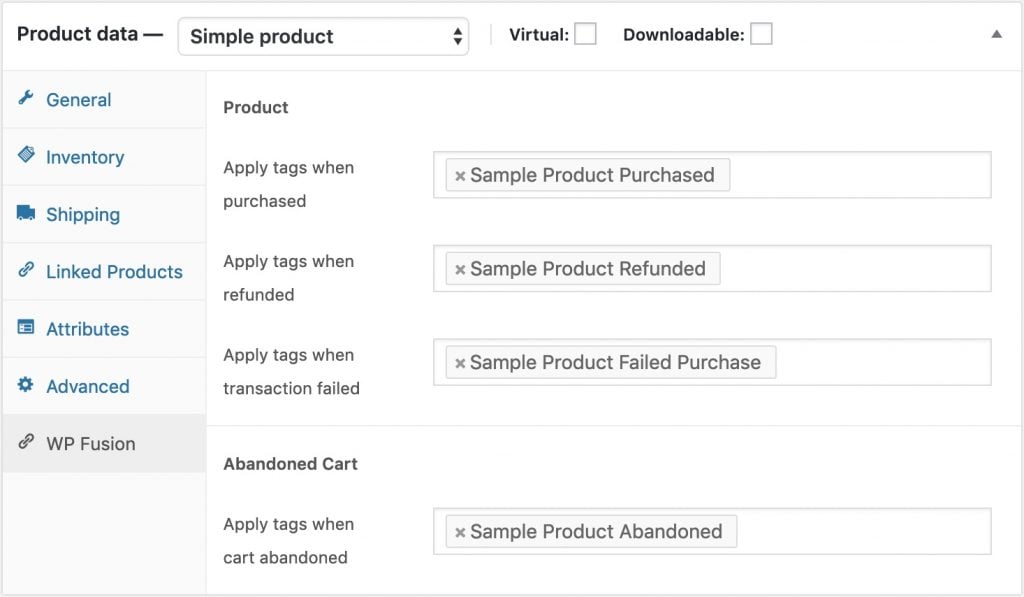
The standard settings are:
Apply tags when purchased: These tags will be applied in the CRM when the product is purchased. They will be removed automatically if the order is refunded.
Apply tags when refunded: These tags will be applied in the CRM when an order is refunded.
Apply tags when transaction failed: These tags will be applied when an initial payment fails, or when an order status changes to Failed. They will be removed when a successful payment is received.
You may see additional fields for Subscriptions or Deposits if you are using those plugins.
If the Abandoned Cart Addon is active you can also configure tags to be applied when the product is left in an abandoned cart.
#Variable products
If you』re using variable products, you can also specify tags to be applied at purchase per-variation. These are visible when editing the variation, alongside the price and other details.
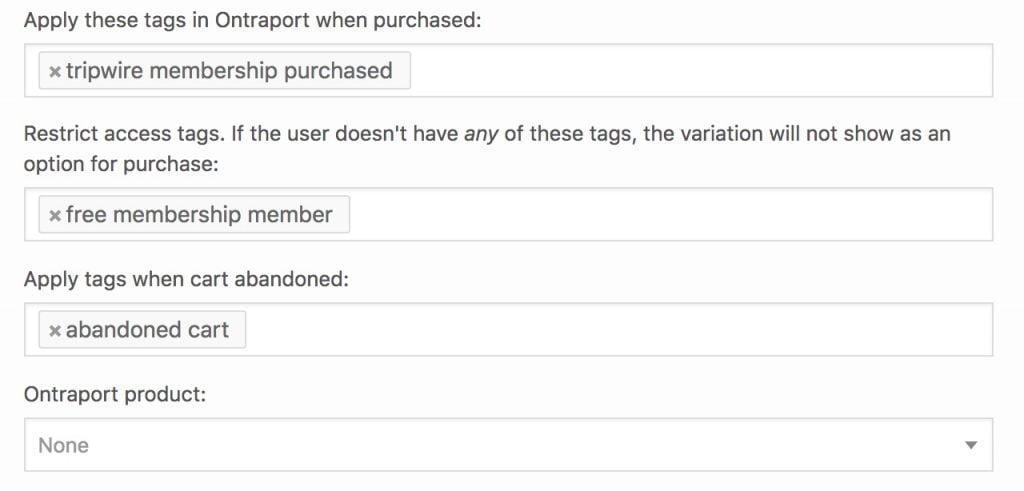
WP Fusion also gives you the option to only show specific variations to users based on their tags. This can be used to offer special products or pricing to existing members.
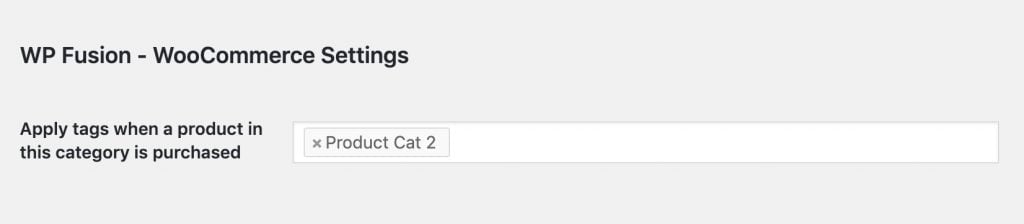
#Category tagging
You can also specify tags to be applied at the category level. To do this click Edit on any product category, and you』ll see a setting where you can specify tags to be applied.
#Bulk Editing
There may be situations where you need to bulk edit the tags that are configured on your WooCommerce products. WPSheetEditor provides a free WP Fusion addon to customers of their WooCommerce Products Spreadsheet plugin.
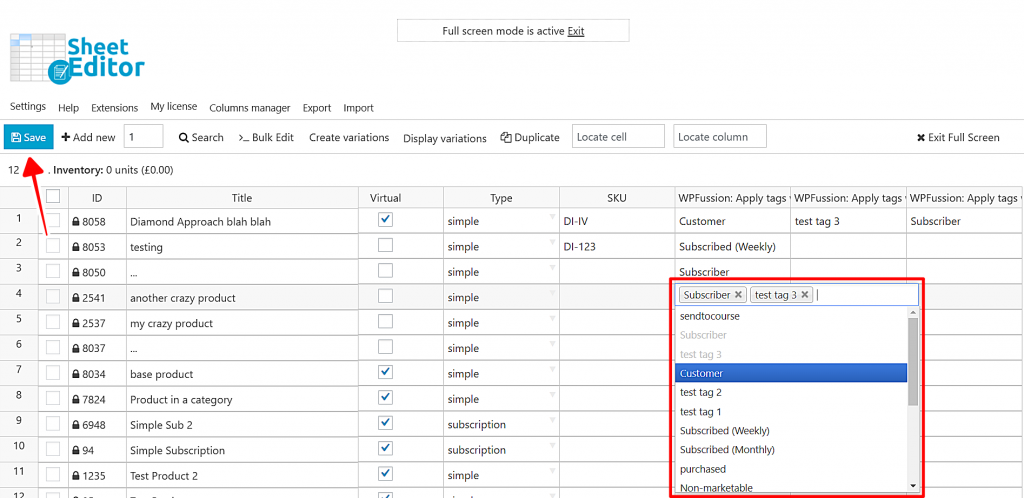 Quickly set up WP Fusion for many products using WPSheetEditor
You can read a tutorial on bulk editing WP Fusion tag rules here.
#Refunds
If an order is marked Refunded in WooCommerce, the tags specified in Apply tags when purchased will automatically be removed. You can also optionally specify tags to be applied when an order is refunded using the Apply tags when refunded setting.
#Coupons and Discounts
While editing any coupon, you can specify tags to be applied to the customer if the coupon is used.
#Restricting access to coupons
You can require a user to be logged in and to have a specific tag to use a coupon code. This can be set from the Required Tags setting on the Usage Restriction tab in the coupon settings.
#Auto-applying discounts
You can also automatically grant coupons to customers based on their tags in your CRM.
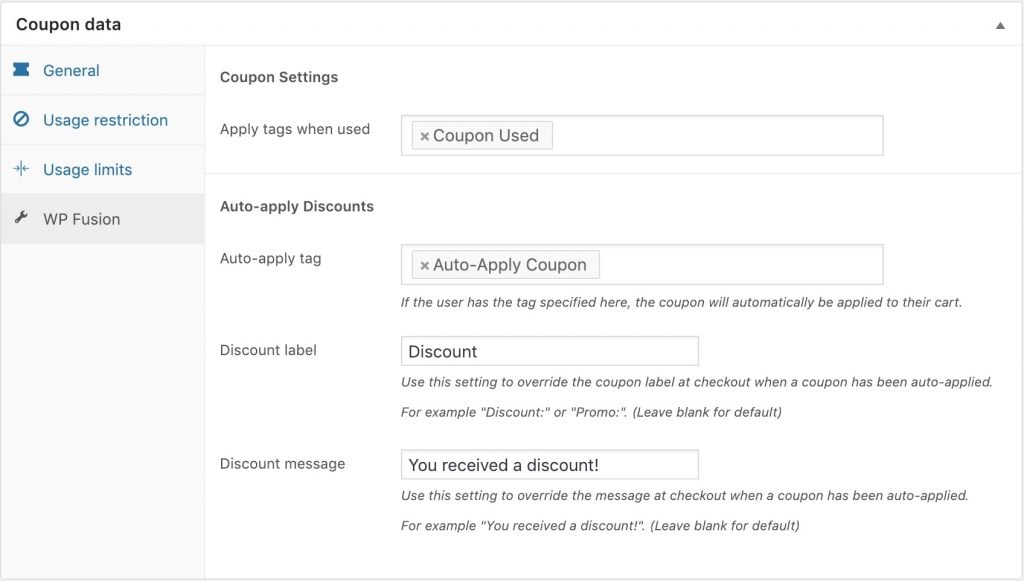
If the user has any one of the specified tags, the discount will be applied when they add a product to their cart. This feature also works with our auto-login links.
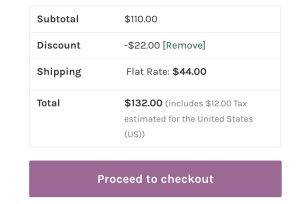
#Discount labels
You can optionally override the coupon labels shown on the cart and at checkout. The Discount label is displayed in the order summary.
 Custom discount label in the order summary.
By default this will be the coupon code of the applied coupon, but here we』ve overridden it to say 「Discount」. You could set this to say something like 「Member Discount」 or 「Loyalty Program」.
The Discount message is shown at the top of the cart or checkout when the coupon is applied.
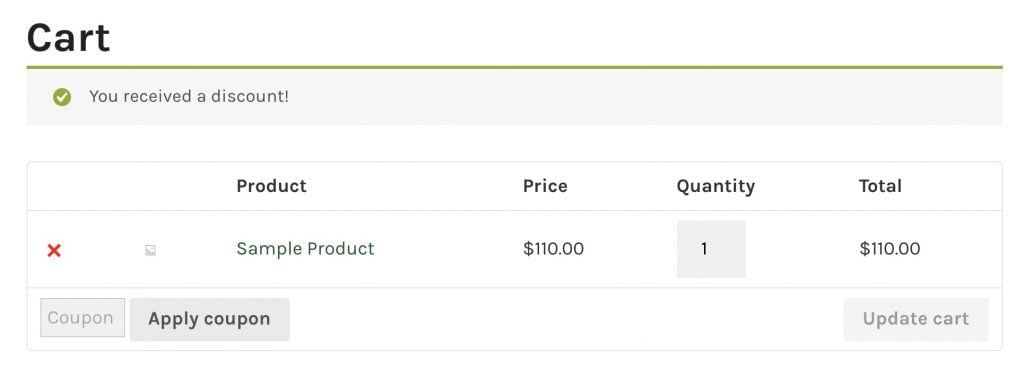
By default this will say 「Coupon code applied successfully.」 Here we』ve overridden it to say 「You received a discount!」
#Product Availability
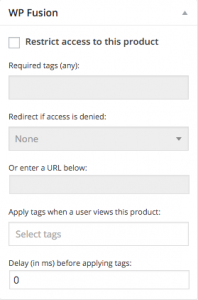
You have the option to restrict access to a product unless a user has a certain tag applied to their account.
This is a great way to offer up-sell products or add-ons for your existing users. For more information on restricting content, see the documentation on meta box setup.
#Event tracking
Using the Event Tracking addon, you can track WooCommerce product purchases as events in supported CRMs.
Events can be configured in two places. On an individual product, on the WP Fusion settings tab:
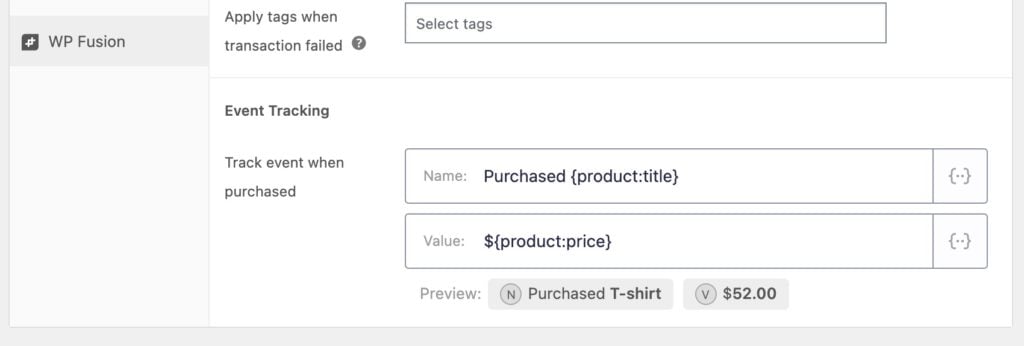 Event tracking can be configured on the WP Fusion tab when editing any WooCommerce product.
Or in the Event Tracking global settings:
 Event tracking can also be configured globally at Settings » Event Tracking.
The available triggers for event tracking with WooCommerce are:
Purchased Product: Triggered each time a single product is purchased.
Order Placed: Triggered each time a WooCommerce order is placed.
#Syncing historical orders
If you already have an existing WooCommerce store, you can use WP Fusion to sync all historical orders to your CRM.
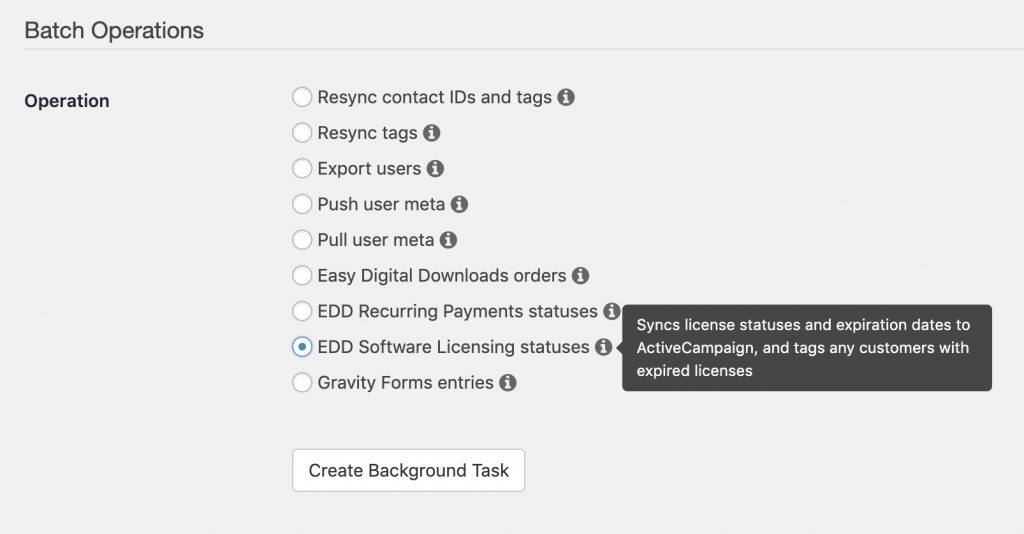
First configure your products with any tags you』d like to be applied when purchased. Then navigate to Settings » WP Fusion » Advanced and scroll down to the Batch Operations section.
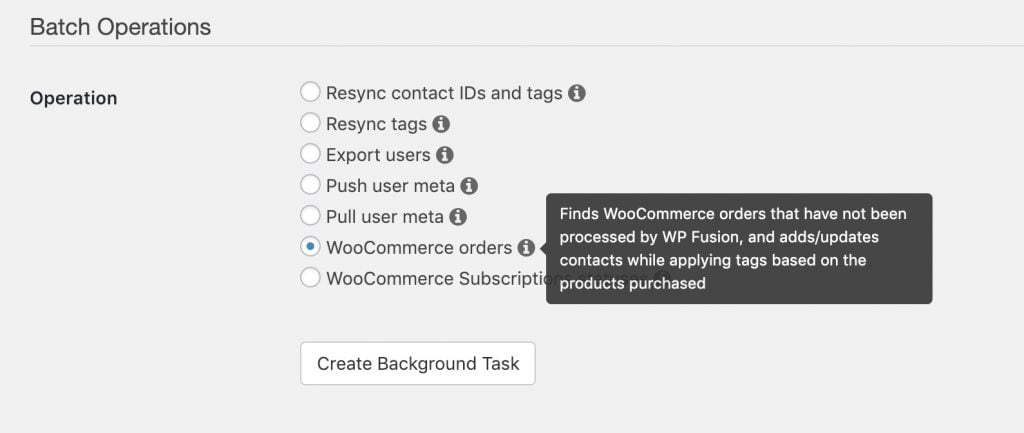
Select 「WooCommerce orders」 from the list of options, and click Create Background Task.
WP Fusion will go through all of your orders, adding / updating contacts as necessary, and tagging them based on the products purchased. A status bar will appear at the top of the page indicating the progress.
After each order is processed it will be locked by WP Fusion so it can』t be exported again, to prevent duplicate data from going to your CRM.
#Developers
WP Fusion』s WooCommerce integration is very developer friendly. If you open the integration file in /wp-fusion/includes/integrations/class-woocommerce.php you』ll find many actions and filters that allow you to modify what data is synced with your CRM (and when).
Some general notes:
#Order statuses
By default WP Fusion processes a WooCommerce order when its status is changed to either processing or completed. When an order is 「processed」, a contact record is created in your CRM, and any tags configured on the products (and elsewhere) are applied.
There may be situations in which you need to process an order at a different status. For example maybe you want to apply tags that grant access to content while an order is still in pending status (i.e. before a payment has been received).
#Register additional statuses for sync
You can register additional statuses by hooking into the woocommerce_order_status_{$status} action and calling wp_fusion()->integrations->woocommerce->process_order( $order_id ).
function wpf_add_custom_order_status() {
// Process "pending" status orders
add_action( 'woocommerce_order_status_pending', array( wp_fusion()->integrations->woocommerce, 'process_order' ) );
// OR, alternatively, on a custom order status "tbh-unpaid"
// add_action( 'woocommerce_order_status_tbh-unpaid', array( wp_fusion()->integrations->woocommerce, 'process_order' ) );
}
add_action( 'wp_fusion_init', 'wpf_add_custom_order_status' );
#Exclude order statuses from syncing
Or, maybe you want to prevent WP Fusion from running on a particular status. This example causes WP Fusion to ignore the processing status and only run on the completed status.
add_filter( 'wpf_woocommerce_order_statuses', function( $statuses ) {
$ignore_statuses = array( 'processing' );
return array_diff( $statuses, $ignore_statuses );
} );
#Actions
WP Fusion includes the following action hooks for WooCommerce:
wpf_guest_contact_created
wpf_guest_contact_updated
wpf_woocommerce_payment_complete
wpf_woocommerce_panel
wpf_woocommerce_variation_panel
wpf_woocommerce_coupon_panel
#Filters
WP Fusion includes the following filter hooks for WooCommerce:
wpf_woocommerce_customer_data
wpf_woocommerce_order_statuses
wpf_woocommerce_billing_email
wpf_woocommerce_user_id
wpf_woocommerce_apply_tags_checkout
wpf_auto_apply_coupon_for_user
#Was this helpful?
Let us know if you liked the post. That』s the only way we can improve.
Yes
No


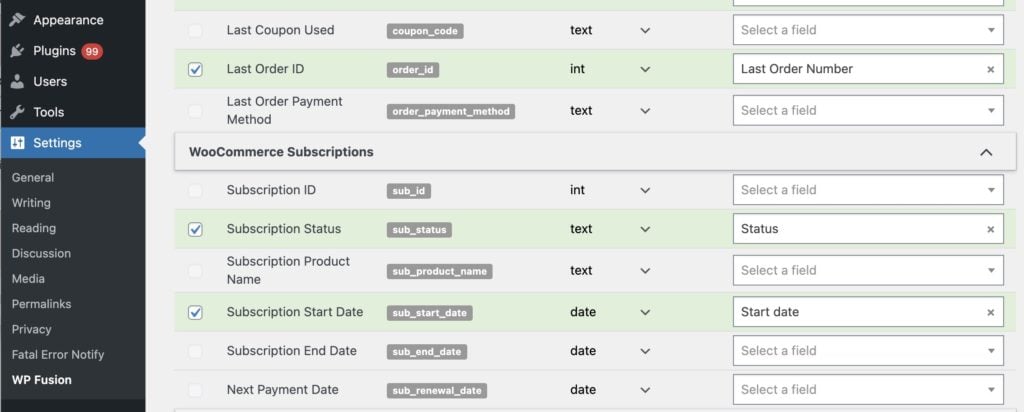 WP Fusion can sync data from WooCommerce subscriptions to custom fields or properties on contact records in your CRM
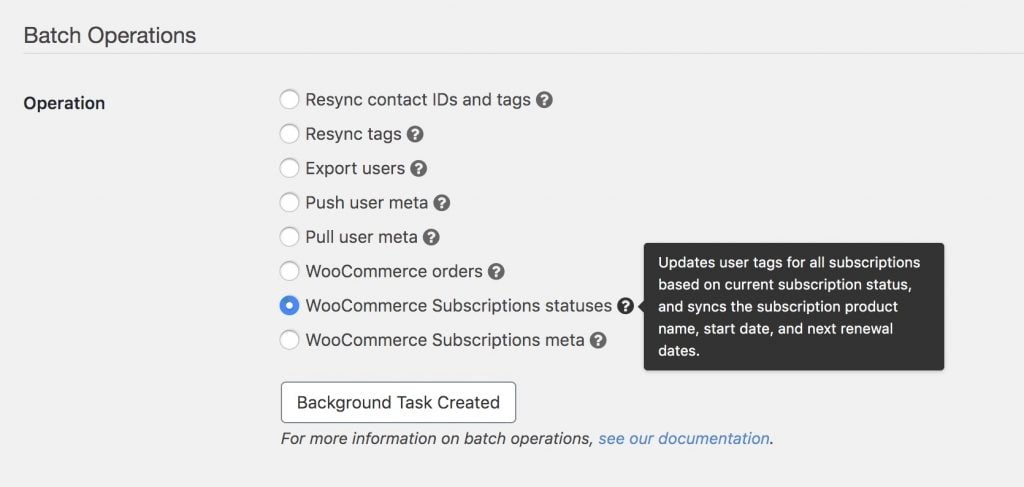
 Orders will be displayed under the orders tab for each contact record.
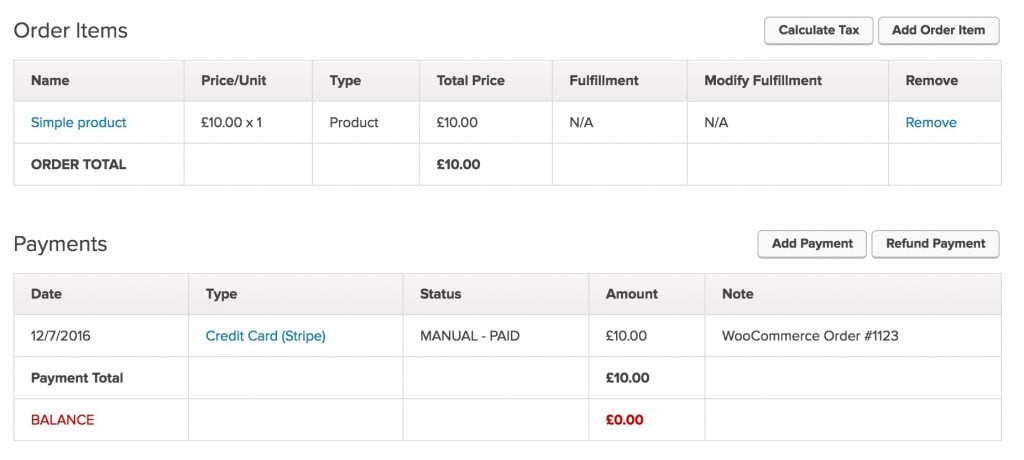 Clicking on an order will give you the full details of the order, including the products purchased, payment type, and any additional line items.
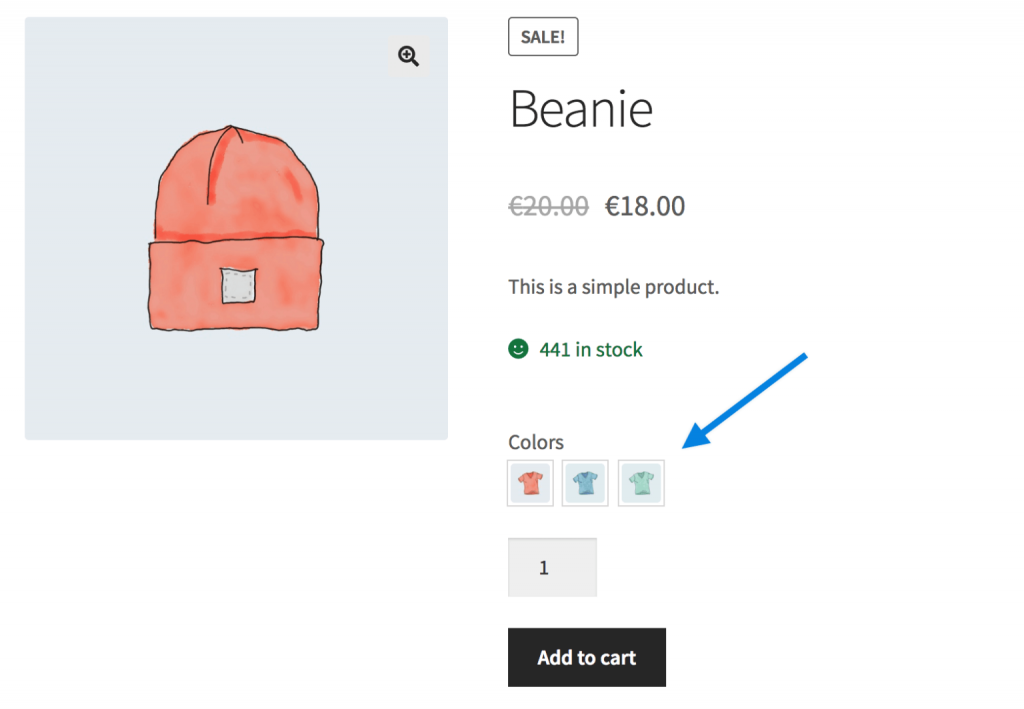


 Donor badge is displayed on the Person record in NationBuilder
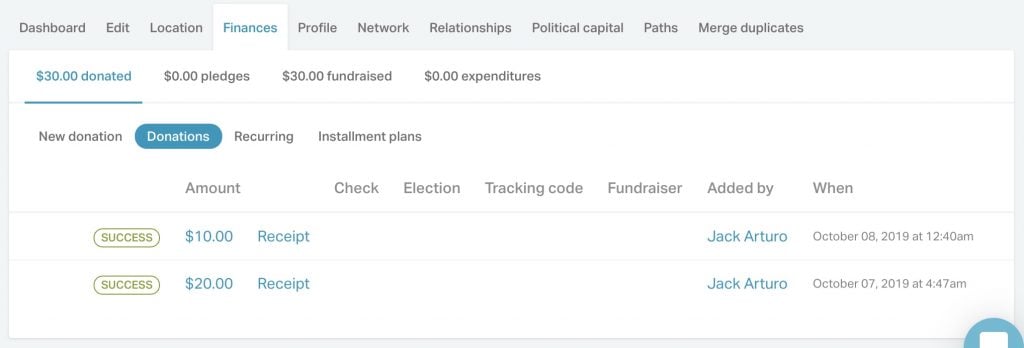 Donations are displayed on the Person details view
 The integration name and transaction ID are shown in the donation notes