ActiveCampaign Overview#Overview
WP Fusion』s Ecommerce Addon (available for Plus and Professional license holders) allows you to track customer purchases and lifetime revenue in ActiveCampaign for sales made in:
WooCommerce
Easy Digital Downloads
Event Espresso
LifterLMS
MemberPress
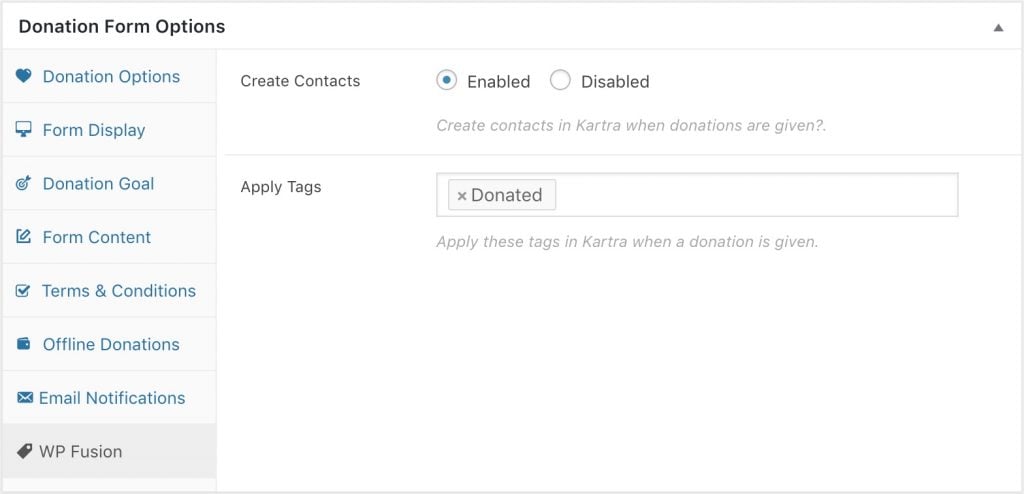
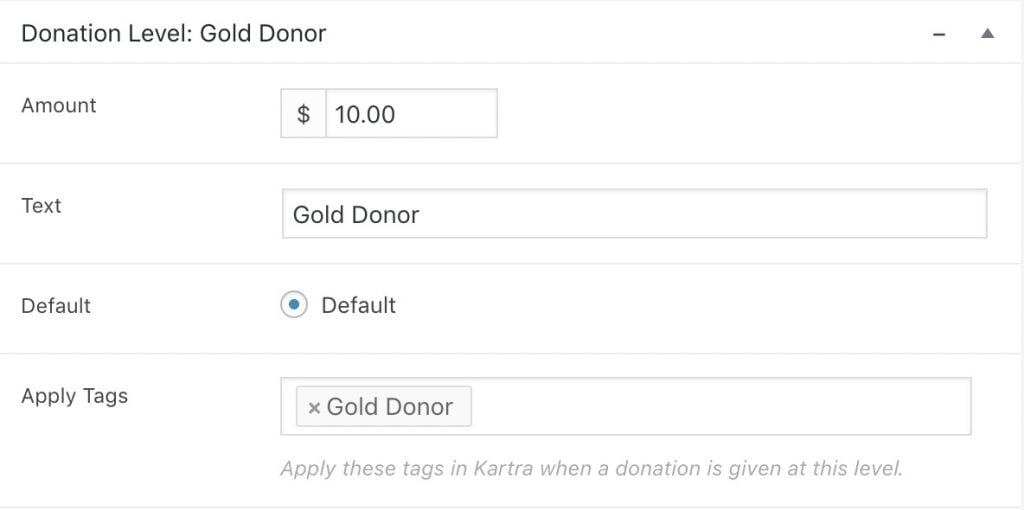
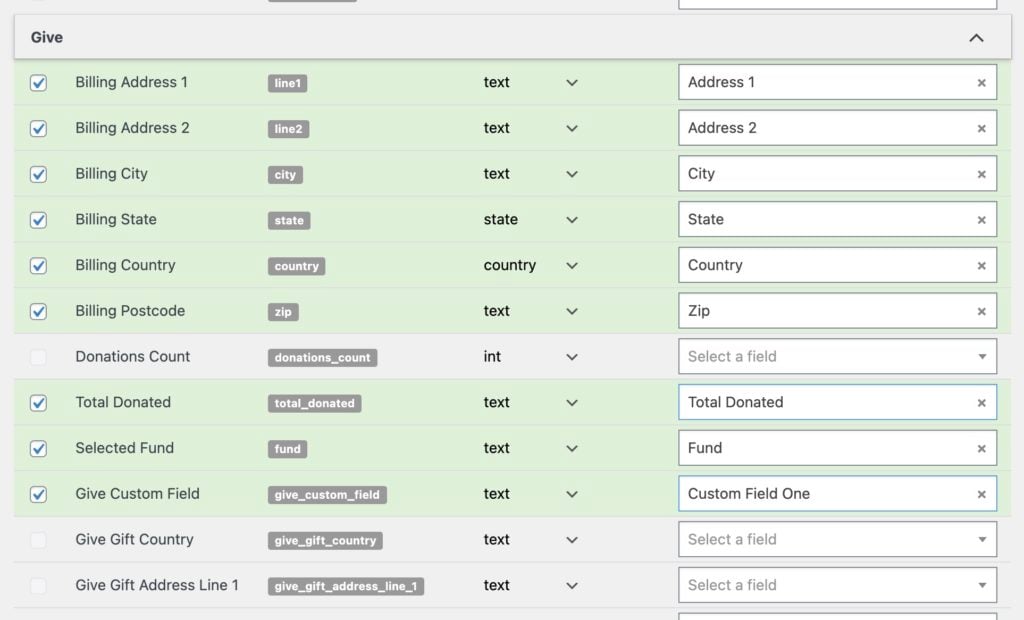
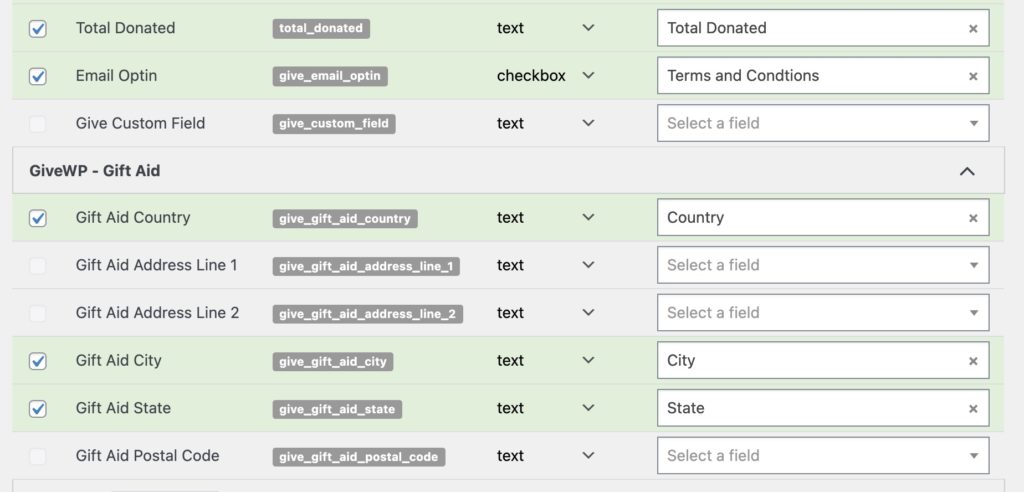
Give
and Restrict Content Pro
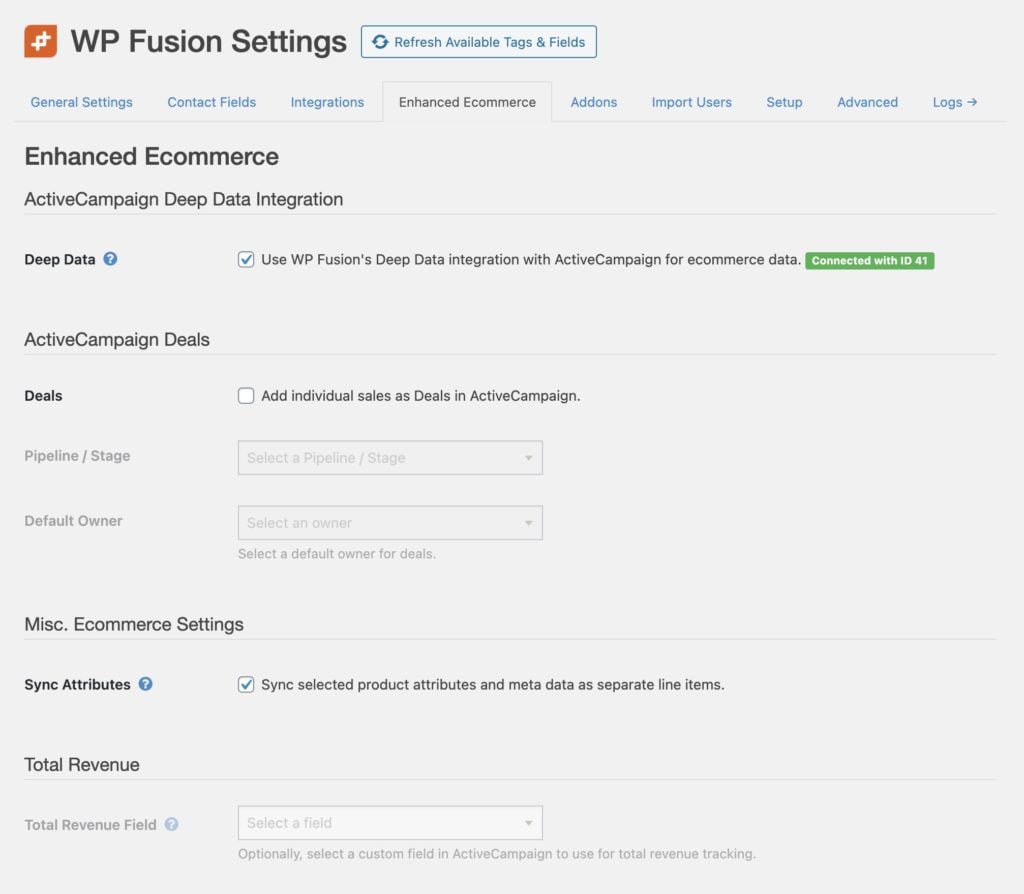
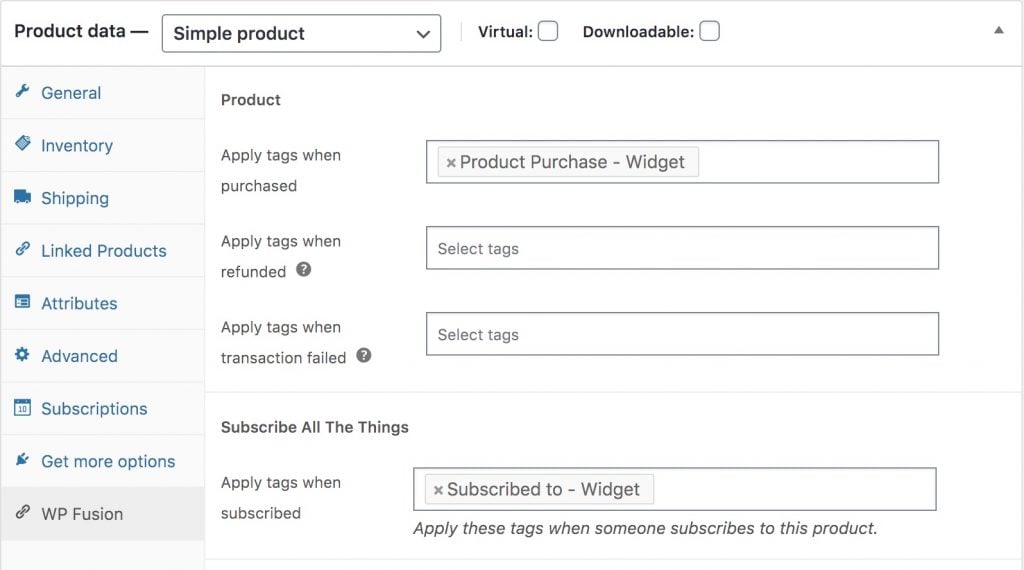
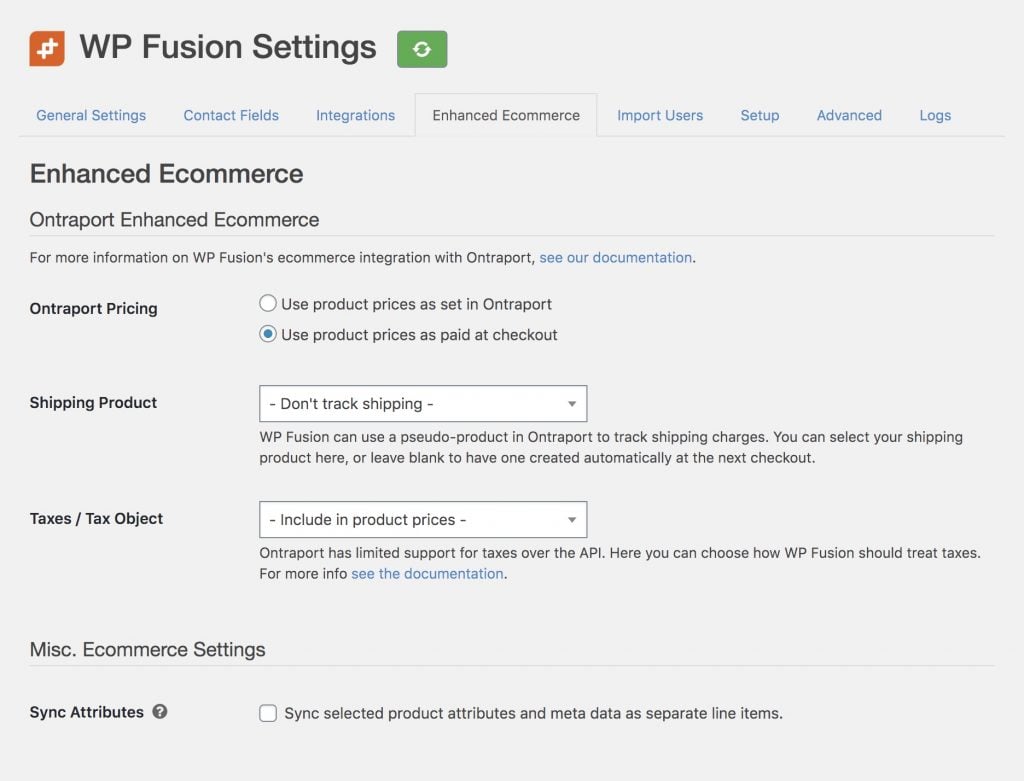
After installing the plugin, go to the WP Fusion settings page and click on the Enhanced Ecommerce tab to see the configurable options.
#Deep Data
Note: Deep Data integration with ActiveCampaign requires a Plus level plan or higher.
Warning: If you』re connecting WooCommerce to ActiveCampaign via WP Fusion』s Deep Data integration, make sure you』ve deactivated and disconnected ActiveCampaign』s native WooCommerce integration, as having two active connections will result in duplicate order data.
WP Fusion includes support for ActiveCampaign』s Deep Data API. On the Enhanced Ecommerce tab in the WP Fusion settings, check the box next to Deep Data and save the settings to initialize the connection.
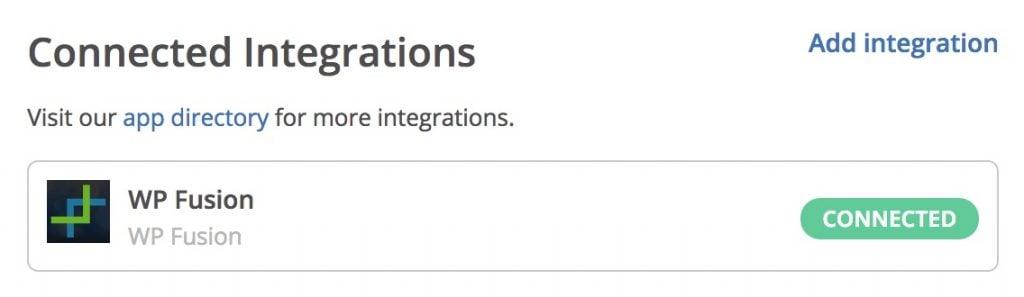
In your ActiveCampaign account, navigate to the settings and click on the Integrations tab. You should see WP Fusion listed.
Any sales made in any of the supported plugins will be added to the corresponding contact record using the new deep data display. ActiveCampaign will automatically track lifetime revenue, total orders, and total products purchased for the contact.
Note: When WP Fusion is connected to ActiveCampaign via Deep Data, ActiveCampaign will apply a tag 「WP Fusion-customer」 to anyone who makes a purchase. This is an ActiveCampaign feature and can』t be turned off, though the tag can be removed using an automation.
#How it looks
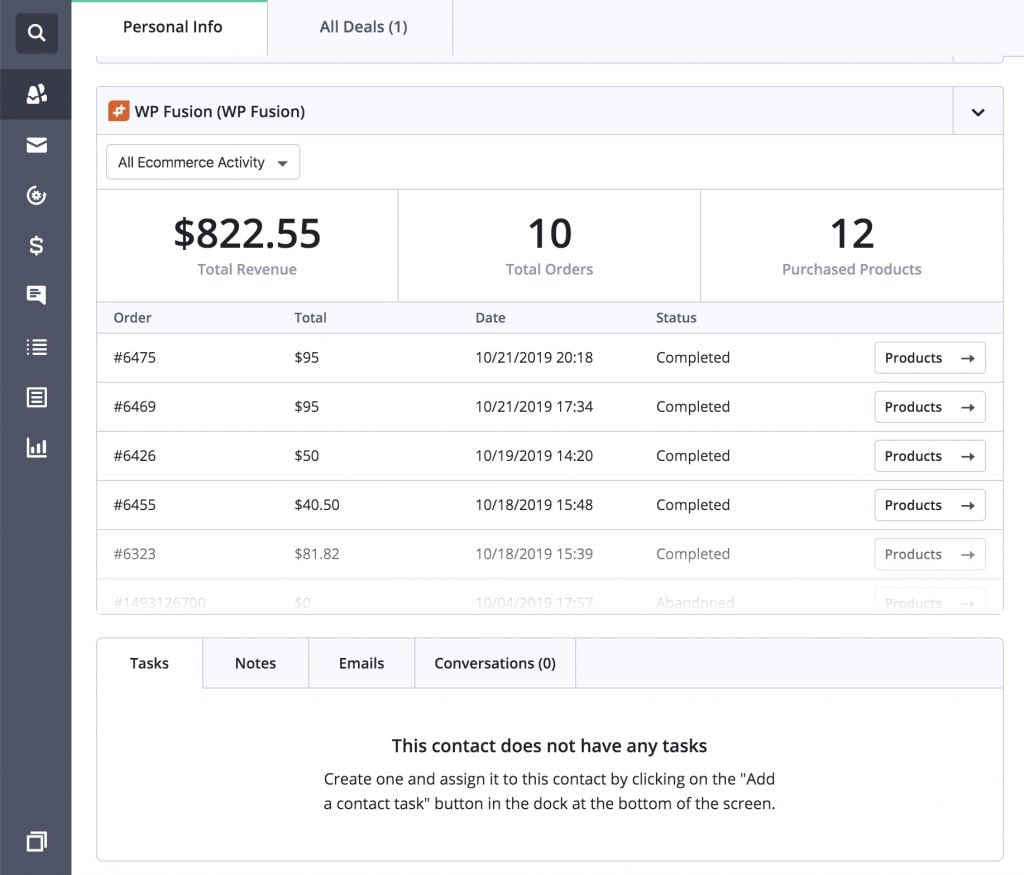 Deep Data from WooCommerce showing on the contact record in ActiveCampaign
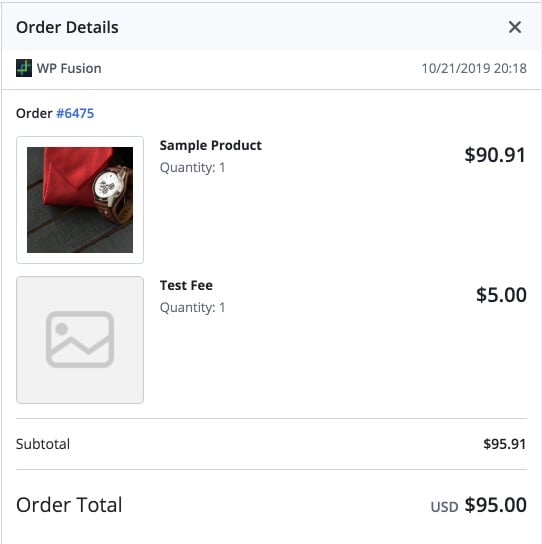 The order details are shown inside ActiveCampaign
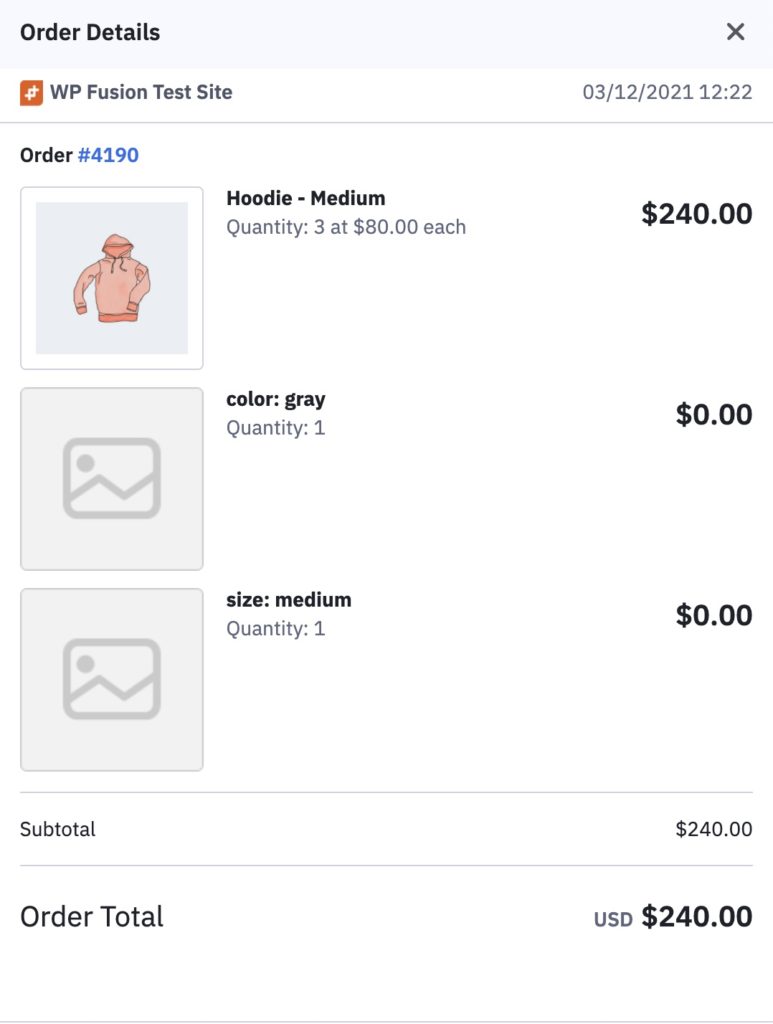 Deep Data order showing selected product attributes, with the Sync Attributes setting on.
#Refunds
ActiveCampaign doesn』t have a specific order state for 「refunded」. However, when Deep Data is enabled, if an order is refunded or cancelled in WooCommerce the order total in ActiveCampaign will be updated to $0.00 so that lifetime values are still calculated accurately.
#Revenue Tracking
Note: If you』re using our Deep Data integration with ActiveCampaign, revenue tracking is handled automatically by ActiveCampaign. You only need to set up revenue tracking if you』ve elected not to use the Deep Data API.
To set up revenue tracking, first create a new contact custom field in ActiveCampaign. This field will be used to track the total amount spent by a customer in your store. If the field doesn』t appear in the Total Revenue Field dropdown, begin typing the name and click 「Resynchronize」 at the prompt to load the new custom field from ActiveCampaign.
Whenever a customer checks out on your store, this field will be incremented with the total value of their purchase.
#Deals Tracking
For more advanced ecommerce automation, ActiveCampaign』s Deals system is one of the best systems available. Using the Enhanced Ecommerce Addon, WP Fusion can create deals in ActiveCampaign with the order value and other details, and associate those deals with the originating customer.
Note: The Deal settings will be hidden if your ActiveCampaign account doesn』t support Deals, or if you haven』t created any Pipelines or Stages yet. If you』ve just created a new Pipeline, click Resynchronize on the Setup tab to reload the available Pipelines and Stages. The settings should now be visible.
#How to Enable Deals
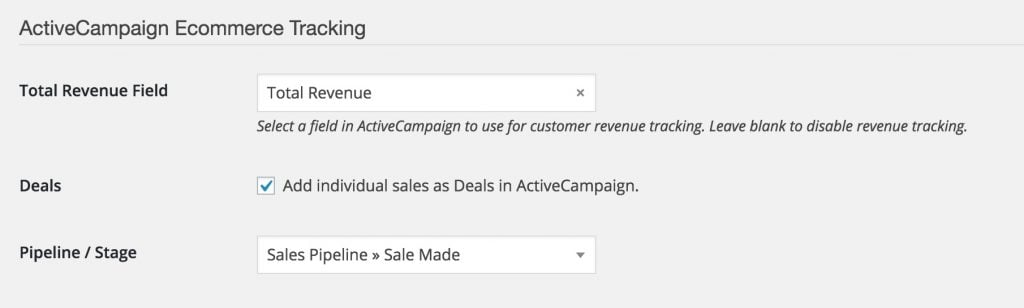
To enable deals tracking, first check the box next to Deals in the Ecommerce Tracking settings. Next select a pipeline and stage where new deals will be inserted (deals can later be moved using automations).

If you』ve just created a pipeline or stage and it doesn』t appear in the list, go to the Setup tab and the Refresh Available Tags & Fields button to reset the list of available pipelines and stages.
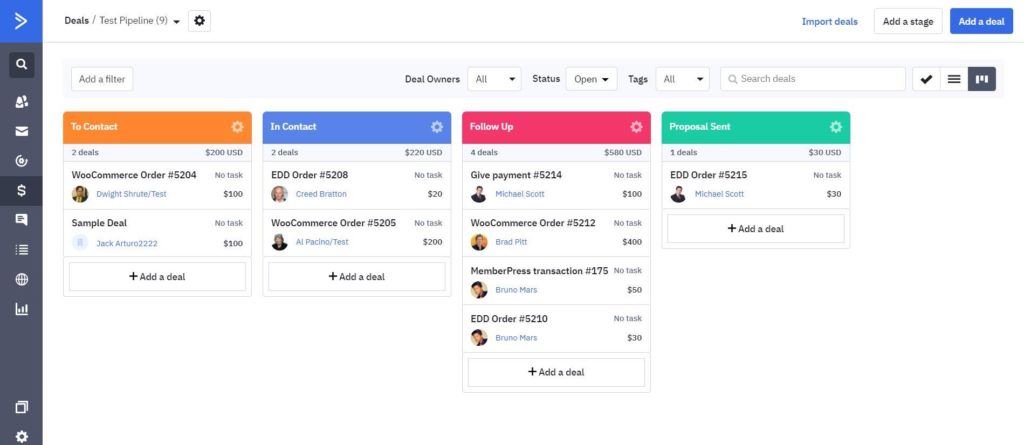
Once enabled, deals will be added to ActiveCampaign like in the screenshot below.
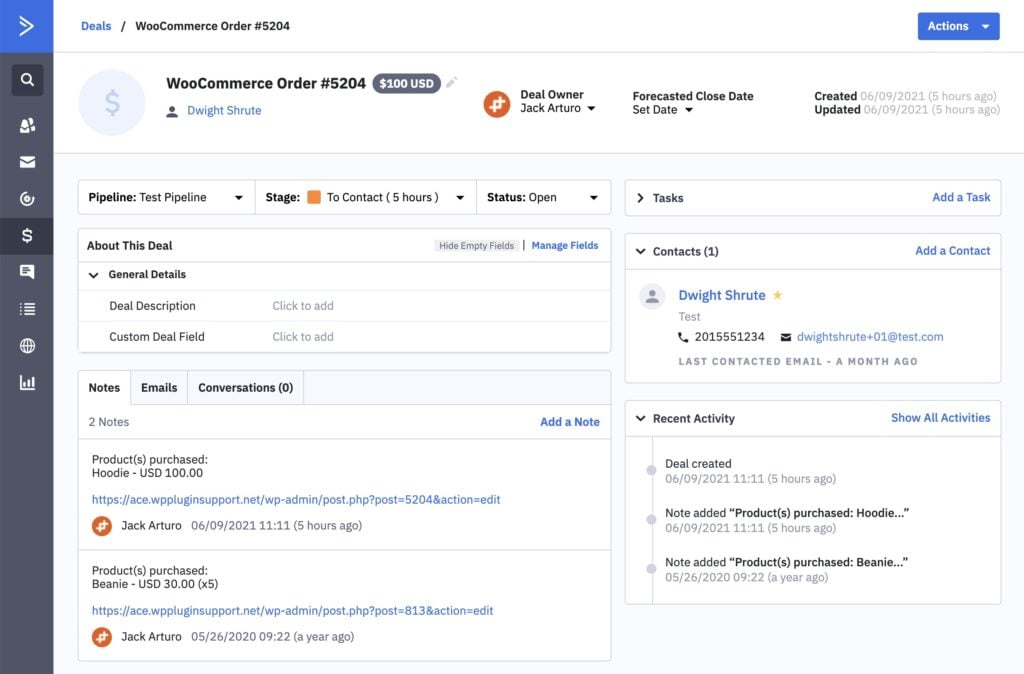
Each deal will have a title indicating the plugin that created the deal and order number. The deal value will be set to the total value of the purchase, and the deal will be assigned to the contact record who made the order.
A note will be attached to the deal containing the products purchased and a link to view the associated order in your WordPress admin.
Using ActiveCampaign』s Automations you can then move deals between stages, create followup tasks, set deal statuses, and much more.
#Video – Enhanced Ecommerce – ActiveCampaign
#Developers
The Enhanced Ecommerce addon has three filters specific to ActiveCampaign, wpf_ecommerce_activecampaign_add_deal, wpf_ecommerce_activecampaign_add_deal_note and wpf_ecommerce_activecampaign_add_deep_data depending on whether you』re syncing Deals or Deep Data.
#Deal Filter
For example to modify the deal title:
function my_custom_deal_properties( $deal, $order_id ) {
/* $deal is structured like (see https://developers.activecampaign.com/reference#create-a-deal-new)
$deal = array(
'title' => 'WooCommerce Order #XXX',
'value' => 100,
'currency' => 'usd',
'pipeline' => '1',
'stage' => '1',
'contactid' => '123',
'owner' => '1',
); */
$deal['title'] = 'My Order #' . $order_id; // Change the title
return $deal;
}
add_filter( 'wpf_ecommerce_activecampaign_add_deal', 'my_custom_deal_properties', 10, 2 );
#Deal Note Filter
For example to modify the note description:
function my_custom_note( $note, $order_id ) {
$note = 'My custom note for order #' . $order_id;
return $note;
}
add_filter( 'wpf_ecommerce_activecampaign_add_deal_note', 'my_custom_note', 10, 2 );
#Deep Data Filter
For example to record the use of a WooCommerce coupon:
function my_custom_deep_data_properties( $data, $order_id ) {
/* $data is structured like below (for more info https://developers.activecampaign.com/reference#create-order)
$data = array(
'ecomOrder' => array(
'externalid' => '123',
'source' => '1',
'email' => '[email protected]',
'orderNumber' => '123',
'orderProducts' => array(
'externalid' => 'PROD12345',
'name' => 'Pogo Stick',
'price' => 4900,
'quantity' => 1,
'category' => 'Toys',
'sku' => 'POGO-12',
'description' => 'lorem ipsum...',
'imageUrl' => 'https://example.com/product.jpg',
'productUrl' => 'https://store.example.com/product12345'
),
'orderUrl' => 'https://store.example.com/wp-admin/edit.php?post_id=123',
'orderDate' => '2016-09-13T17:41:39-04:00',
'totalPrice' => 4900,
'currency' => 'USD',
'connectionid' => '1',
'customerid' => '123',
),
); */
$order = wc_get_order( $order_id );
$coupons = $order->get_coupon_codes(); // See if a coupon was used
if ( ! empty( $coupons ) ) {
// Add it to the deep data
$data['orderDiscounts'] = array(
array(
'name' => $coupons[0],
'type' => 'order',
'discountAmount' => $order->get_total_discount(),
),
);
}
return $data;
}
add_filter( 'wpf_ecommerce_activecampaign_add_deep_data', 'my_custom_deep_data_properties', 10, 2 );
#Was this helpful?
Let us know if you liked the post. That』s the only way we can improve.
Yes
No
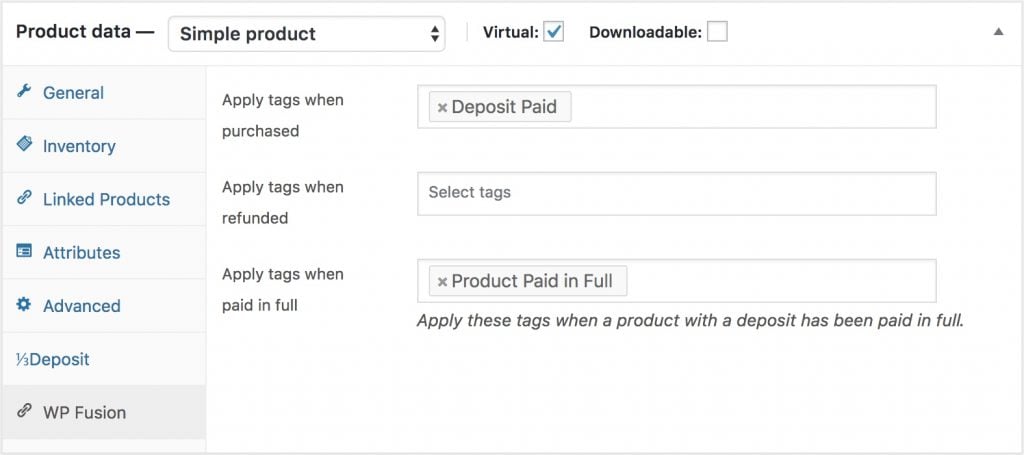
 These tags are applied to the customer who made the purchase
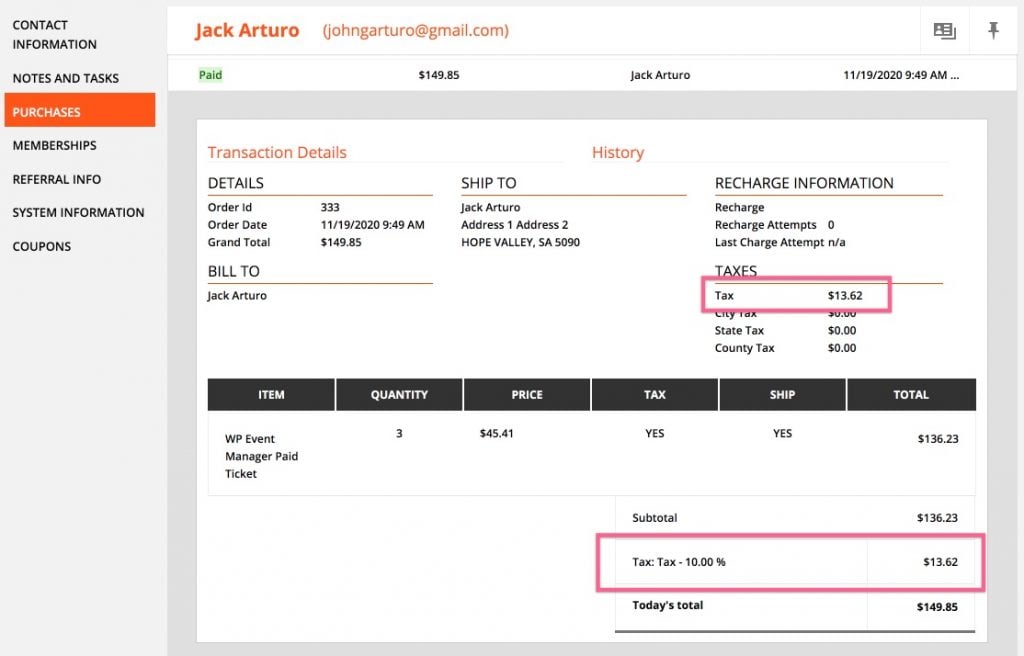 A WooCommerce purchase synced into Ontraport using WP Fusion, using a tax object with a 10% tax rate
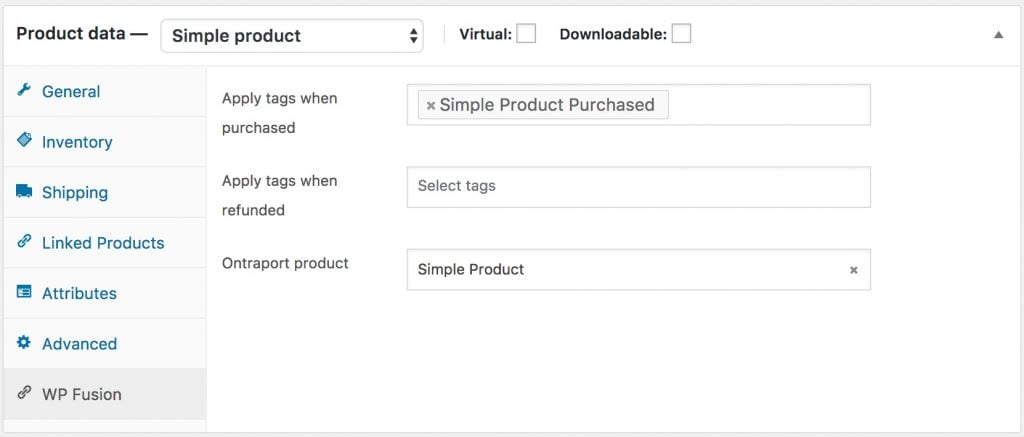
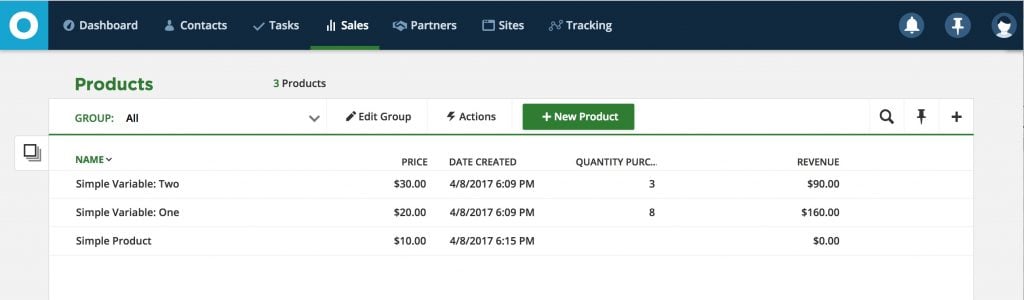 Products dynamically added to the Ontraport products list, including variable products.
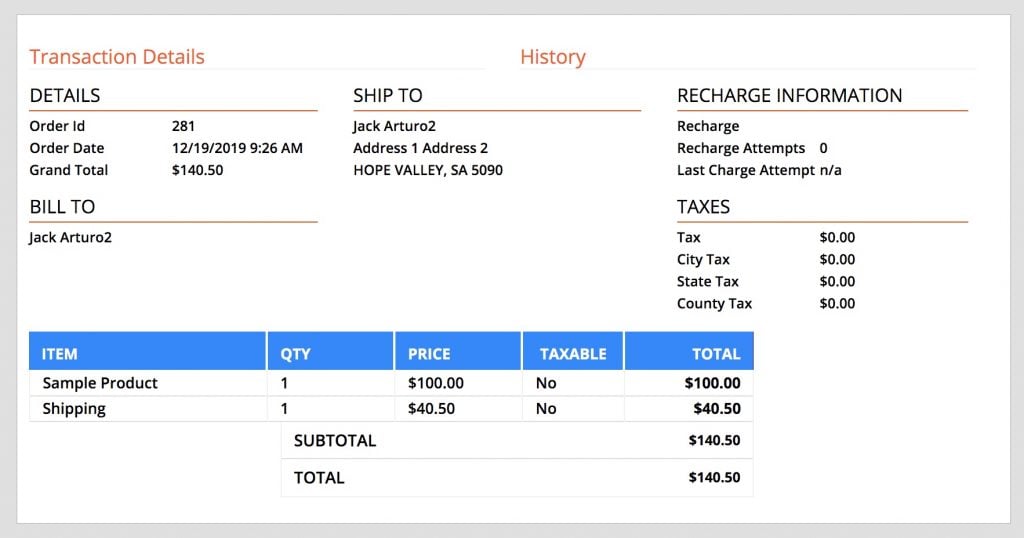
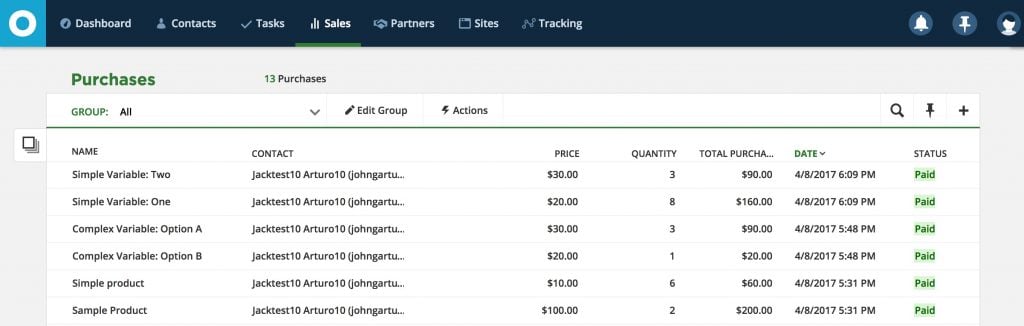 Purchases will be tracked in Ontraport』s purchase logs and can be used in all reports.
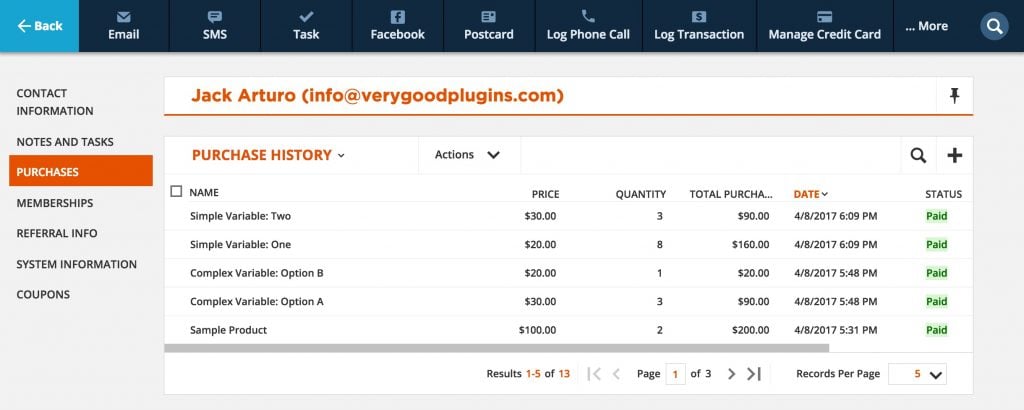 You can also view a customer』s purchase history from the Purchases tab within their contact record.
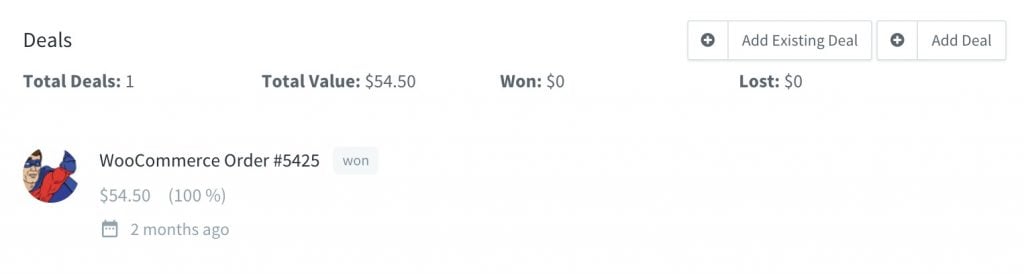 Deal added to the 「Won」 column with order number and order value
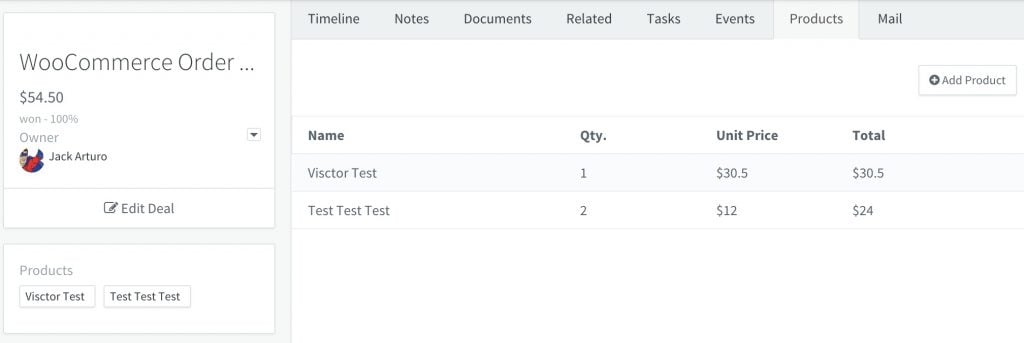 Deal details with products purchased