GiveWP#Overview
WP Fusion integrates with the GiveWP donation plugin to sync donors with any one of 40+ supported CRMs and marketing automation platforms, and apply tags and/or lists based on their donation level and subscription status.
#Donation Form Settings
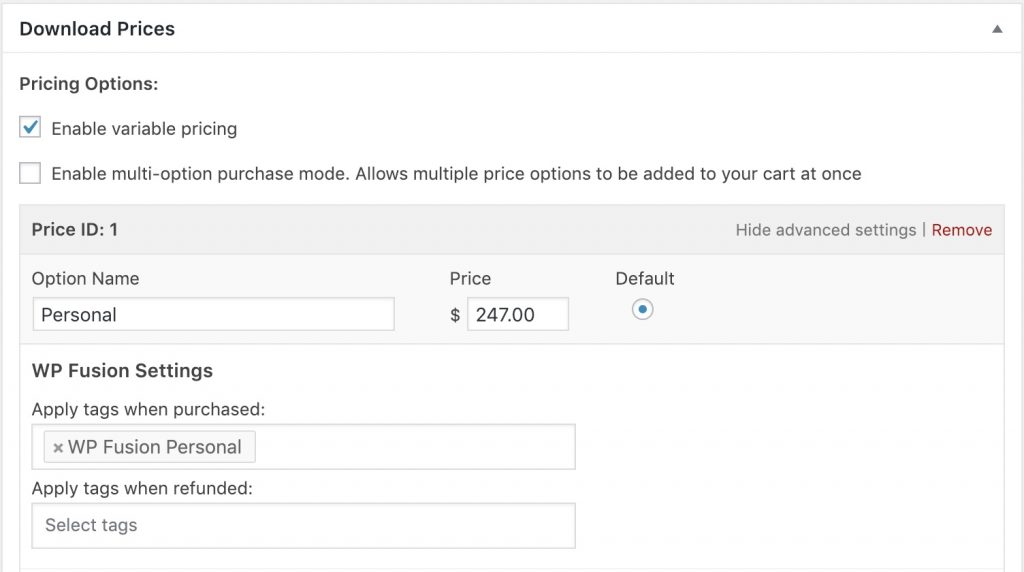
With WP Fusion active, a new pane will appear when editing the settings for any donation form.
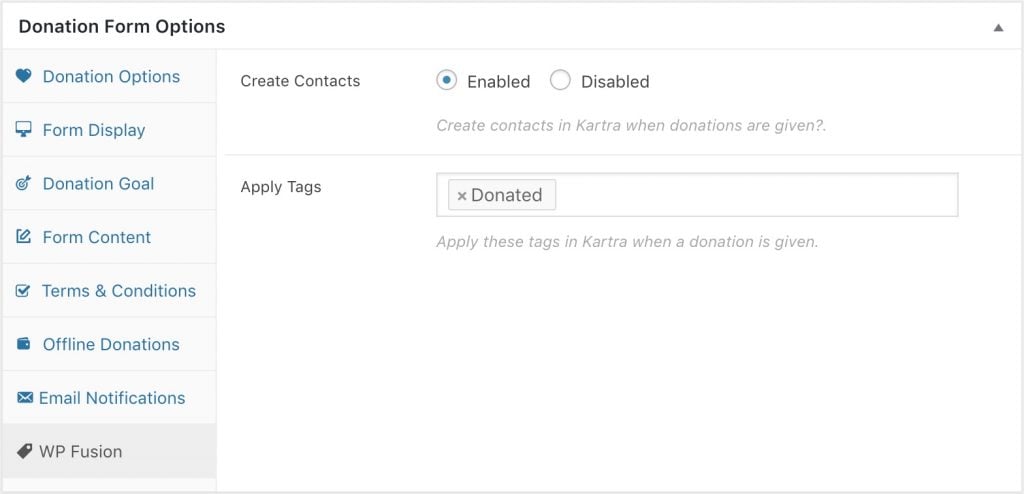
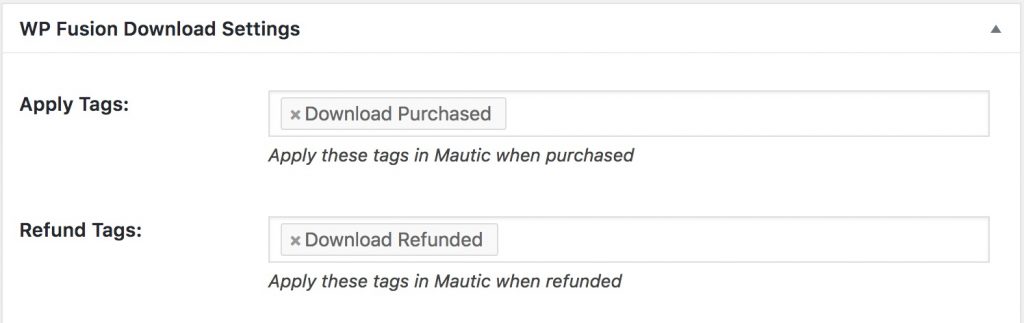
Here you can specify whether or not contacts should be added to your CRM after they make a donation. You can also specify any tags to apply.
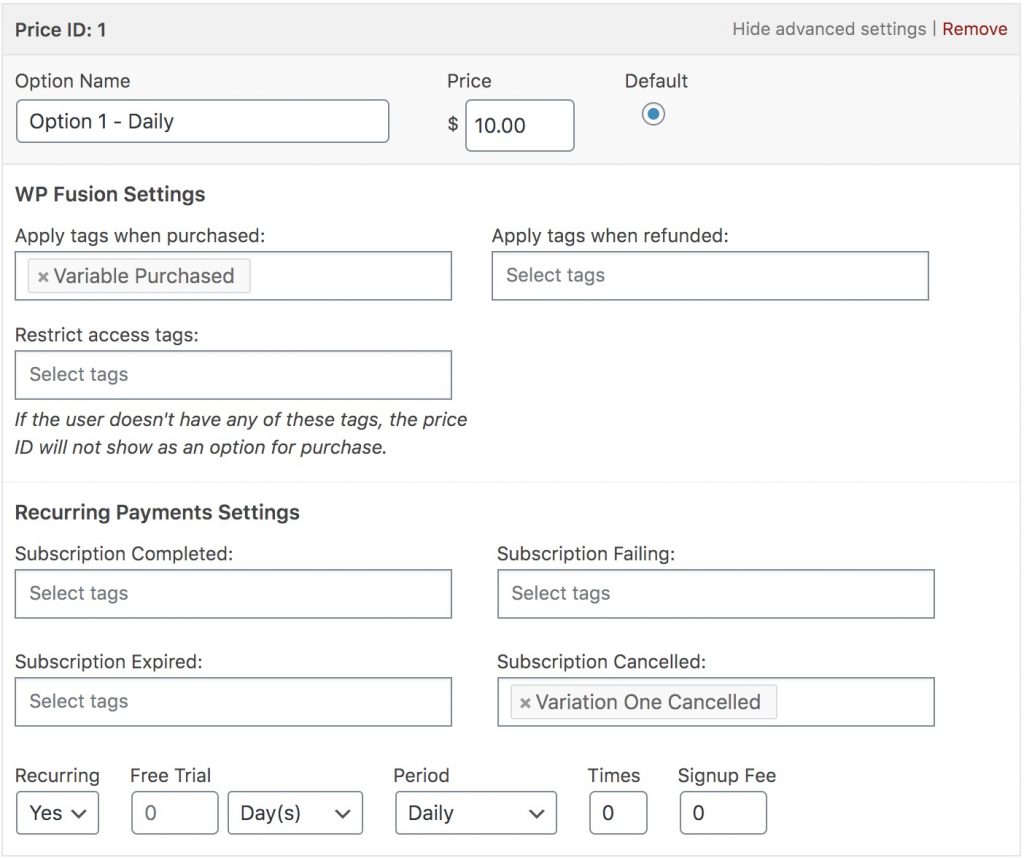
#Donation Level Settings
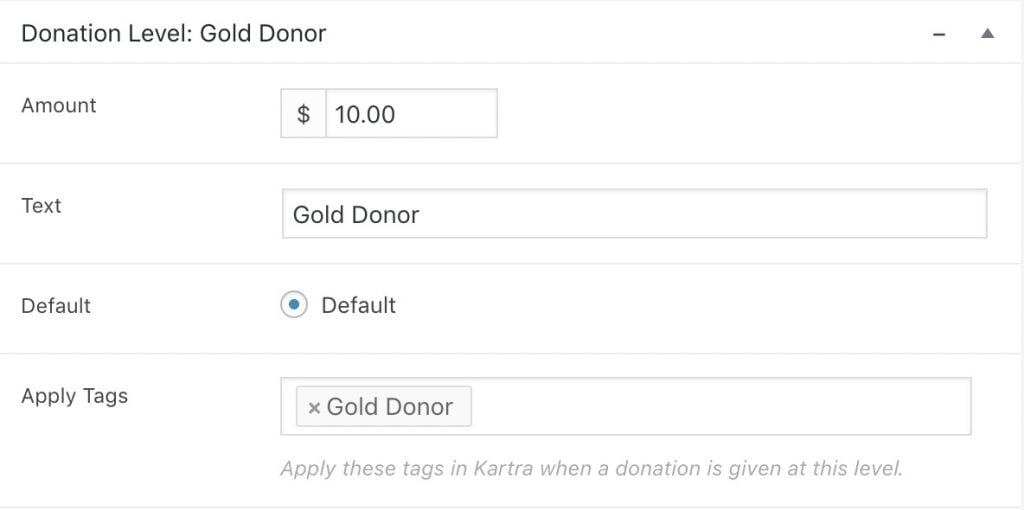
From the Donation Options tab you can create multiple donation levels. Here you can also tag contacts by level, allowing you to segment donors by their donation amount in your CRM.
#Syncing donors
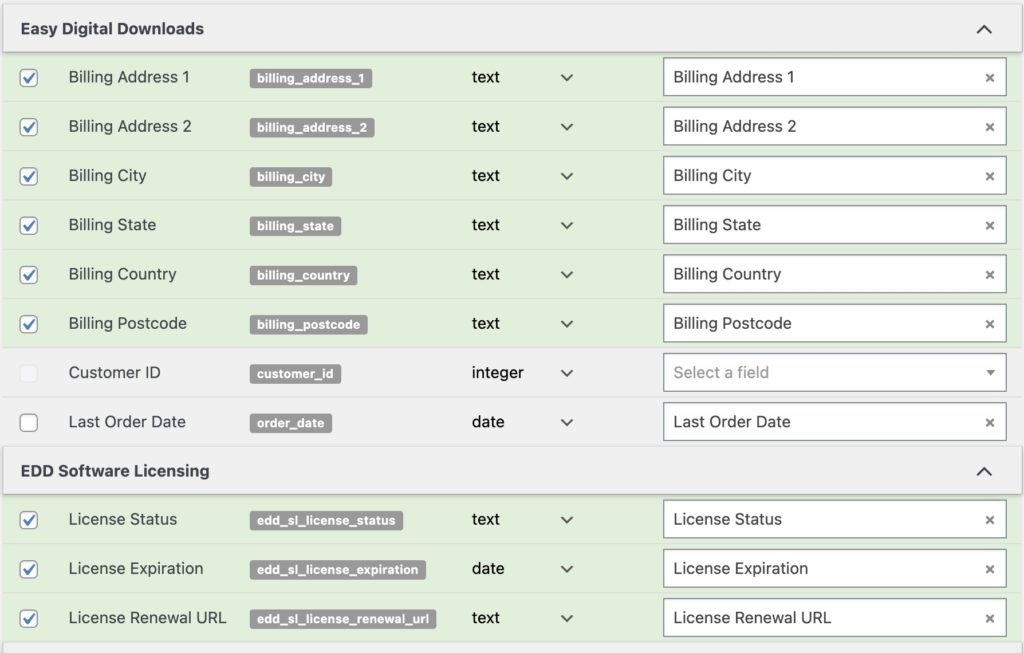
You can configure the field mapping between your Give donor fields and custom fields in your CRM in WP Fusion』s Contact Fields settings.
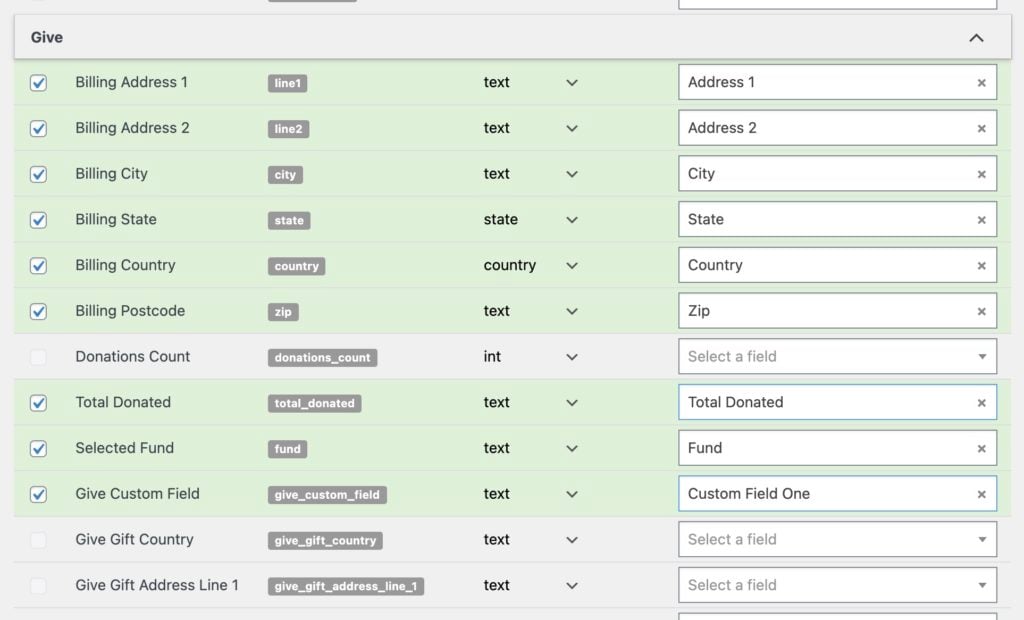
For each field in Give, you can select a corresponding field in your CRM. When a donation is made, the enabled fields will be synced to your CRM.
In addition to the standard Give fields, you』ll also see two 「pseudo」 fields:
Donations Count: This will be updated each time a donation is made, and will be a number indicating how many donations have been given by the donor.
Total Donated: This will be updated each time a donation is made, and will be a number indicating the total amount ever donated by the donor.
#Custom Fields
If you』re using the Form Field Manager addon for Give, you can add custom fields to your donation forms, and WP Fusion supports syncing these fields to custom fields in your CRM.

Any custom fields you』ve added to your donation forms will show up under the Give header at Settings » WP Fusion » Contact Fields. From here you can choose a corresponding custom field in your CRM to store the collected data.
#Gift Aid
If you』re using the Gift Aid addon for Give, you can sync the Gift Aid address provided by the donor to custom fields in your CRM.
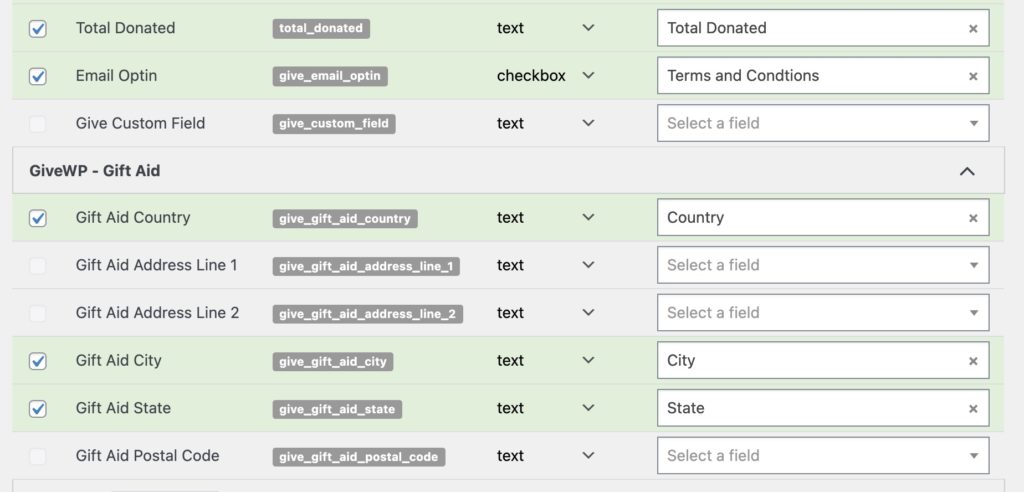
These Gift Aid fields will appear beneath the main GiveWP fields in the Contact Fields list when the Gift Aid plugin is active.
#Video – GiveWP General Settings and Donation Level Settings
#Email Optins
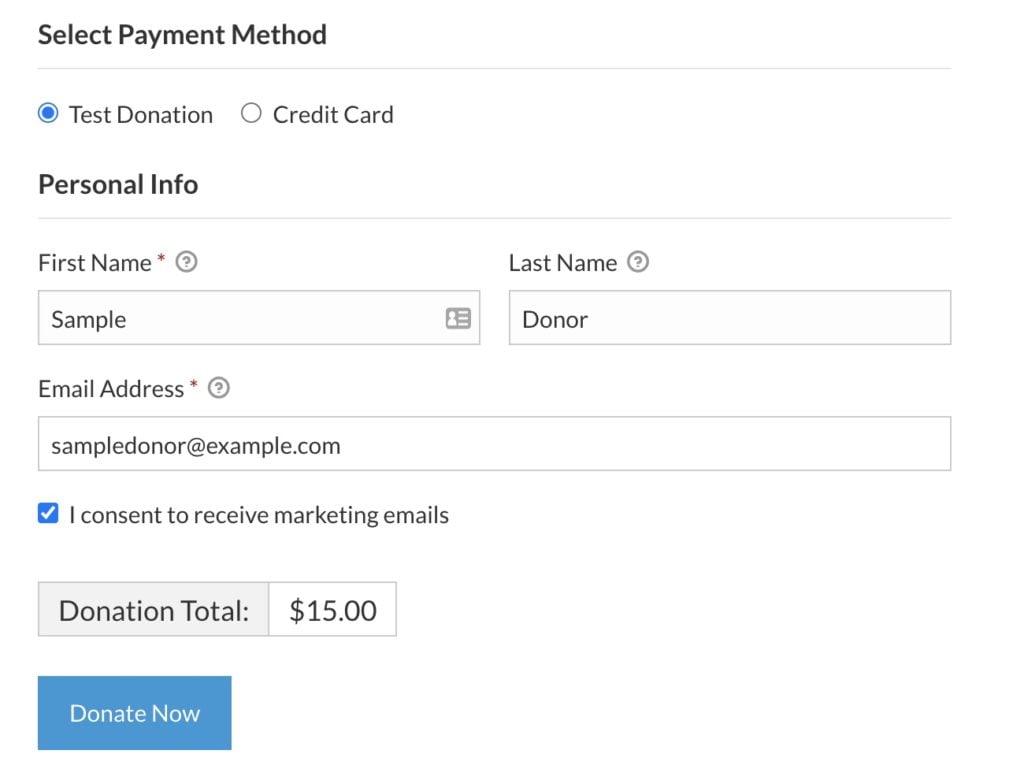
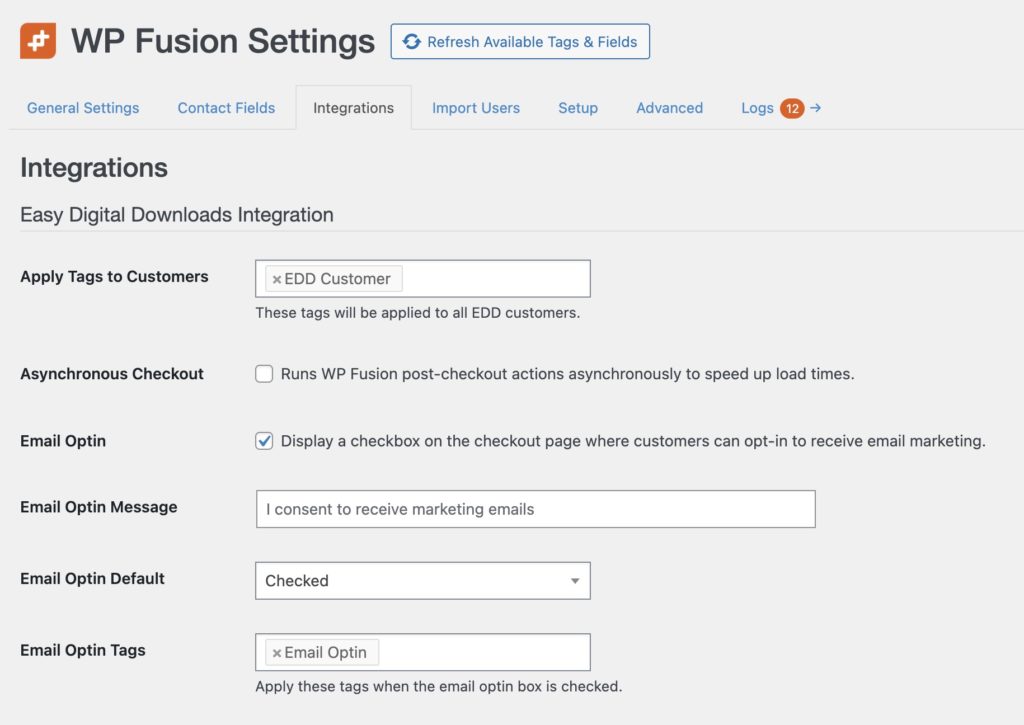
WP Fusion includes an option to add an email optin checkbox to your GiveWP donation forms.
This can be enabled by checking the box for Email Optin at Settings » WP Fusion » Integrations » GiveWP.
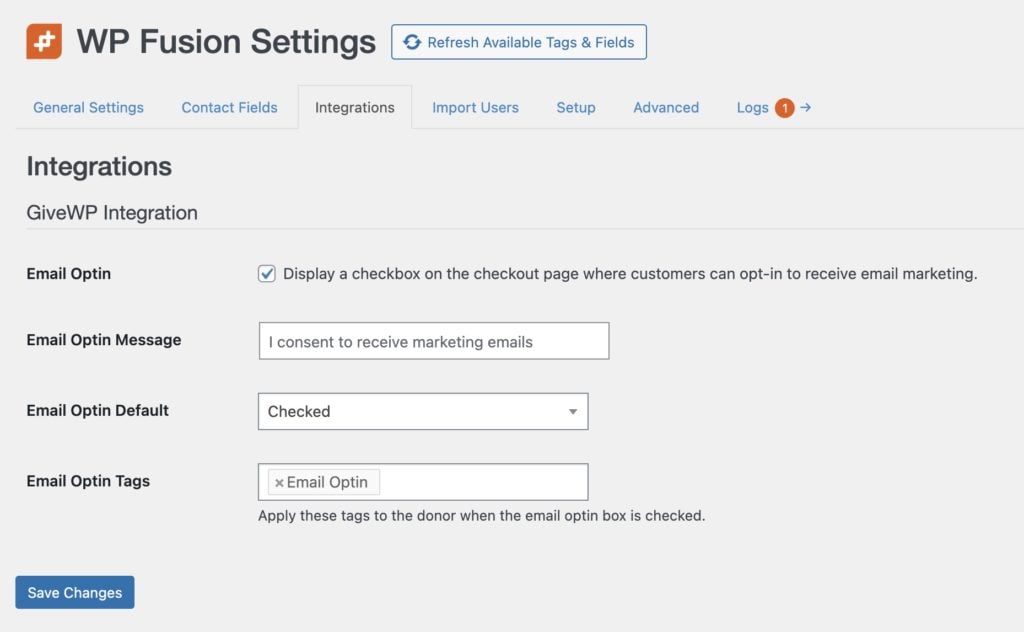
You can customize the message that』s displayed, as well as the tags that are applied when the checkbox is checked.
As an alternative to applying tags, you can also sync the value of the optin checkbox to a custom field in your CRM, by enabling the give_email_optin field for sync at Settings » WP Fusion » Contact Fields » GiveWP.
When enabled the optin checkbox will be displayed at the bottom of the GiveWP donation form.
#Recurring Donations
If you have the Recurring Donations addon for Give active, two additional settings will appear on the WP Fusion panel.
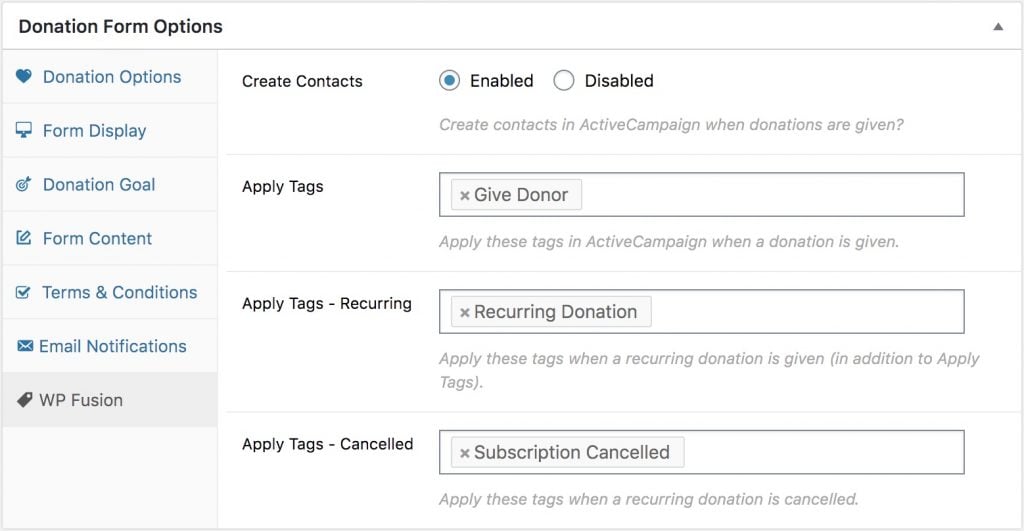
Those options are:
Apply Tags – Recurring: These tags will be applied in your CRM in addition to the 「Apply Tags」 tags, when a donor makes a recurring donation.
Apply Tags – Cancelled: These tags will be applied in your CRM when a recurring donation is cancelled, either by an admin, the user, or the gateway.
Apply Tags – Failed: These tags will be applied in your CRM when a recurring donation payment fails.
#Video – GiveWP Recurring Donations
#Funds & Designations
WP Fusion also supports the Funds & Designations extension, allowing you to apply tags in your CRM when a donation is made to a specific fund.
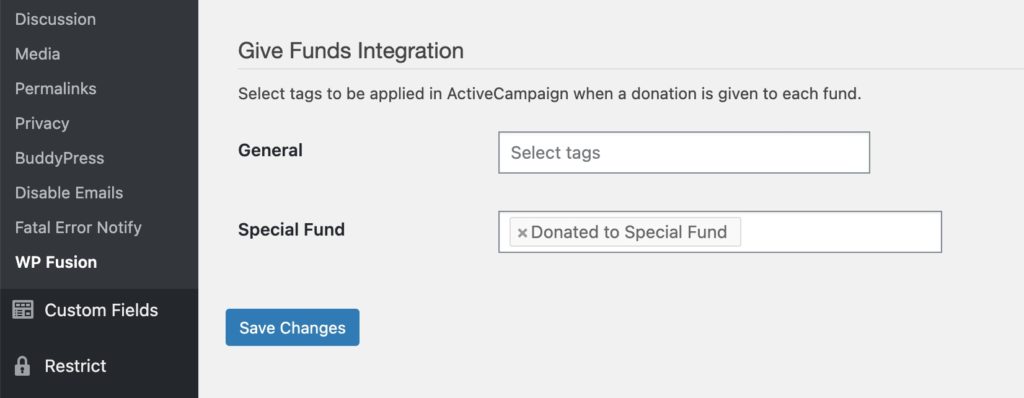
The settings for this are found at Settings » WP Fusion » Integrations » Give Funds.
In addition to applying tags, you can also sync a donor』s selected fund to a custom field in your CRM. This can be turned on by enabling the Selected Fund field for sync from the Contact Fields settings.
#Video – GiveWP Custom Fields
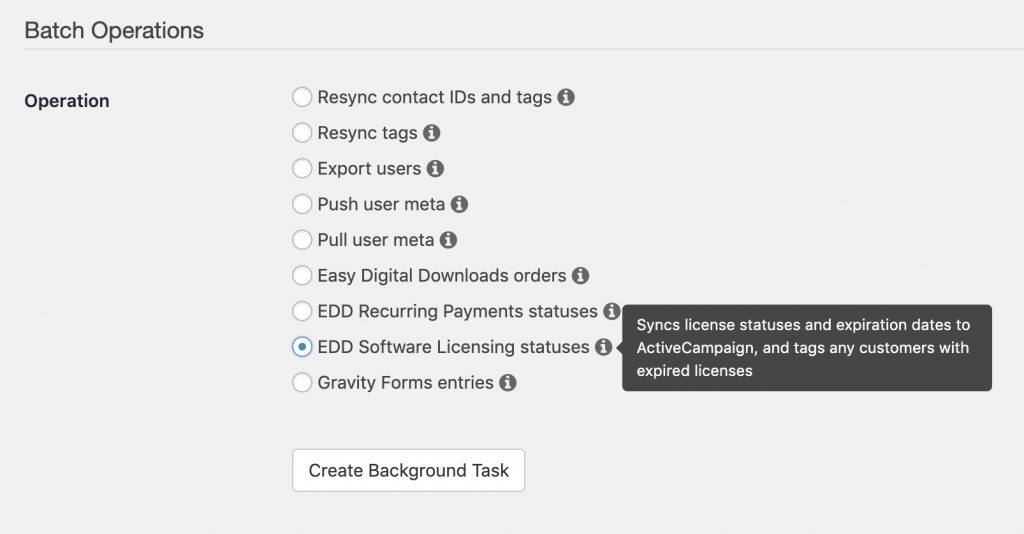
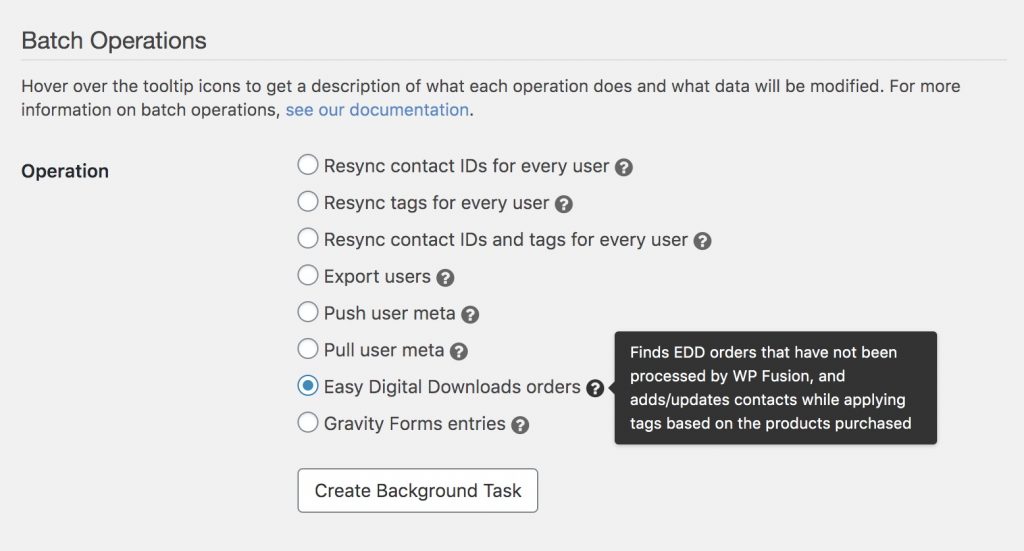
#Batch Operations
WP Fusion provides two batch operations for GiveWP data, to allow you to sync historical donor and payment data to your CRM. These can be found under Settings » WP Fusion » Advanced » Batch Operations in the WP Admin.
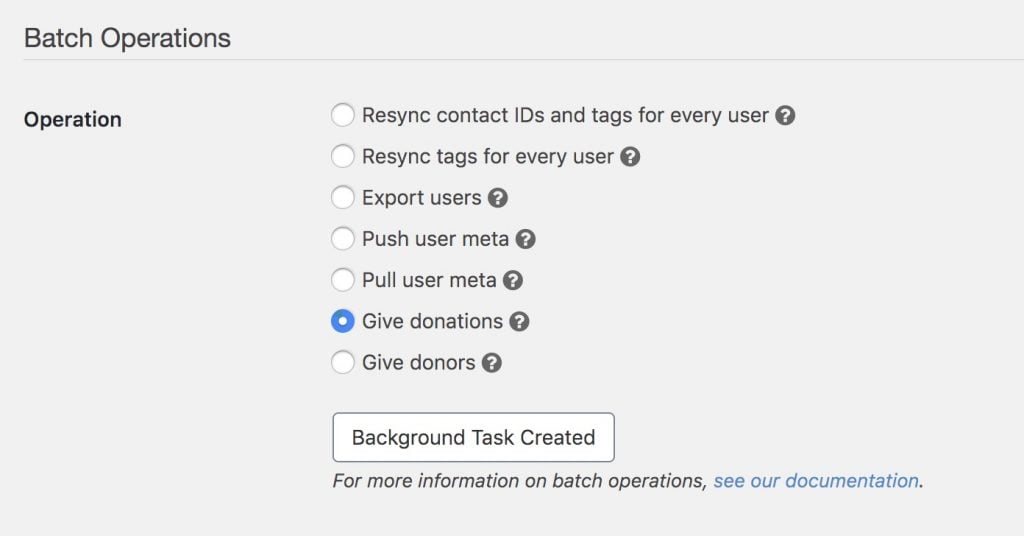
The two options are:
Give donations: This operation goes through all of your Give donations (payments) in order from oldest to newest. For each payment it will create or update the donor』s contact record in your CRM, and apply any tags configured for that donation form. If the donation is a recurring donation, tags will be applied based on the donor』s current subscription status.
Give donors: This operation goes through all of your Give donors, and for each it will create or update the donor』s contact record in your CRM. If you』ve enabled the Total Donated or Donations Count fields for sync, these will also be updated. This operation does not modify any tags.
#Enhanced Ecommerce
If you』re using WP Fusion』s Enhanced Ecommerce addon, you』ll also see a third option:
Give donations (Ecommerce addon): This operation looks for Give payments that have already been processed by the core WP Fusion (contact records were created and tags were applied), but that haven』t yet been processed by the Enhanced Ecommerce addon.You would only need to run this operation if you』d already been using WP Fusion with Give for some time, and you』ve just installed the Enhanced Ecommerce addon and now need to sync the ecommerce data to your CRM as well.
#Was this helpful?
Let us know if you liked the post. That』s the only way we can improve.
Yes
No
 These tags are applied to the customer who made the purchase

 The Discount Label setting can be used to customize how the auto-applied discount appears on the checkout page.
 The WP Fusion settings appear on each step』s Settings panel in the new CartFlows UI

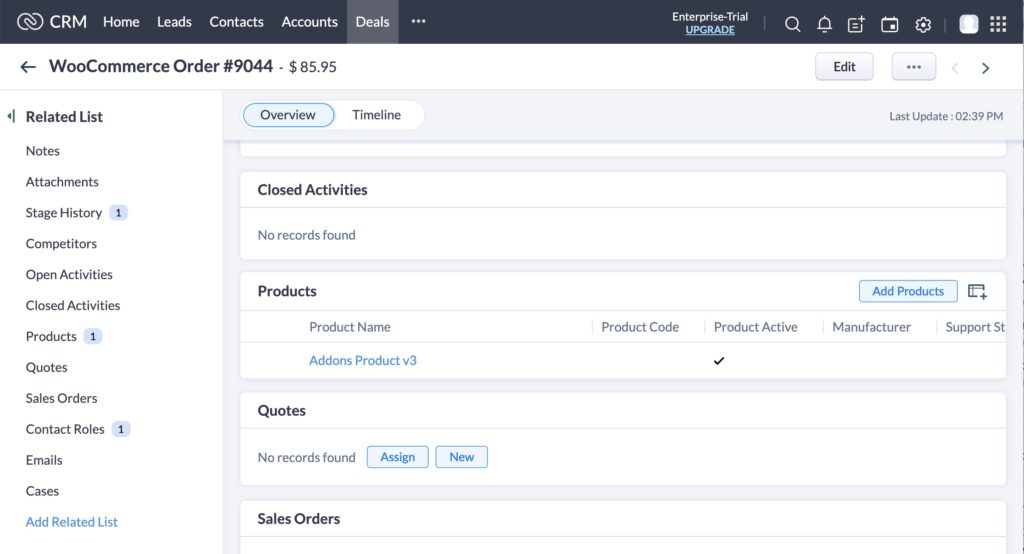
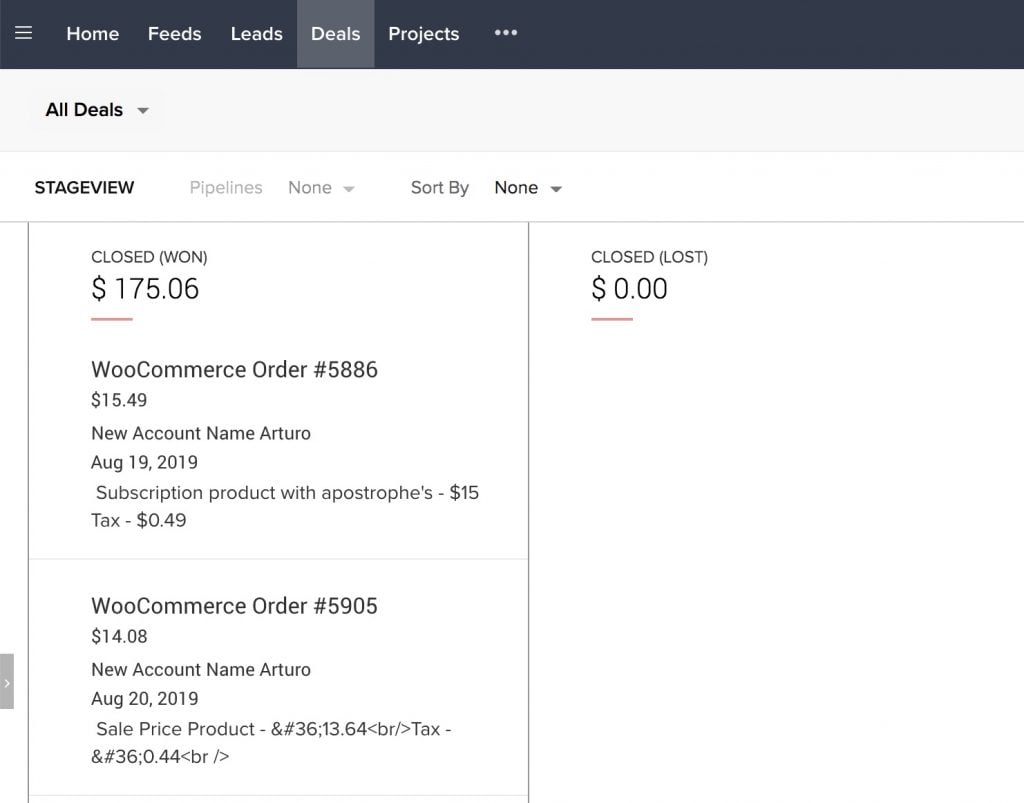 WooCommerce orders shown in the Deals list in Zoho
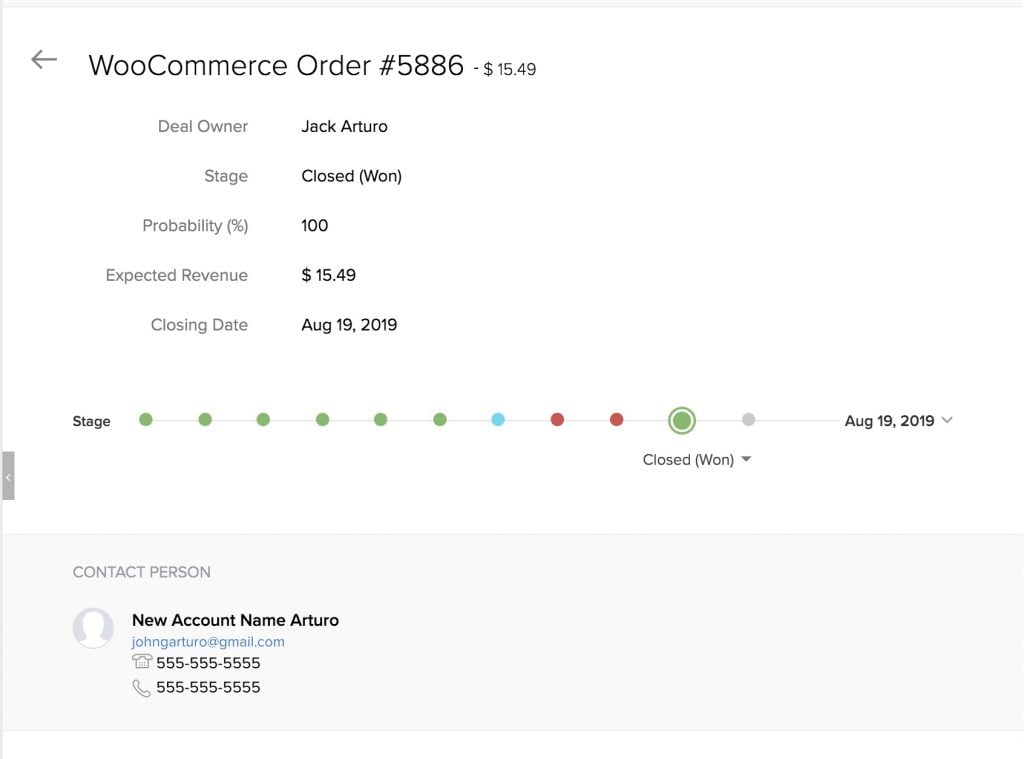 The deal is created with the total order value and associated with the contact who made the purchase
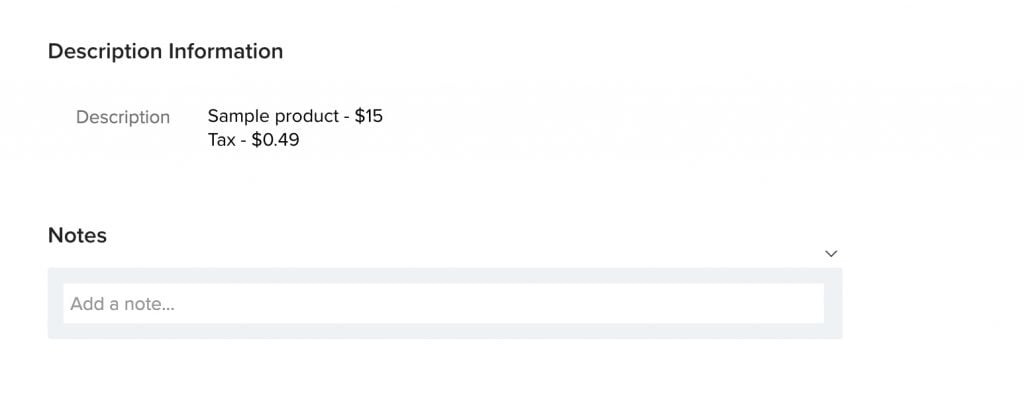 The order details are added to the deal description field
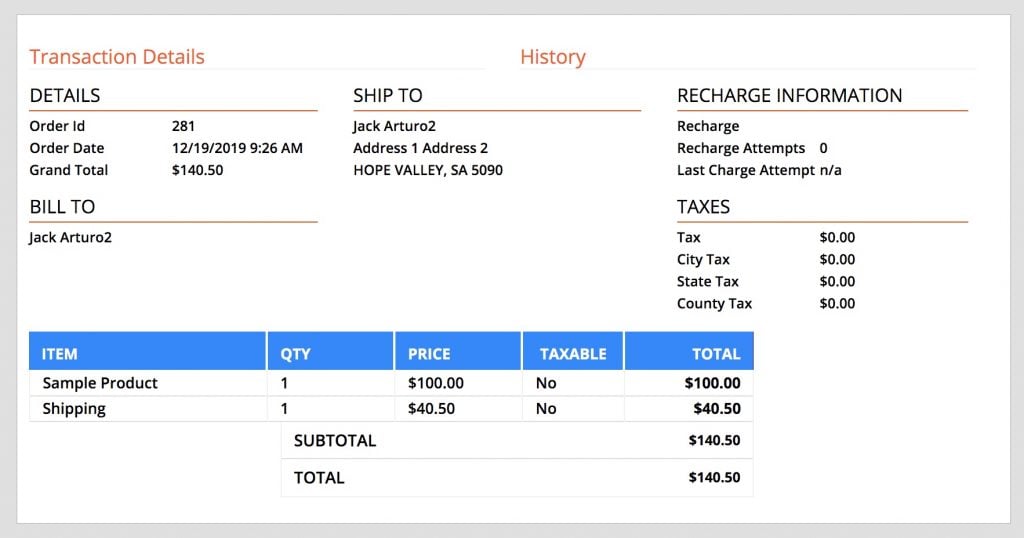
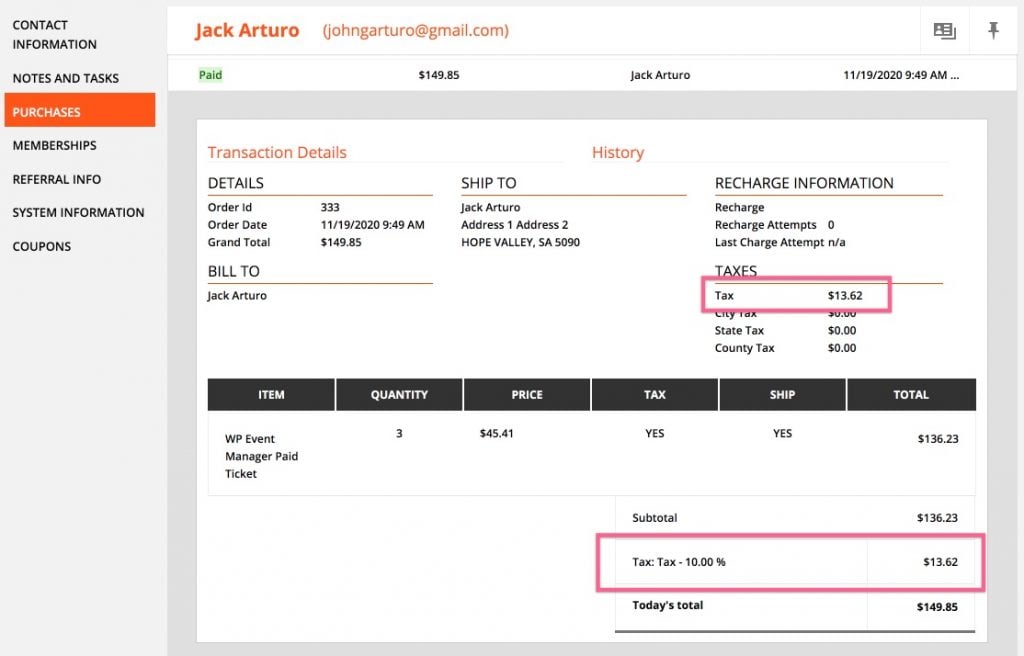 A WooCommerce purchase synced into Ontraport using WP Fusion, using a tax object with a 10% tax rate
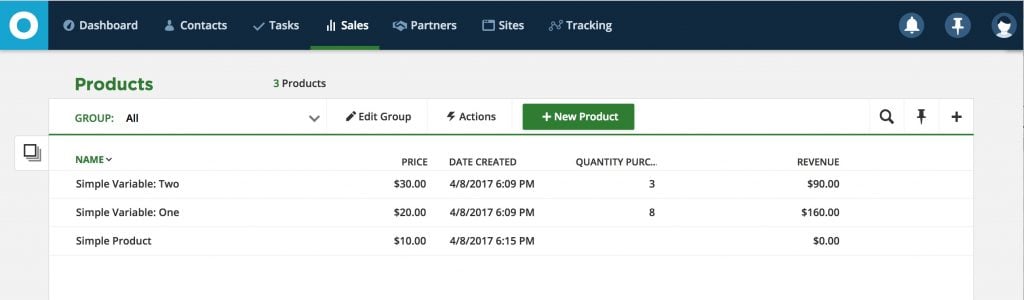 Products dynamically added to the Ontraport products list, including variable products.
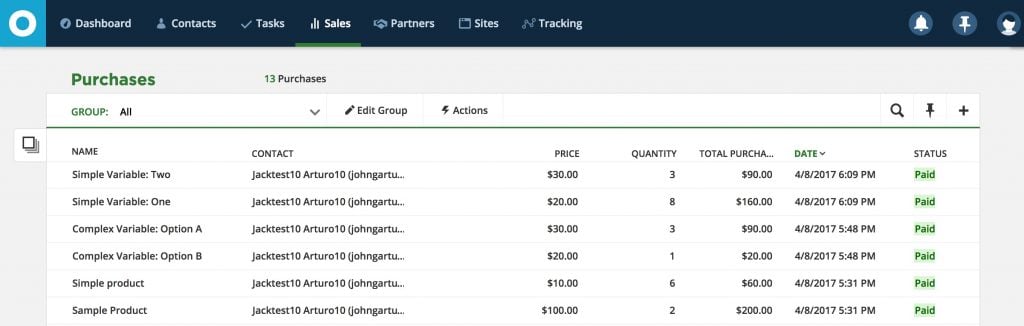 Purchases will be tracked in Ontraport』s purchase logs and can be used in all reports.
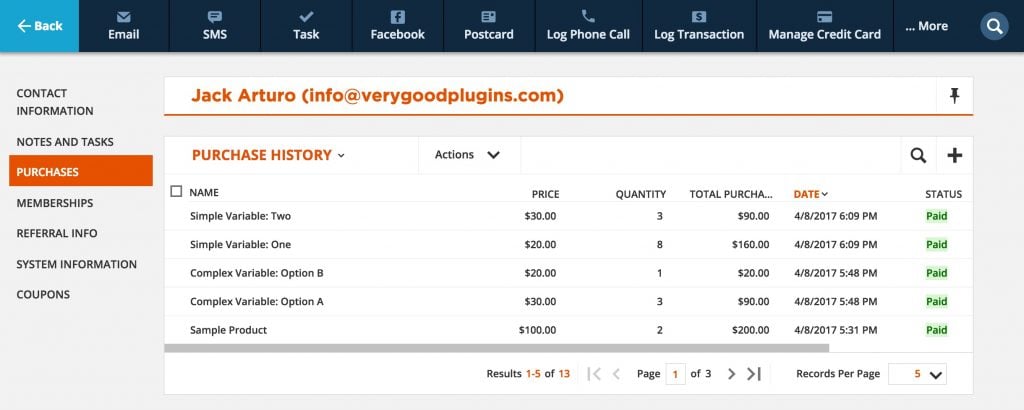 You can also view a customer』s purchase history from the Purchases tab within their contact record.

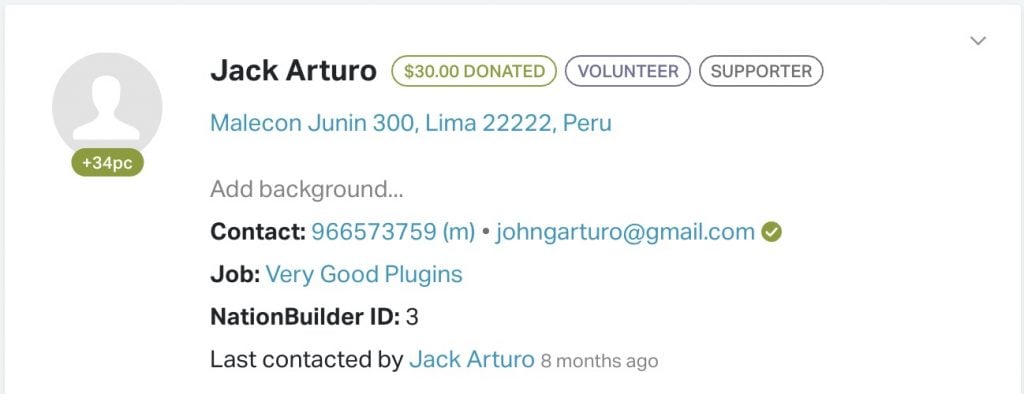 Donor badge is displayed on the Person record in NationBuilder
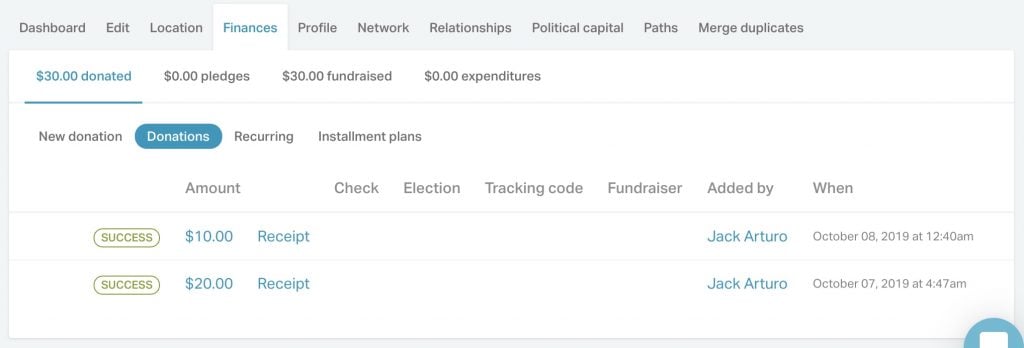 Donations are displayed on the Person details view
 The integration name and transaction ID are shown in the donation notes