Gravity Forms#Overview
WP Fusion integrates with Gravity Forms to send new form submissions to any one of 40+ CRMs and marketing automation tools, allowing you to track and engage with leads.
It also supports the Gravity Forms User Registration Add-on for user registrations.
#Setup
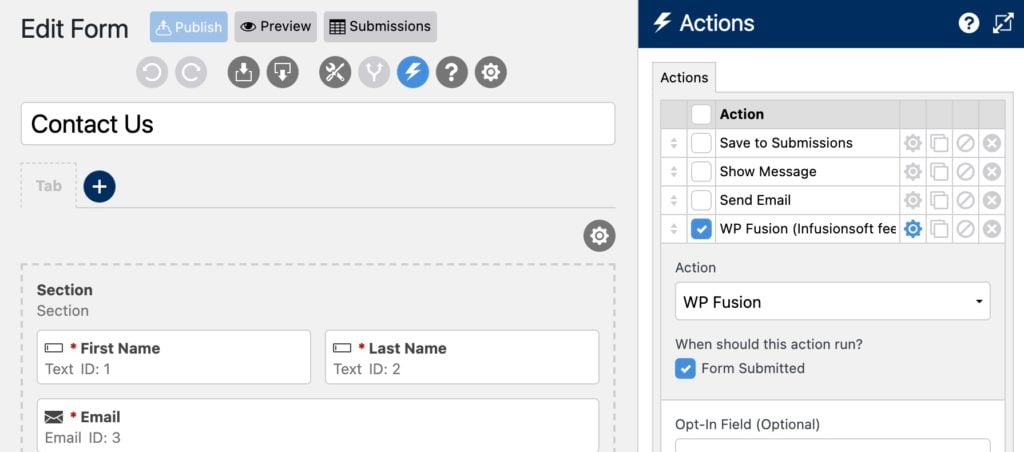
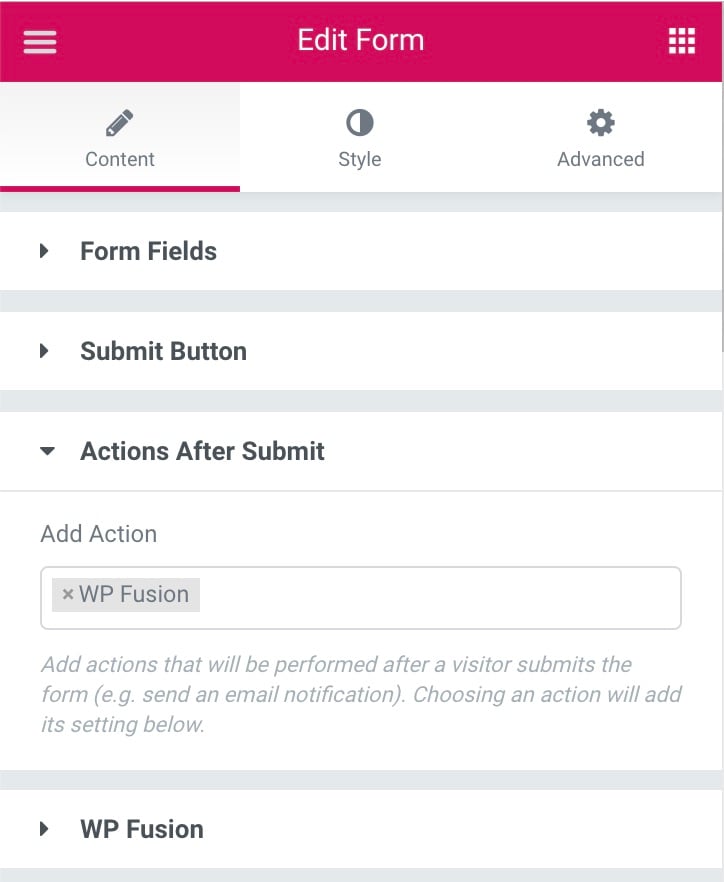
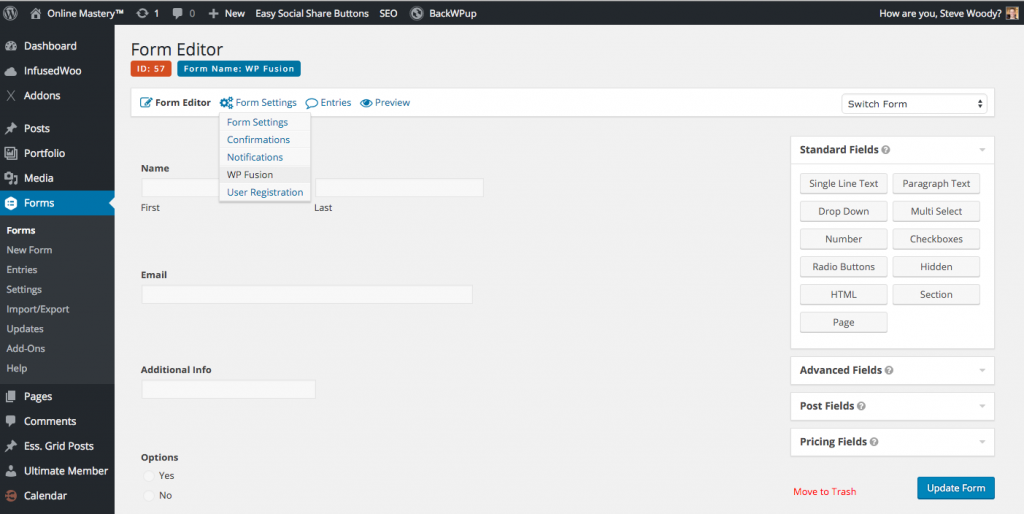
First create a form in Gravity Forms and save it. Then you』ll be able to access the WP Fusion feeds list via the Form Settings menu.
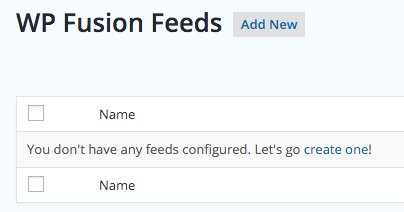
Here you will be asked to create a new WP Fusion Feed.
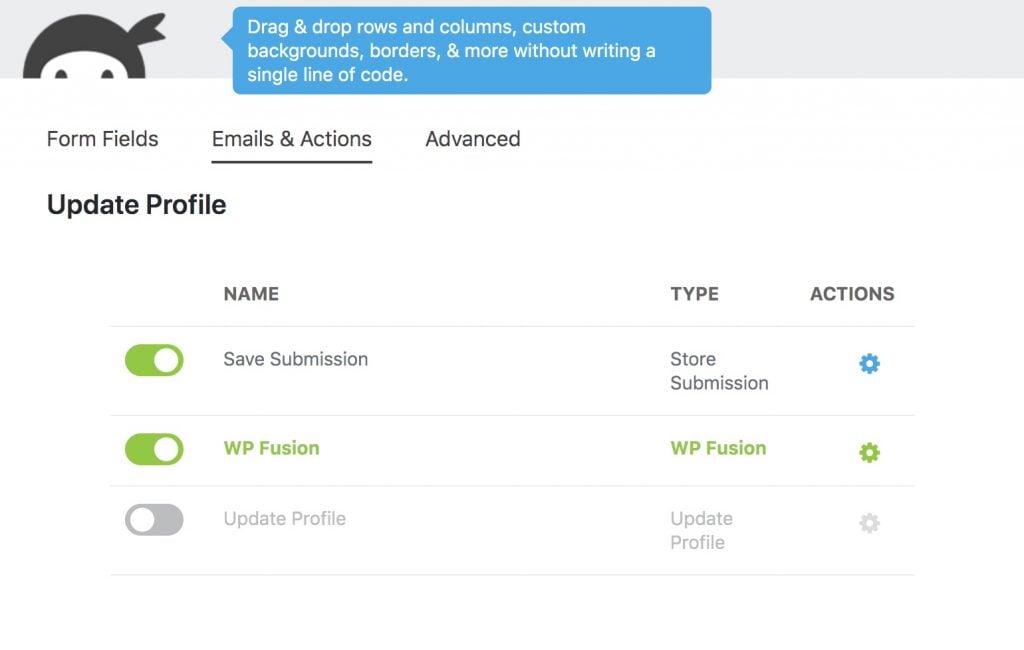
#Feed Settings
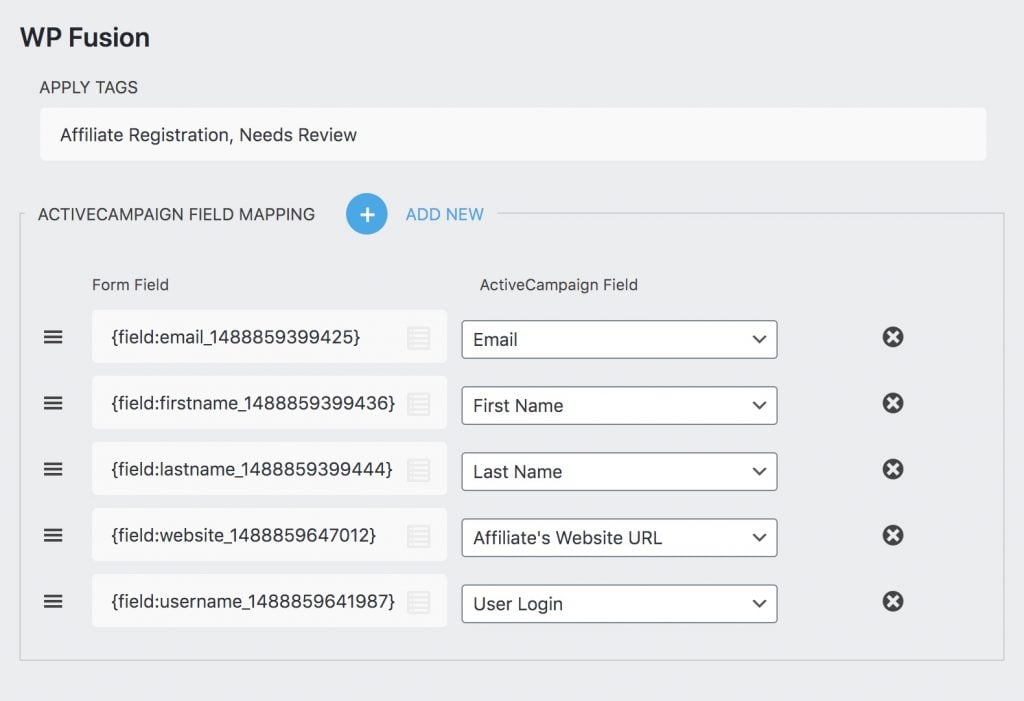
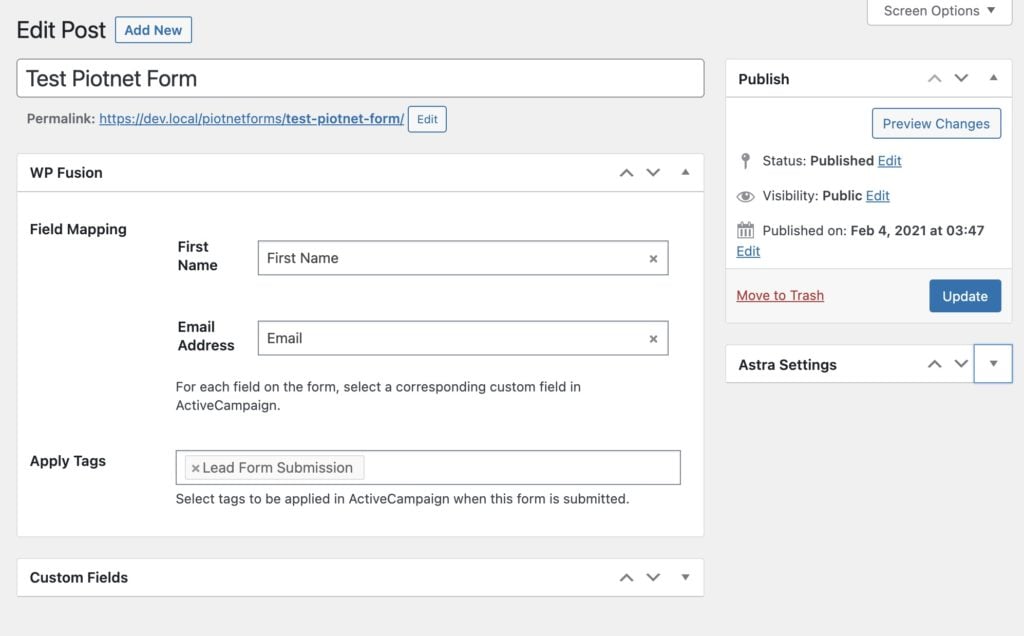
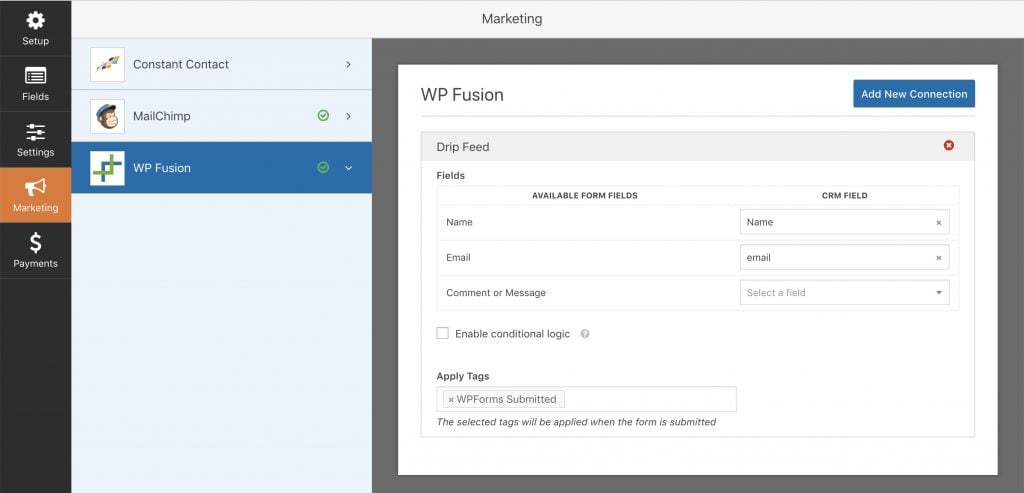
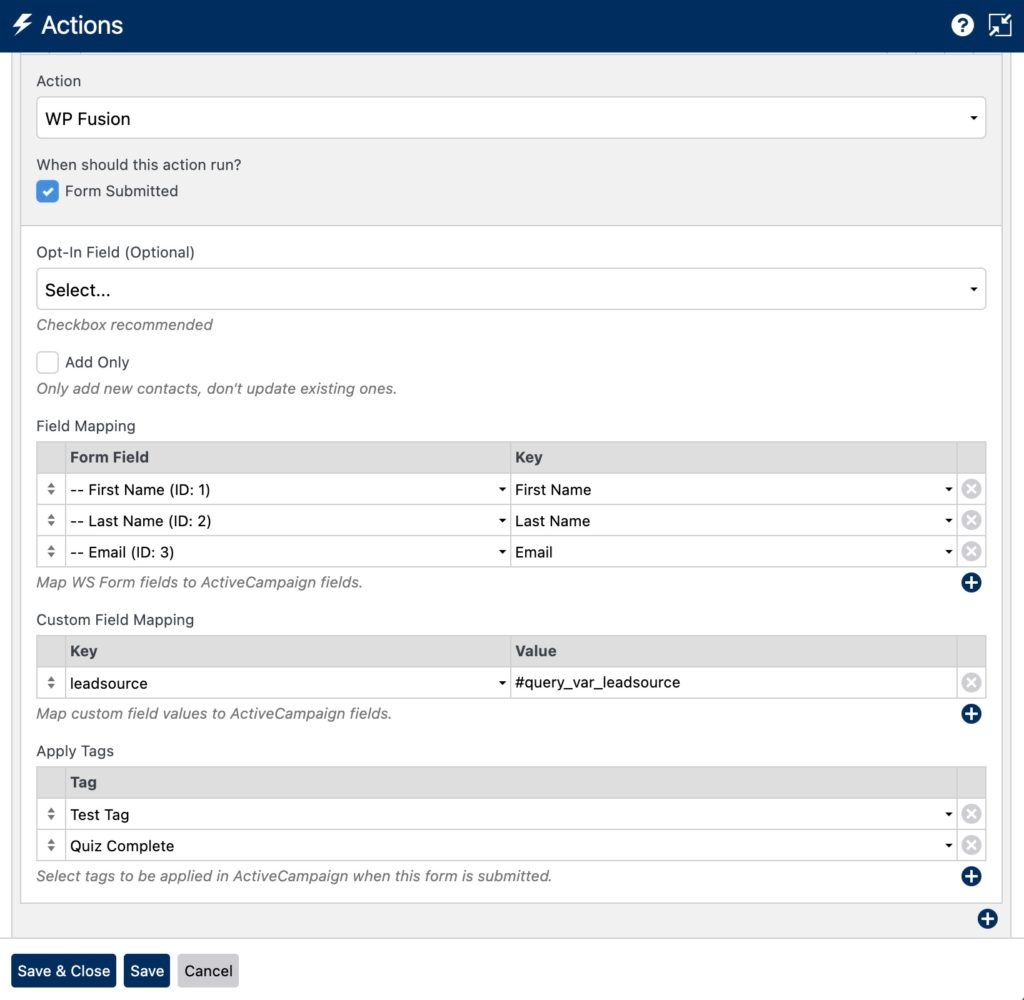
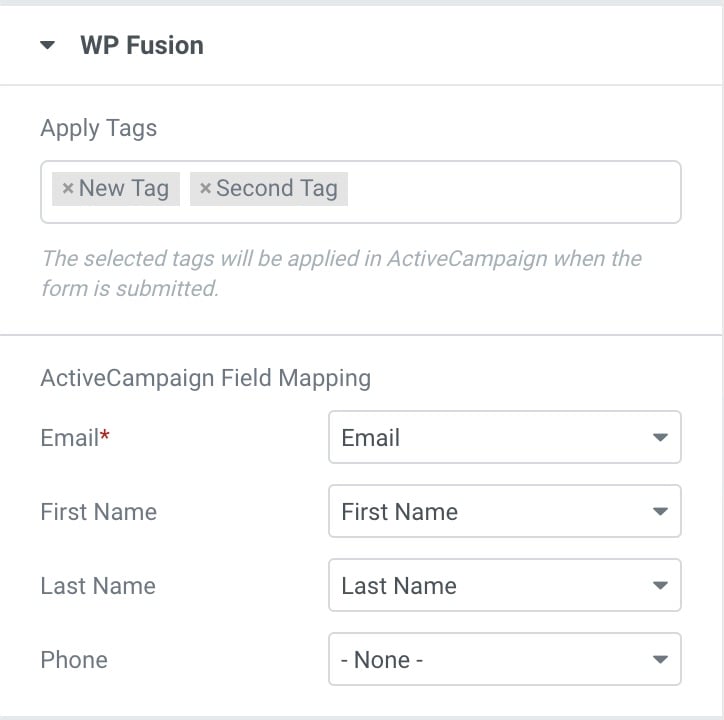
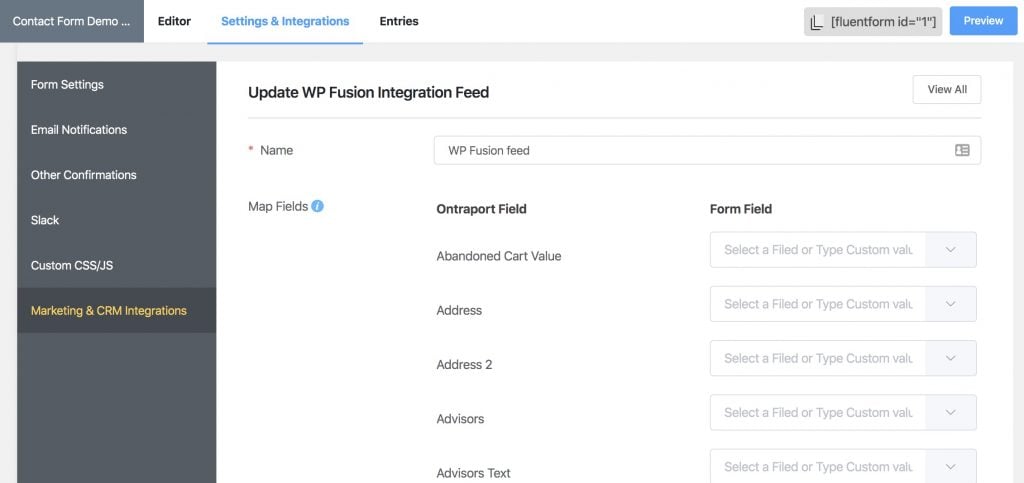
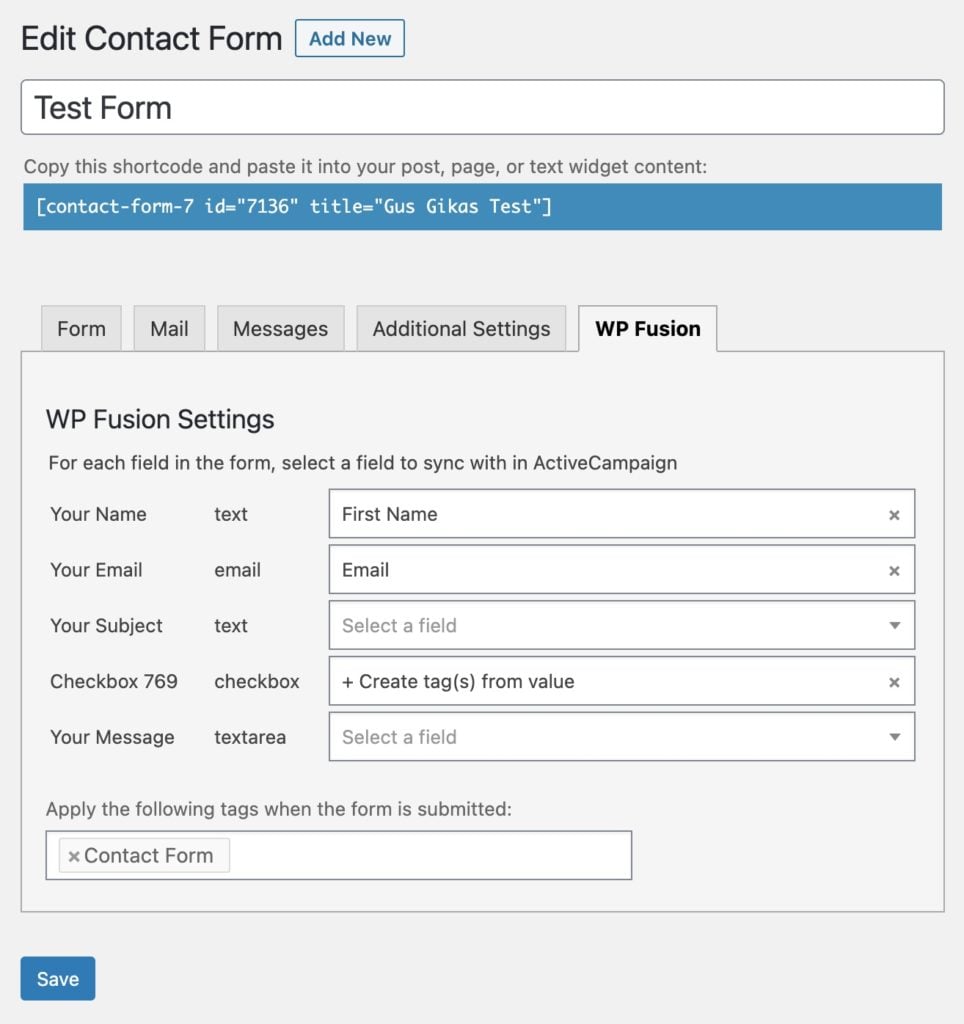
On the feed settings panel, WP Fusion will list all of your form fields. In the right column you can use the dropdown to select a corresponding custom field in your CRM.

Underneath the Form Fields you』ll find additional meta fields related to the form, such as IP address, entry URL, and form ID.
#Tagging leads
Underneath the field mapping list, you can configure any tags you』d like to be applied when the form is submitted.

Depending on your connected CRM you may see an option to select lists in addition to tags.
#Conditional logic
Finally you have the ability to create conditional logic to decide if the feed runs on form submission.
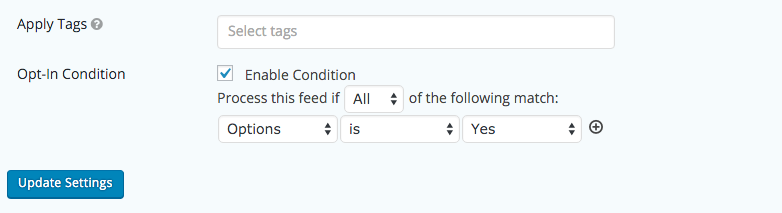
If any of the conditions are not met the form will be submitted but the feed will not run. You can have multiple feeds per form.
#Video
Here is a video showing the process.
#Auto-login
If you have form auto login enabled in the WP Fusion settings, tracking cookies will be set when a guest user submits a form. This allows you to apply tags via a form submission and then use those tags on subsequent pages to grant access to content and track activity.
#Pre-fill form fields
You can pre-fill Gravity Forms form fields with user data, and this also works with auto-login sessions. For example {user:first_name}.
For a reference, see the Gravity Forms documentation.
Note that the field names must be usermeta field names, not CRM field names (you can see your usermeta field names when looking at the Contact Fields list in the WP Fusion settings).
When the auto-login link is visited, any enabled fields are loaded from your CRM and cached in the corresponding user meta field keys in WordPress. It』s these fields that are then displayed by the {user:field_name} merge tag.
Note that as of v3.38.5 of WP Fusion, this feature no longer requires Set Current User to be enabled in WP Fusion』s auto-login settings, it will work automatically when an auto-login session is detected.
#Return after login
It』s possible to require an email optin via a Gravity Forms form in order to access protected content on your site.
To set this up, first go into the post you』d like to protect, and in the WP Fusion meta box, enable Users must be logged in to view this content. You can optionally specify some required tags. For the Redirect if access is denied, select the page with your form from the dropdown.
Then in the main WP Fusion settings, enable the option for Form Auto Login. This will start a tracking session whenever your form is submitted.
Finally, enable the setting for Return After Login.
Now, when a visitor tries to access the protected content, they will be redirected to the page with your Gravity Forms optin form on it. When the form is submitted, a contact record will be created in your connected CRM, and any specified tags will be applied.
This will start an auto-login session, which unlocks any content protected by WP Fusion. Finally, the Return After Login feature will redirect the lead back to the post or page they』d previously tried to access.
#Merge fields
WP Fusion makes a {contact_id} merge field available for use in Gravity Forms notifications.
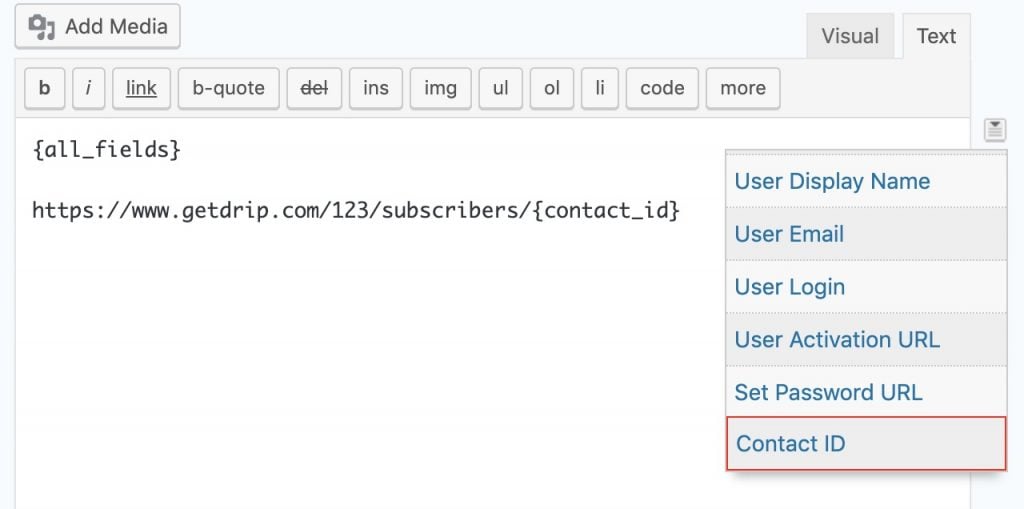
You can use this to include a link to the contact record in notification emails.
#Managing entries
When WP Fusion processes a Gravity Forms entry it will add a note to the entry indicating the contact ID that was created/updated in your CRM. If there are any API errors these will also be saved as a note on the entry.
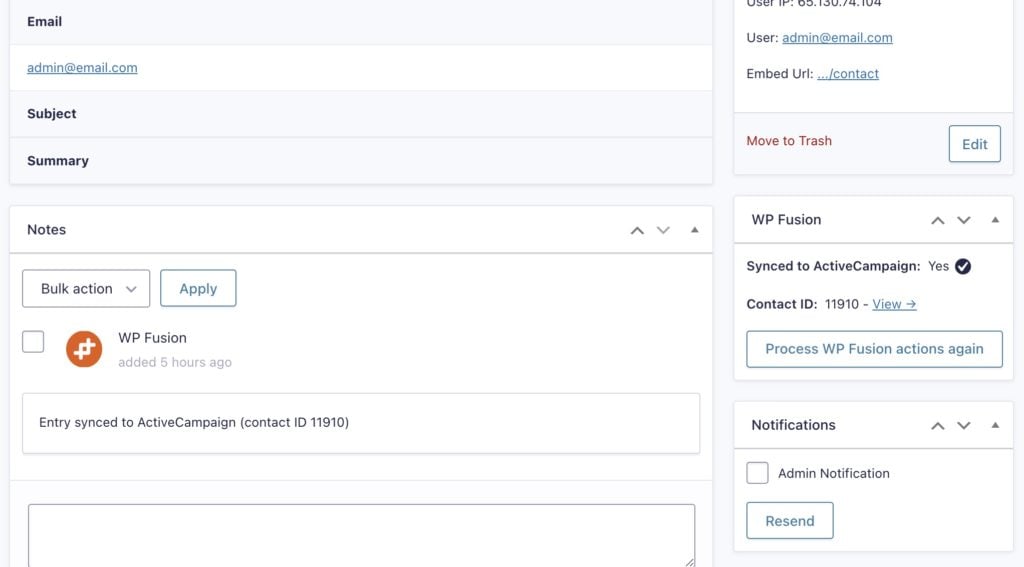
WP Fusion also adds a metabox to the side of every entry where you can view the status of that entry, with a link to view the corresponding contact record in your CRM.
If an entry didn』t sync correctly for some reason, you can click the Process WP Fusion actions again button to re-send the form entry to your CRM.
#Event Tracking
Using the Event Tracking addon, you can track Gravity Forms entries as events in supported CRMs.
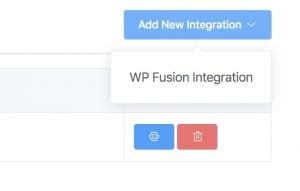
Events can be configured when editing individual forms, by creating an Event Tracking Feed:
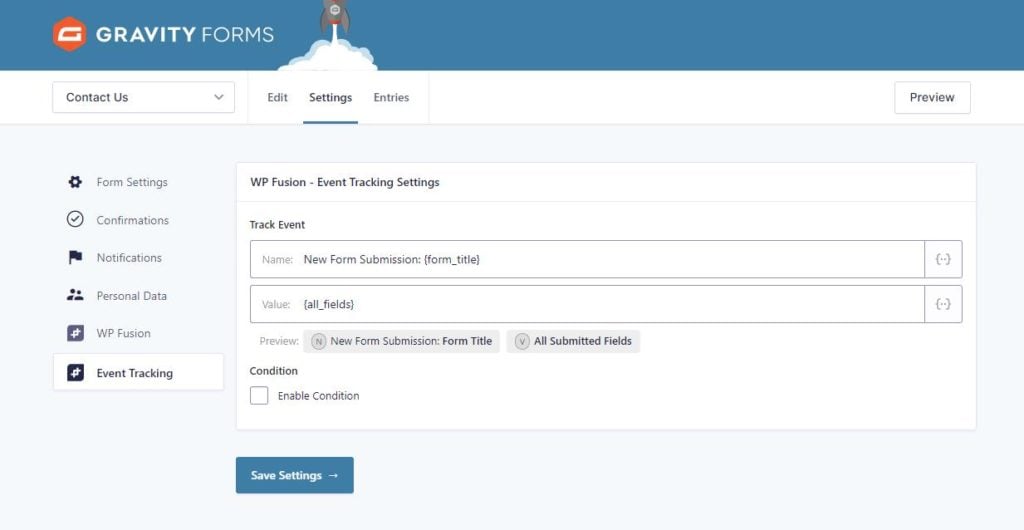 Event tracking can be configured on the Event Tracking Feed when editing any Gravity Forms
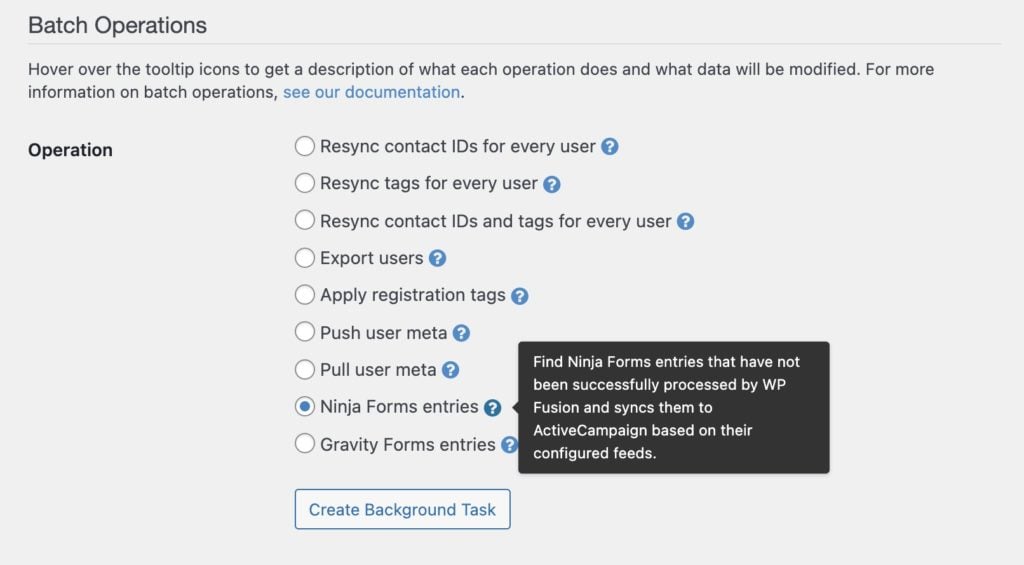
#Syncing historical entries
If you already have existing Gravity Forms entries from before you installed WP Fusion, you can use a batch processing tool to export all of those entries to your CRM.
First configure your form feeds. Then navigate to Settings » WP Fusion » Advanced and scroll down to the Batch Operations section.
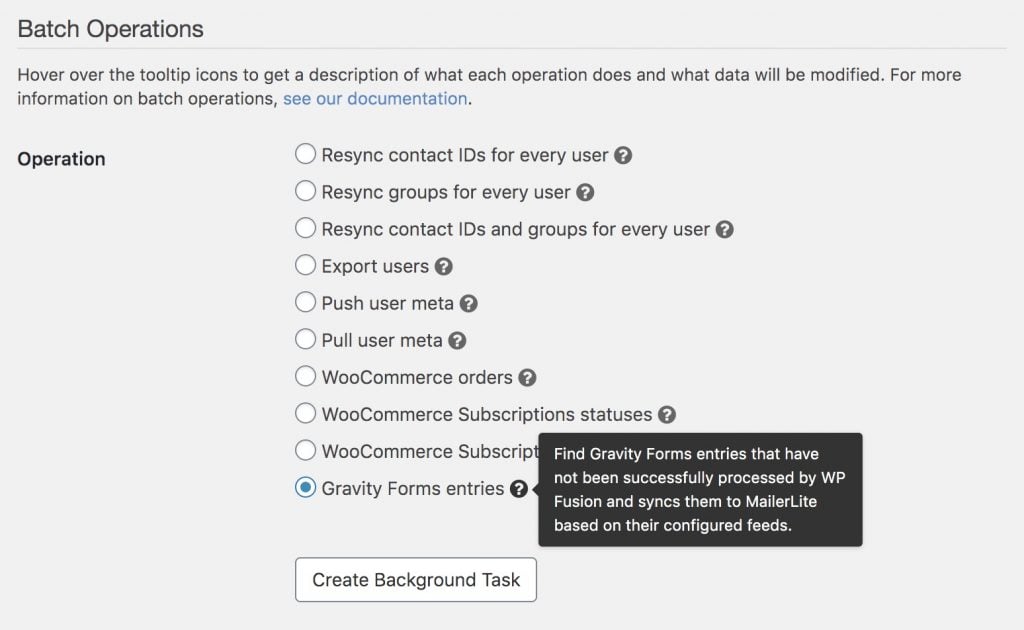
Select 「Gravity Forms entries」 from the list of options, and click Create Background Task.
WP Fusion will go through all of your historical entries, processing each according to the feeds set up on the corresponding form. A status bar will appear at the top of the page indicating the progress.
After each entry is processed it will be locked by WP Fusion so it can』t be exported again, to prevent duplicate data from going to your CRM.
#Was this helpful?
Let us know if you liked the post. That』s the only way we can improve.
Yes
No