MemberPress#Overview
WP Fusion provides a bi-drectional integration between MemberPress and any one of 50+ supported CRMs and marketing automation systems.
When a user checks out on your MemberPress site, their contact details will automatically be added to your CRM of choice, including support for custom fields.
WP Fusion also supports applying tags in your CRM based on each member』s membership level and subscription status.
As well, WP Fusion can automatically import users from contact records in your CRM and auto-assign membership levels based on tags.
#Tagging
When configuring a membership level, you can click on the WP Fusion tab to configure any tags you』d like applied when the membership is purchased and when subscription and transaction statuses change.
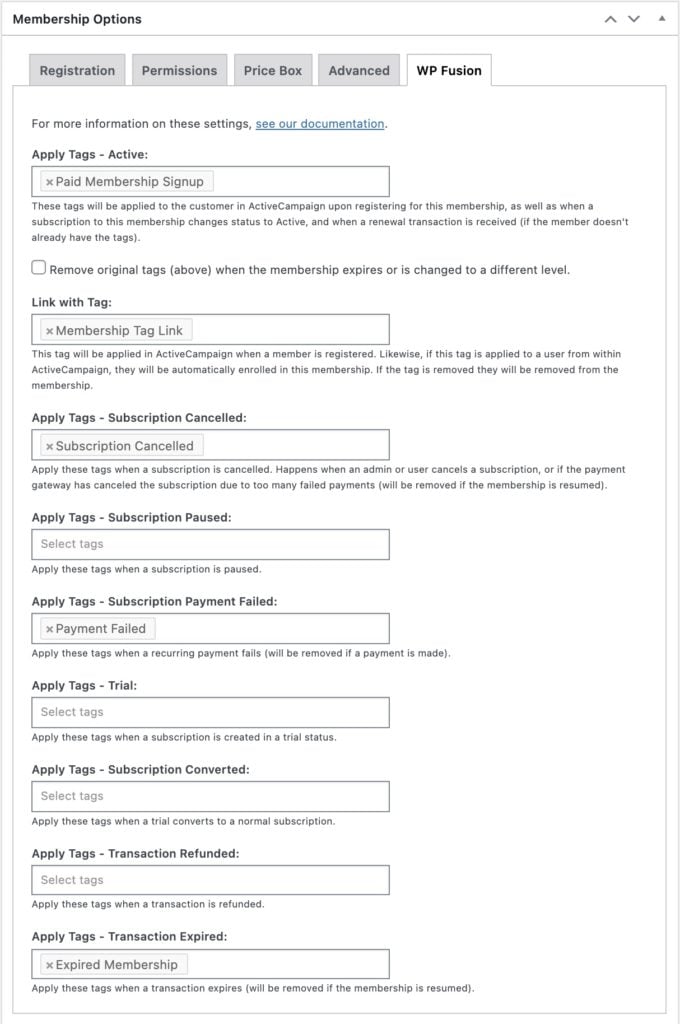
There are quite a few settings here (twelve in total):
Apply Tags: When the customer purchases a membership, these tags will be applied in your CRM. These tags will also be re-applied when an expired membership becomes active again, or if a renewal payment is received and the user no longer has the tags.
Remove Tags: When this setting is checked, the tags applied at registration will be removed when a membership expires or is changed to a different level. The tags applied at registration will be re-applied if the membership is resumed.
Link With Tag: See below
Apply Tags – Subscription Cancelled: These tags will be applied immediately when a subscription is cancelled by an admin or a user (even if there is time left in the subscription). They will be removed if the membership is resumed.
Apply Tags – Subscription Paused: These tags will be applied when a subscription is paused. They will be removed when the subscription is reactivated.
Apply Tags – Upgraded: These tags will be applied when a member upgrades to this membership level.
Apply Tags – Downgraded: These tags will be applied when a member downgrades to this membership level.
Apply Tags – Subscription Payment Failed: These tags will be applied when a payment fails as part of a recurring transaction. They will be removed if a successful payment is made later.
Apply Tags – Trial: These tags will be applied when someone signs up for a subscription with a trial period.
Apply Tags – Subscription Converted: These tags will be applied when a trial converts to a full subscription (i.e. when a transaction is recorded on the subscription after the trial has ended).
Apply Tags – Transaction Refunded: These tags will be applied when a transaction is refunded.
Apply Tags – Transaction Expired: These tags will be applied when a transaction expires, including when a cancelled subscription reaches the end of its billing cycle. They will be removed if the membership is resumed.
#Link with Tag / Membership Auto-enrollment
Most sites won』t require this, but it is available as an option for those that need it. This setting allows you to select a tag that becomes linked with the membership level.
If this tag is applied to a user they will be automatically enrolled in the membership. Likewise if this tag is removed, they will be removed from the membership.
This lets you automate individual users』 membership levels using sequences in your CRM in conjunction with webhooks / HTTP Posts.
When WP Fusion detects that the linked tag has been applied, a free transaction will be created in MemberPress in order to grant access to the membership. When the linked tag is removed the original transaction will be deleted.
#A note on membership level changes
With most of WP Fusion』s membership plugin integrations (like Paid Memberships Pro or WooCommerce Memberships), WP Fusion watches for a membership level change for a user, and applies the specified tags at that time.
MemberPress is a bit different in that by default, it supports multiple memberships. That means that a user isn』t 「at」 one membership level. Instead, when they try to access something, MemberPress looks at their history of transactions and subscriptions and determines in real time whether the member has the necessary permissions.
This gives you a lot more flexibility than a 「traditional」 membership plugin, but it can make WP Fusion hard to work with because tag changes aren』t necessary tied to membership level changes.
As an example, let』s say a member is a Premium Member, and their access expires so they revert to a Free Member. In this case, the Apply Tags – Transaction Expired tags will be applied for the Premium Member level, but no tags from the Free Member level will be applied.
That』s because the customer didn』t actually make a purchase, register, or start a new subscription on the Free Member membership— it』s just the level they have when no other level is taking priority.
With that in mind, it』s helpful to understand exactly when WP Fusion can apply tags and sync member data:
When a member signs up for a new account at a membership level
When a subscription status changes (to/from active, cancelled, and suspended)
When a recurring transaction fails
When a transaction expires (usually when a subscription isn』t renewed and the access period ends)
When a transaction is made to upgrade a subscription
When a transaction is made to downgrade a subscription
#Corporate Accounts
WP Fusion also supports the Corporate Accounts addon for MemberPress. When this addon is detected a new setting will appear at the bottom of the WP Fusion settings when editing any membership level.
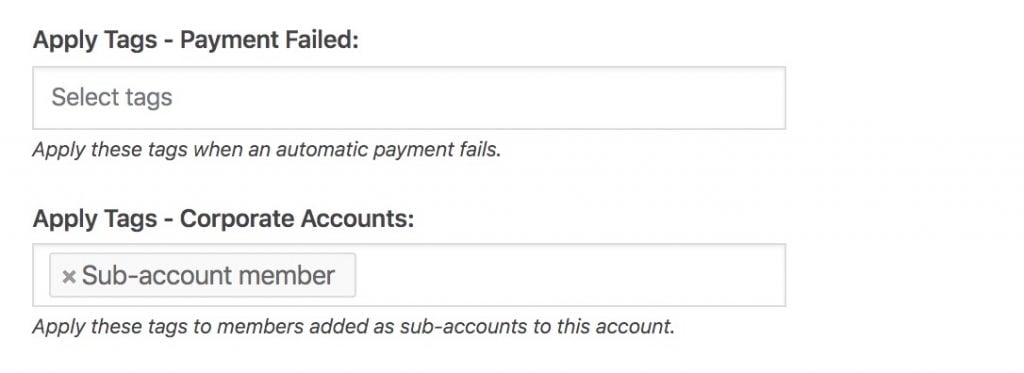
Here you can specify tags to be applied to members who are added as sub-accounts to the corporate account.
#Coupons
WP Fusion also allows to to apply tags to the new contact when a specific coupon is used at checkout.
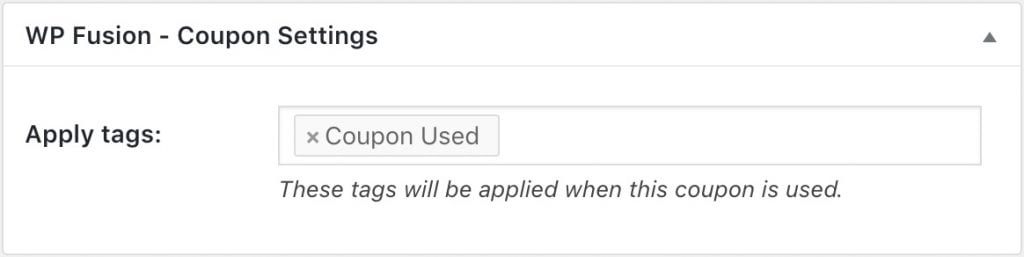
You』ll see the new settings box when editing any MemberPress coupon.
#Additional MemberPress fields
With MemberPress installed, you』ll see additional fields under the MemberPress section in the Contact Fields list in the WP Fusion settings.
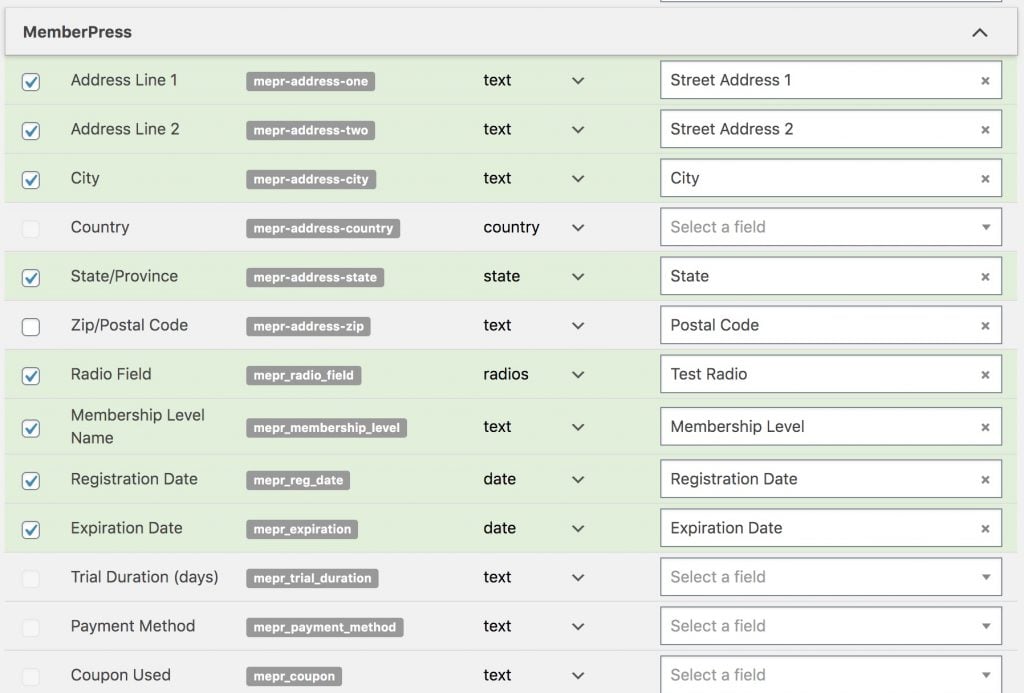
Here you will see all of the standard MemberPress registration fields, as well as any custom registration fields or profile fields. Each field can be synced to your CRM by selecting a corresponding custom field in the dropdown in the right column.
In addition to the standard fields, WP Fusion can sync several pseudo-fields relevant to a member』s membership level. Those are:
Membership Level Name: The name of the current membership level (if users have multiple memberships this will be the name of the most recent membership).
Registration Date: The date of the member』s most recent subscription or transaction.
Expiration Date: If the member』s membership expires, the expiration date will be synced at registration.
Trial Duration (days): If a subscription is purchased with a free trial, the number of days in the trial will be synced.
Payment Method: The name of the payment method used for the member』s most recent transaction.
Coupon Used: If the member signed up with a coupon, the name of the coupon will be synced.
By syncing this data to your CRM you can trigger email sequences to follow up with a member as their expiration date is approaching, or create rewards for members who have been with you for a long time.
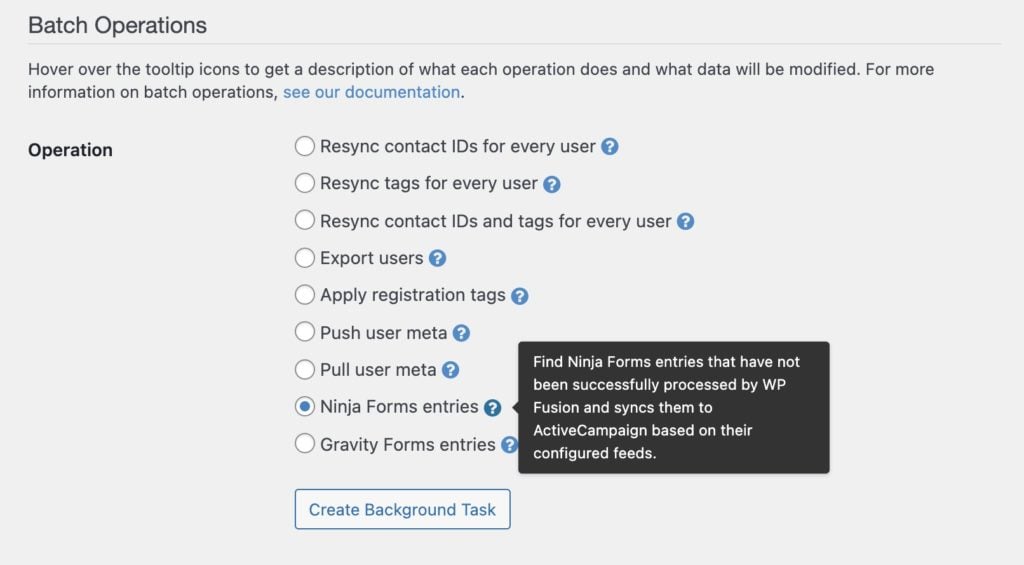
#Batch Operations
WP Fusion includes a few MemberPress-specific batch operations, these can be found on the Advanced tab in the WP Fusion settings.
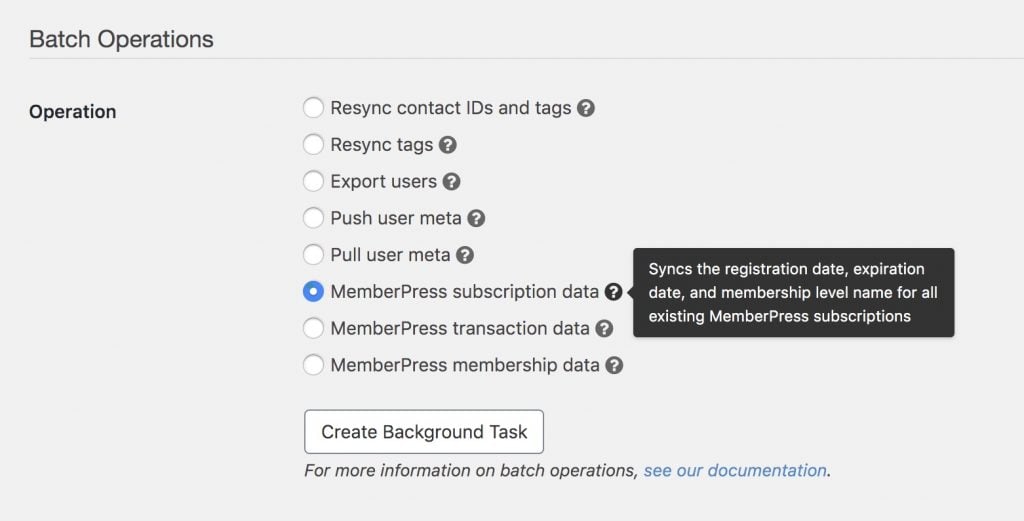
These are useful for syncing member data to your CRM from before you installed WP Fusion, or to retroactively tag all your members based on the current tag configuration.
The available options are:
MemberPress subscription data: Syncs the registration date, expiration date, and membership level name for all existing MemberPress subscriptions. Does not modify tags or create new contact records.
MemberPress transaction data: Syncs the registration date, expiration date, payment method, and membership level name for all existing MemberPress transactions. Does not modify tags or create new contact records.
MemberPress memberships statuses: Updates the tags for all members based on their current membership status. Does not create contact records.
#Was this helpful?
Let us know if you liked the post. That』s the only way we can improve.
Yes
No


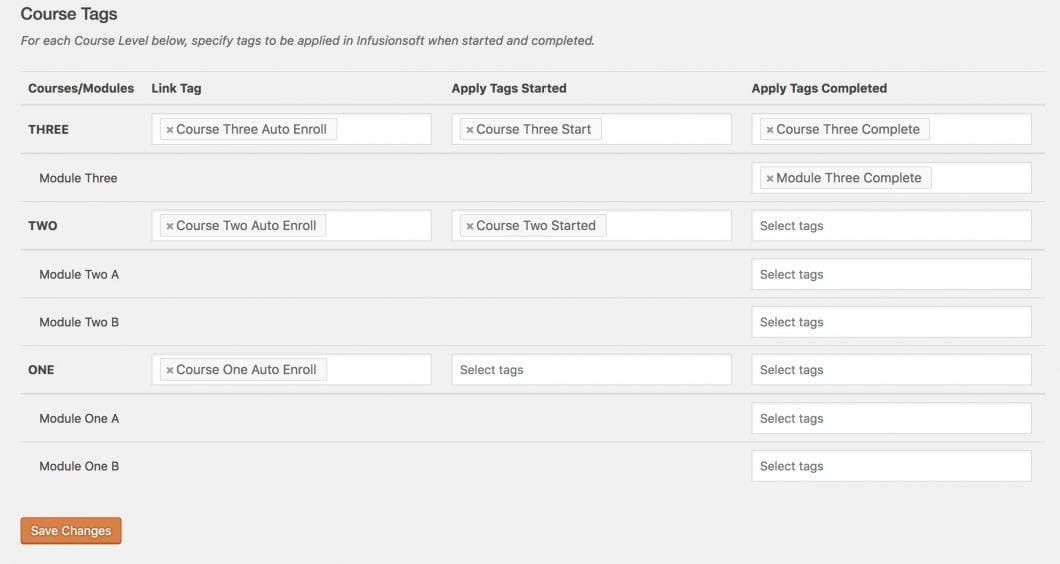 WP Fusion』s integration with WP Courseware, available as a settings page under the WP Courseware header in the WordPress admin menu