#Overview
WP Fusion includes a logging tool, which you can enable from the Advanced tab of the options page.
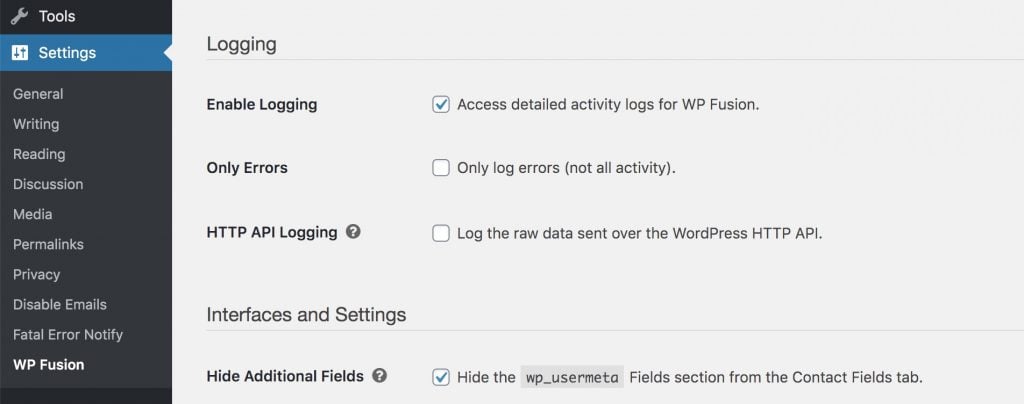
There are three options:
Enable Logging: This is the default level of logging for WP Fusion. It』s on by default but can be turned off.
Only Errors: With this checked, only error level messages (like API errors or timeouts) will be recorded to the logs.
HTTP API Logging: With most CRMs, WP Fusion utilizes the WordPress HTTP API for API calls. If this setting is available you can turn it on and log the raw API requests and responses from your CRM. Note that this will add a lot of extra data to your logs so it』s recommended to only turn this on temporarily for debugging purposes.
When the logs are enabled, you』ll see a new tab appear at the top of the WP Fusion settings page with a link to the activity logs.
The logs can also be accessed in the main WordPress admin menu under Tools » WP Fusion Logs.
#The logs
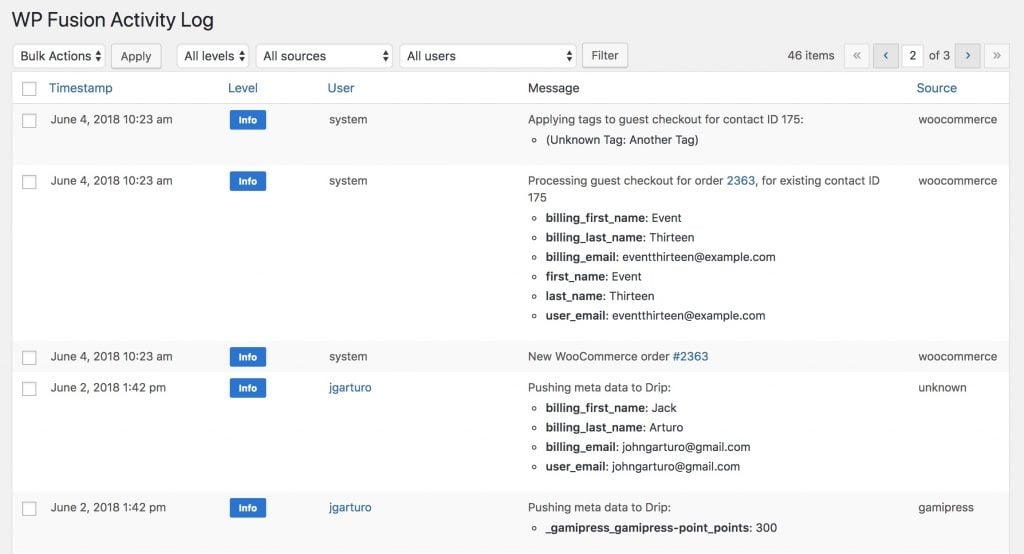
The activity log will record any API calls sent by WP Fusion, as well as any webhooks received and auto-enrollments that are triggered.
You can filter the log entries by severity level, source (plugin integration), and related user by using the dropdowns at the top.
You can adjust the number of entries displayed per page by opening the Screen Options panel at the top of the table.
#Field formatting
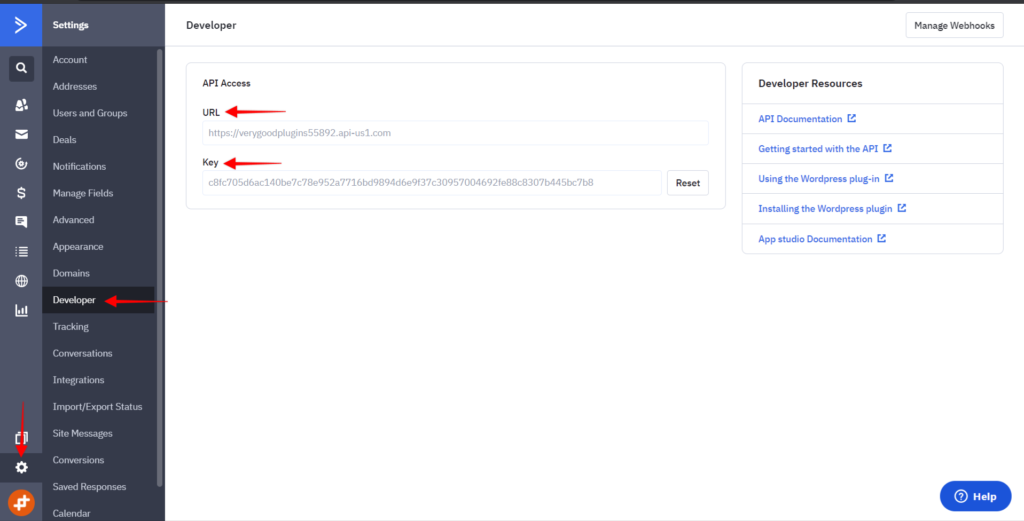
When setting up the field sync between WordPress and your CRM in the Contact Fields settings, WP Fusion gives you the option to select a field type for each field.
If a special field type is selected, then the data for that field will pass through a filter before being sent to your connected CRM.
For example many CRMs have require special treatment for date fields, they require the fields to be in a timestamp, and so when a field type is set to 「date」, WP Fusion converts the value automatically for you.

In cases where a field value has been modified, the logs will show both the input data and the data that was sent to your CRM.
This can be useful in troubleshooting issues with specific fields not syncing correctly.
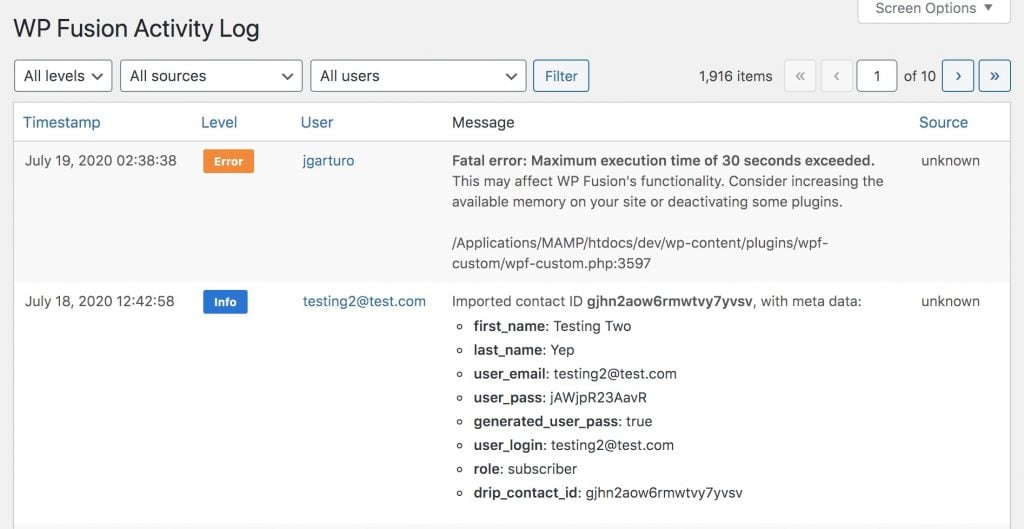
#Errors
The logs will also record any API errors encountered. These will vary depending on your connected CRM, but can be caused by several things— like trying to apply a tag that』s been deleted, API quotas exceeded, or malformed data.

If you encounter an error in the logs that you don』t understand, please contact our support team so we can resolve the issue for you.
#Error notifications
You may want to receive notifications when WP Fusion has an API error. If so, check out our other plugin, Fatal Error Notify.
It can automatically send you an email or ping you on Slack when WP Fusion has an API error.
 The Fatal Error Notify plugin can ping you on Slack when WP Fusion encounters an API error
The notification will include the error message, the affected user, and the page the user was on.
#HTTP API logging
With HTTP API Logging enabled, WP Fusion will log the raw requests and responses to your CRM over the WordPress HTTP API. This can be used to troubleshoot more complex issues that aren』t captured at the normal level of logging.
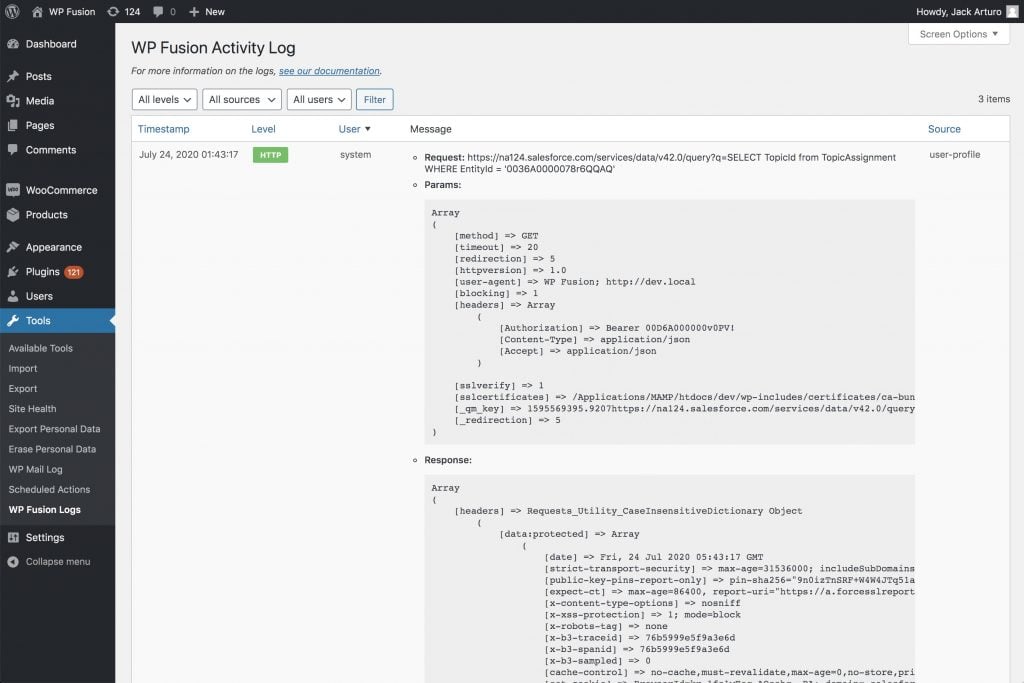 HTTP API logging records the raw HTTP requests and responses from your CRM.
Every API call sent to your CRM will be recorded, and each entry will contain the request URL, the request parameters, and the raw response.
#Common Errors
These are some common errors, with steps to resolve them:
#Notice: Webhook received but no matching user found
When you』re using a webhook with the method ?wpf_action=update or ?wpf_action=update_tags, WP Fusion will only load data from your CRM if there is already a user on your site with a matching contact ID. If there is no user with a matching contact ID, the webhook will be ignored.
This is intended for cases where you have contacts in your CRM that don』t need to have an account in WordPress, and is generally safe to ignore.
However if you need every contact in your CRM to have a user account, you can change your webhook to ?wpf_action=add, which will both update existing users and create new users if they don』t already exist.
#Notice: No contact ID for user, failed to apply tags
This message is triggered when a plugin integration attempts to apply a tag (for example due to a checkout, page view, or membership level change), but WP Fusion was unable to find a contact ID in your CRM for the user.
This could happen because you』ve deleted or merged contacts in your CRM, and so the contact ID that was previously associated with the user has changed. If that』s the case, run a Resync Contact IDs and Tags operation from the Advanced tab in the WP Fusion settings to refresh the cache of contact IDs.
It could also happen if a user wasn』t synced properly to your CRM at registration— either due to an API error, or that user』s role being excluded from sync. In that case you can run an Export Users batch operation.
It』s also perfectly fine to ignore this notice if the user in question doesn』t need to be tagged in your CRM.
#Notice: Unable to determine tag ID from tag name
This notice can be logged when you』re applying a tag via AJAX, either via link click tracking, or the Media Tools addon.
In order to send the API call to apply a tag in your CRM, WP Fusion needs to know the ID of the tag to be applied.
WP Fusion will attempt to take the tag name you』ve entered and convert it to a tag ID, but if it can』t find a matching tag ID then this message will be logged and the tag won』t be applied.
If you』re sure the tag name you』ve entered matches exactly the tag name in your CRM, try clicking Resynchronize Available Tags & Fields from the Setup tab in the WP Fusion settings to refresh the cache of available tags.
#Error: Resource not found / contact not found / 404
For performance reasons WP Fusion keeps a cache of the CRM contact ID for every user on your site.
When WP Fusion goes to update a contact record or apply tags over the API, it uses this cached contact ID rather than having to look up the contact record again by email address.
However, if you have deleted, merged, or de-duplicated contact records in your CRM, the cached contact ID may no longer be valid, and API calls to update contacts or apply tags might return a Resource not found error.
The best way to fix this is to run a Resync Contact IDs operation from the Advanced tab in the WP Fusion settings. This will re-lookup every WordPress user on your site by email address in your CRM and refresh the local cache of contact IDs.
#Error: cURL error 28 — Operation timed out
Most API calls WP Fusion sends to your CRM should complete within 0.5 to 2 seconds.
However there are situations where your CRM』s API may be offline, in which case WP Fusion includes a built in timeout to avoid breaking the visitor experience on your site. This timeout is set to between 10 and 30 seconds depending on your connected CRM.
If this timeout is reached WP Fusion will give up on waiting for a response from your CRM, a cURL error 28 error will be logged, and the page will continue to load normally.
When your CRMs API comes back online you may want to run one or more batch operations to correct for any data that wasn』t synced or tags that weren』t applied during the outage.
If the problem is happening consistently, you could consider using a code snippet to extend the HTTP API timeout for your site. We have an example here.
#System Errors
To aid in troubleshooting, the activity logs will also record two types of system errors. While these don』t necessarily come from WP Fusion, they can affect the stability of your website as whole.
Those error types are:
#Out of memory errors
An 「Allowed memory size exceeded」 error occurs when your site runs out of available memory and stops processing a page load. This can be caused by underpowered hosting, or having too many plugins active.
If an out of memory error happens before WP Fusion has sent data to your CRM, this would prevent any data from being synced. Read some info on fixing this error at WPBeginner.
#Maximum execution time exceeded errors
Most websites will process a single page load for 30 seconds before timing out, and triggering a 「Maximum execution time exceeded」 error.
As an example, let』s say you have several WooCommerce extensions active, and a single checkout does the following:
Creates a new WordPress user
Sends the order invoice data to Xero
Sends the order shipping information to ShipStation
Generates a PDF invoice
Syncs the customer data to ActiveCampaign (via WP Fusion)
Each of these steps takes a few seconds to process. If your site reaches the 30 second timeout limit while it』s still generating the PDF invoice, then this would prevent WP Fusion from sending any data to your CRM.
Preventing these errors involves either increasing your server resources (so each step processes faster), deactivating some plugins (so there are fewer steps to process), or increasing your server』s max_execution_time variable.
For more info on this error see this guide from WPBeginner.
#Logs performance and misc.
The activity logs are stored in their own database table, {$wpdb->prefix}wpf_logging, so they generally shouldn』t have any performance affect on the rest of your site. In addition the table is limited to 10,000 entries, after which the oldest entries will be automatically begin to be dropped.
You can flush the logs database at any time by clicking the Flush Logs button at the bottom of the logs screen.
#Errors displaying the logs
There are some cases where your site doesn』t have enough resources to actually display the logs table, if there are a lot of entries. You might see an error like this:

Increasing your available memory will generally fix it, but you can also force clear the logs by appending &flush-logs=true to the URL in your browser, and hitting enter.
#Logs max entries
If the number of log entries is a recurring problem, you can also limit the total number of log entries using the wpf_log_max_entries filter. For example:
add_filter( 'wpf_log_max_entries', function( $max ) {
return 5000;
} );
That code would limit the maximum number of entries to 5,000 instead of the default 10,000.
#Was this helpful?
Let us know if you liked the post. That』s the only way we can improve.
Yes
No

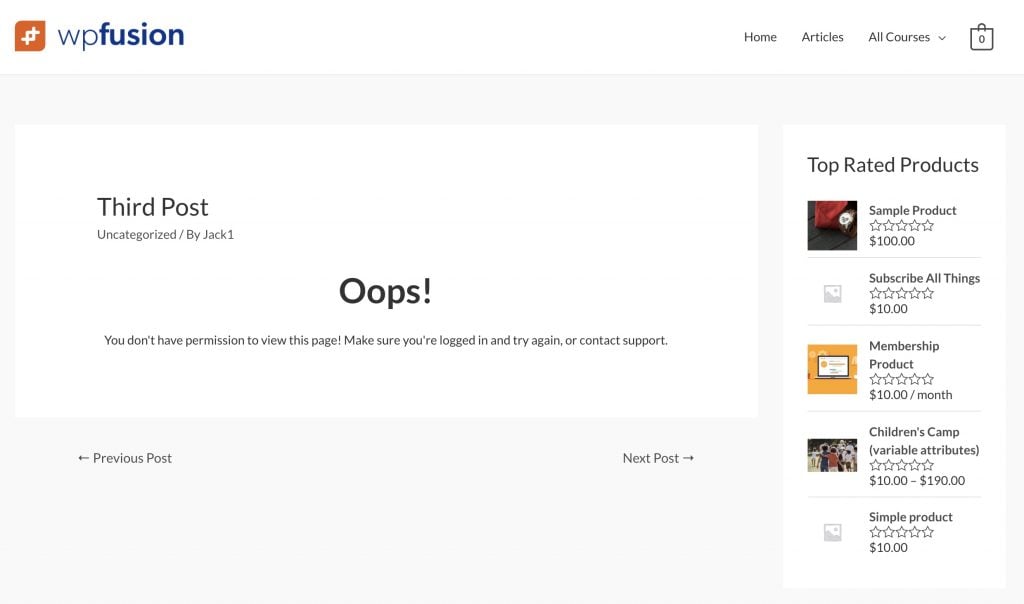 The restricted content message on a blog post.
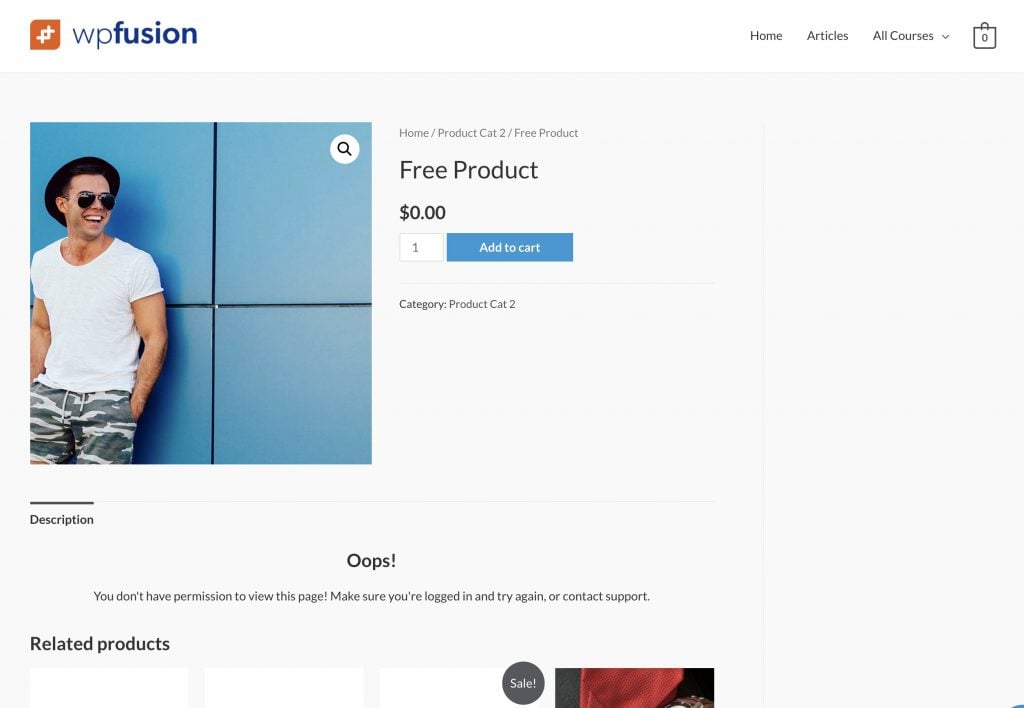 The Restricted Content Message isn』t as effective on a product page since the content area is only a small part of the layout.