Restricting Access to Content#Overview
WP Fusion adds several methods for restricting access to content based on a user』s tags (or 「lists」 or 「segments」) in your connected CRM.
These features can be used to create members-only content, drip-feed access to content, and create personalized listings of posts, pages, courses, and more.
#Meta Box
WP Fusion adds a meta box to every post, page, and other piece of content on your site, where you can control the visibility of that content and set up redirects if a user doesn』t have access.
You can also apply and remove tags when a page or post is viewed.

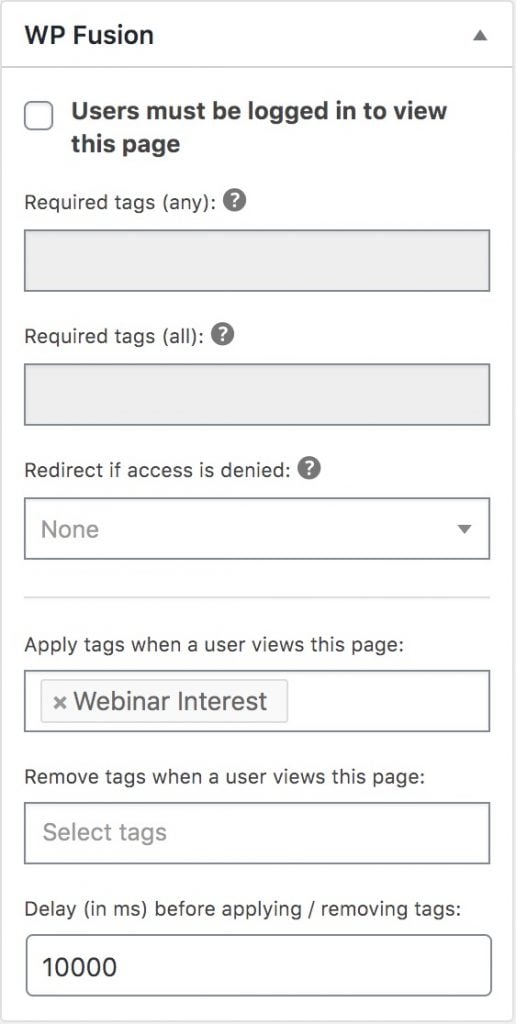
There are a few options in WP Fusion』s content restriction meta box:
Users must be logged in to view this page: Check this box to require a user to be logged in to view the content.
Required tags (any): Here you can specify tags that are required to view the content. If the user has at least one of the tags they』ll be able to access it.
Required tags (all): With this setting the user must have all of the tags in order to access the content. For example 「Active Membership」 and 「Gold Member」.
Required tags (not): With this setting, if the user is logged in and has any of the specified tags, they will be denied access.
Redirect if access is denied: Here you can specify a page on your site to redirect to if access is denied. Leave blank to show the restricted content message (see below).
Or enter a URL: Here you can specify an external URL to redirect the user to.
Apply tags when a user views this page: You can specify any number of tags to be applied when the content is viewed.
Remove tags when a user views this page: You can specify any number of tags to be removed when the content is viewed.
Delay: Here you can set a delay in ms before the tags are applied. For example enter 5000 for 5 seconds.
#Restricted Content Message
The restricted content message will be shown if a page is protected and no redirect is specified. You can edit this from the general WP Fusion settings page.

If you enable the setting for Per Post Messages you』ll be able to set a custom message for every restricted post. This setting will appear at the bottom of the post edit screen.
#Restricted Content Message vs Redirect
When protecting a piece of content with WP Fusion you can either set a redirect if access is denied, or leave the redirect blank to show a restricted content message.
This works by replacing the 「content」 area of the page, which works well with normal posts and pages that have a single content area.
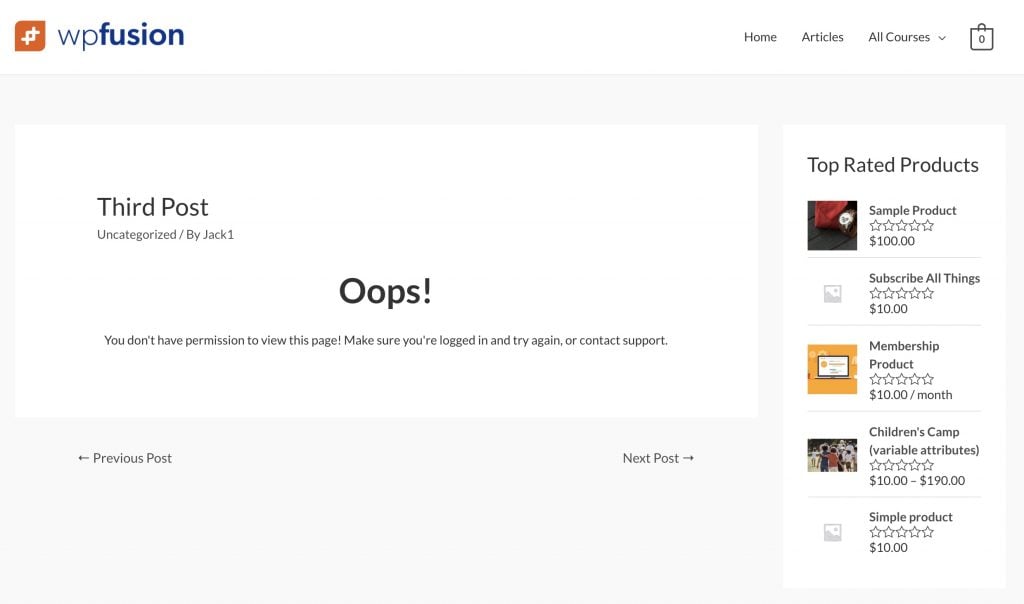 The restricted content message on a blog post.
It does not work as well on pages that have multiple content areas or customized templates, for example a product or course page.
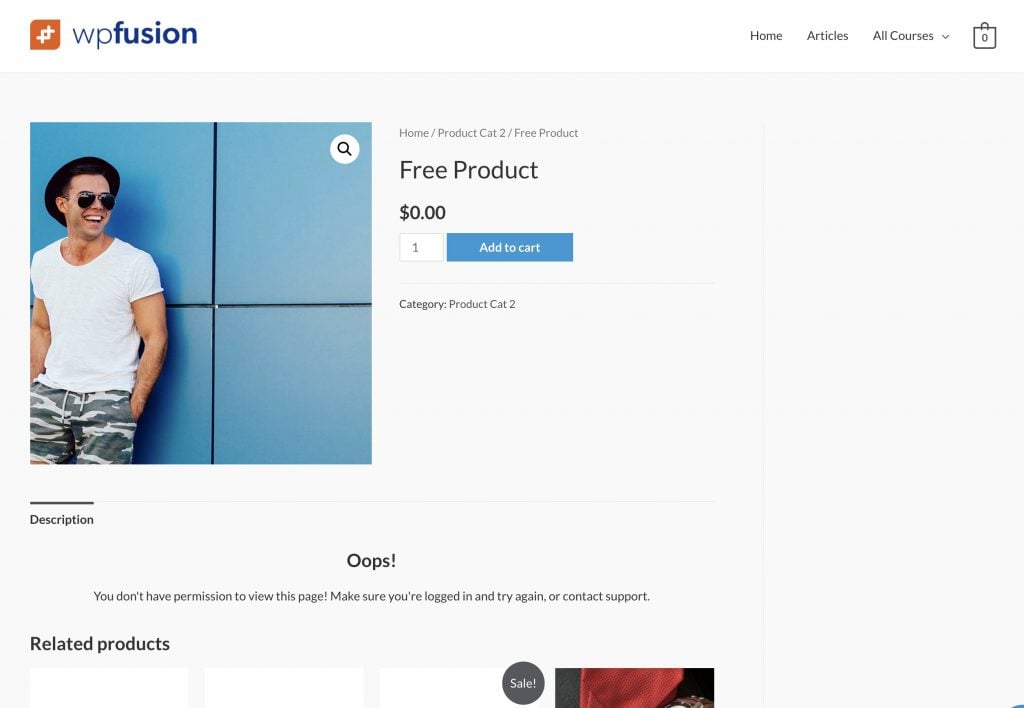 The Restricted Content Message isn』t as effective on a product page since the content area is only a small part of the layout.
In cases like that it』s preferable to set a redirect when access is denied.
#Filter Queries
On the General tab of the WP Fusion settings is an option to Filter Queries. When this is enabled WP Fusion will modify any database queries so that posts a user doesn』t have access to are removed from the results.
This can be used to create post grids or course listings of only items a user has access to. It works with all plugins and theme builders.
There are three options:
Off: No filtering (default).
Standard: Restricted posts will be removed from the query results after the query is run.
Advanced: Restricted posts will be excluded from query results before a query is run. This method is slower but works better when using pagination and limits on the number of results.
Generally Standard mode is sufficient. You would only want to use Advanced mode if your restricted items are split across multiple pages (with pagination), or if you』re doing filtering on the items.
For example hiding lessons a user doesn』t have access to in the LearnDash course navigation would work great with Standard mode, but hiding restricted items in the WooCommerce shop catalog or in FacetWP search results would work best with Advanced mode.
Note: Filter Queries is slow. If you have a lot of posts on your site and you haven』t enabled the Filter Queries Post Types setting, it can easily add several seconds to each page load, or even crash your site.
Filter Queries should be used minimally and only when no other method of protecting content will work.
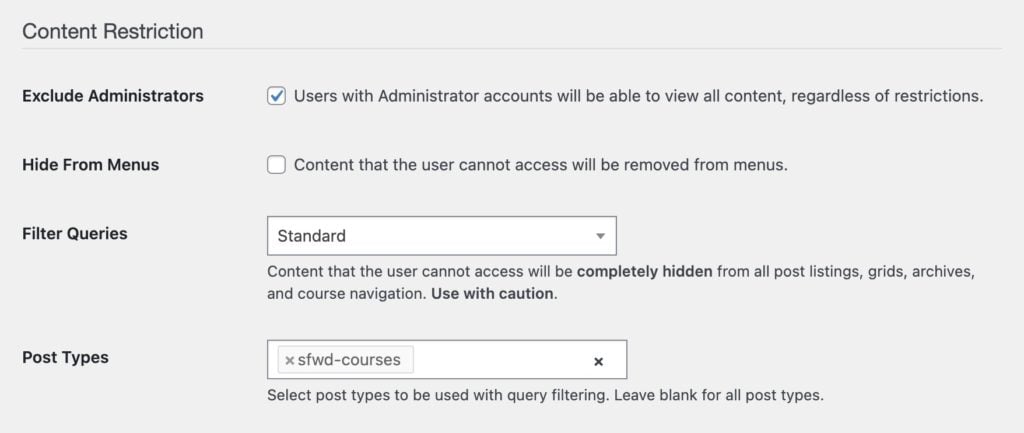
#Filter Queries Post Types
For best performance, it』s recommended to select the post types you want to use query filtering on from the Post Types dropdown.
If this is left blank then query filtering will be run on every piece of content on your site, which may negatively affect performance.
#Filter Queries Arguments
When using Filter Queries in 「Advanced」 mode, by default it will process at most 200 posts in a single query. This is to protect the stability of your site, since each post requires several database queries to calculate the access rules for the current user.
If more than 200 posts are found with WP Fusion access rules, a notice will be logged to the activity logs.
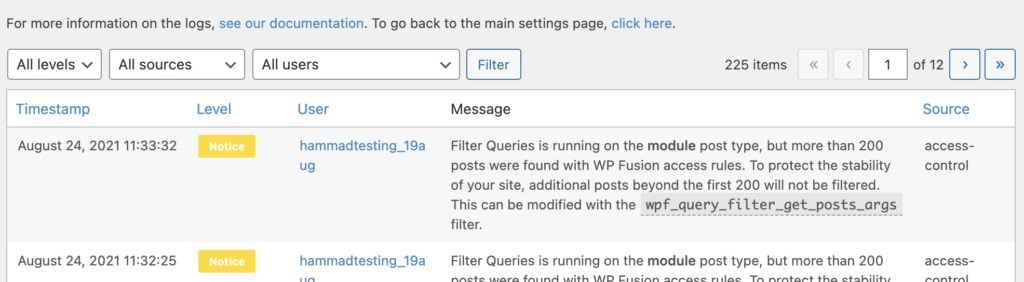 WP Fusion will log a notice if you attempt to process more than 200 posts at a time with Filter Queries in Advanced mode.
Any posts beyond the first 200 will be ignored by Filter Queries, which may result in content being displayed that should be hidden.
You can override this limit using the wpf_query_filter_get_posts_args filter.
However, the higher the limit, the longer the page will take to load, due to the increased number of database queries. This may also result in out of memory errors or timeout errors depending on the available resources of your server.
#Apply Settings in Bulk
You can also apply settings in bulk by selecting multiple posts, pages, or custom post types from the list table in the admin.
Select the items you want to edit, and choose 「Edit」, from the Bulk Actions menu.
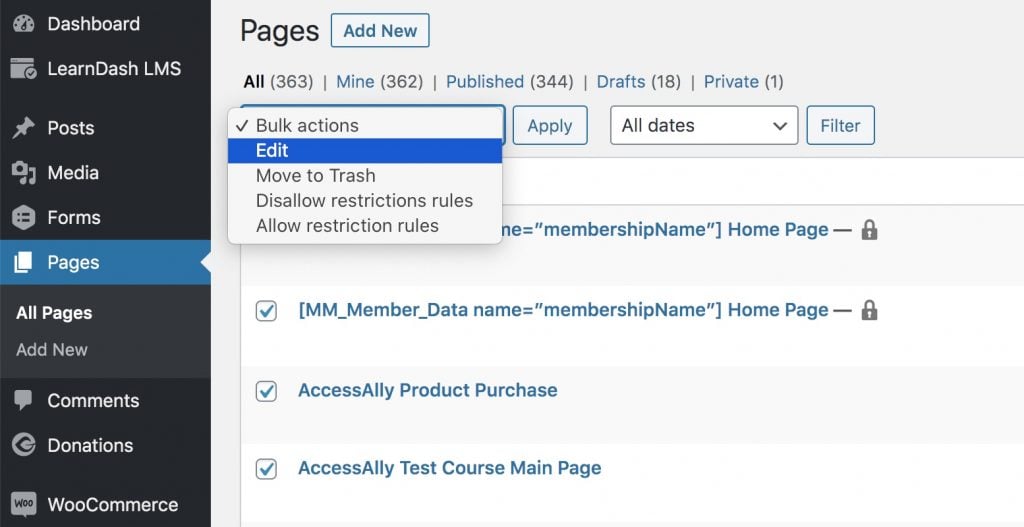 Access the bulk edit panel from the Bulk Actions dropdown
Inside the panel will be a section where you can bulk-configure the WP Fusion settings for the selected posts.
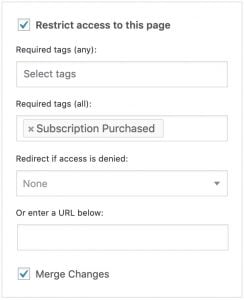
If you check the box for Merge Changes, your new settings will be merged into the existing settings for each post.
If Merge Changes is unchecked, each post』s content restriction settings will be overwritten by the settings specified in the bulk edit tool.
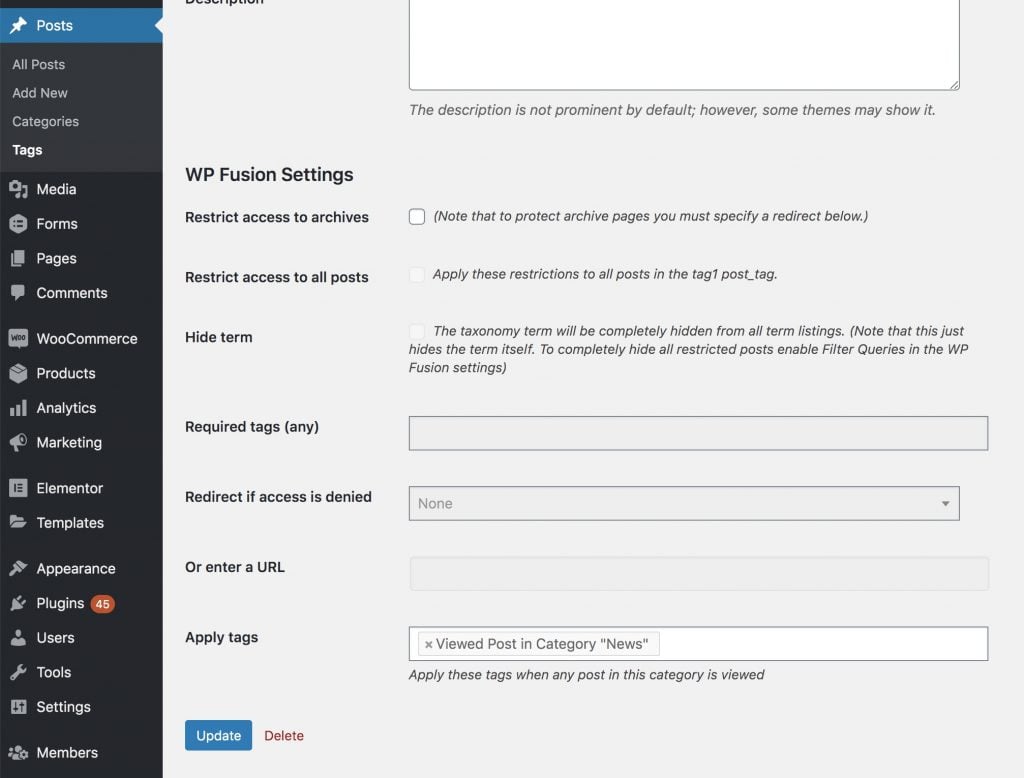
#Restricting Access to Archives and Categories
You may wish to restrict access to a category or taxonomy archive page. Click 「Edit」 next to the category or taxonomy term and scroll down to the WP Fusion – Access Settings section.
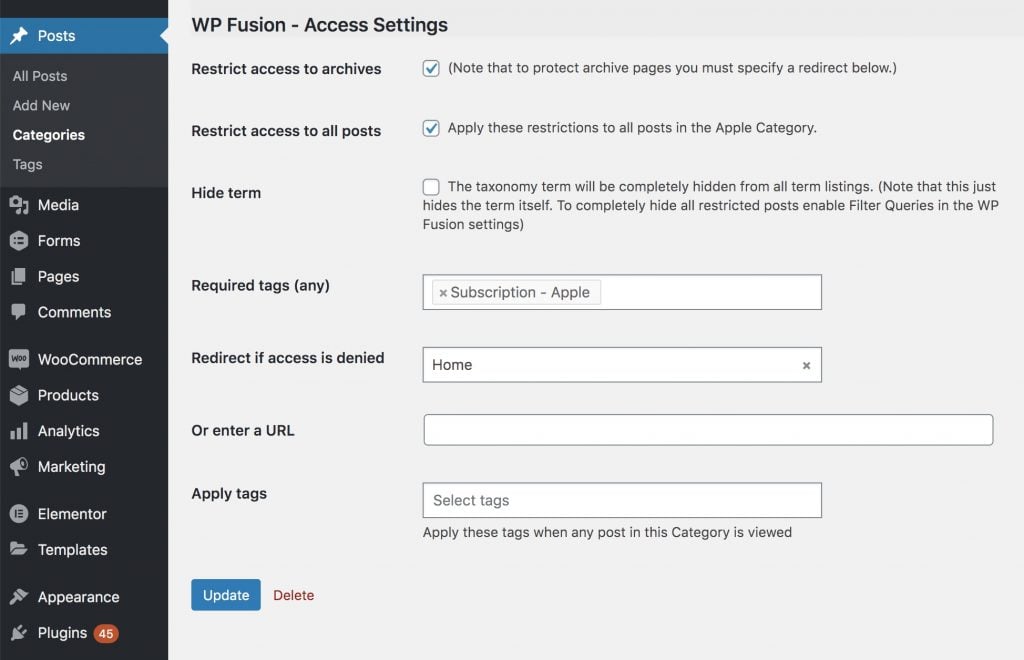
You can enable Restrict access to archives and select a required tag to protect the archive page for that post type.The access restrictions work the same way they do for pages. Keep in mind that this won』t restrict all content that has the category, tag, or term specified— it will just restrict access to the archive pages for that content.
If you want to restrict access to all content that has the given category or term, check the box next to Restrict access to all. These restrictions will take priority over an individual post』s access rules.
If you want to completely hide the taxonomy term when a user doesn』t have access, check the box for Hide term. This will remove the category / term from all term listings, index pages, search results, and navigation.
#Testing content protection
There are a few ways to review and test your content protection with WP Fusion.
#Review in the admin
When viewing any table of posts, pages, courses, or other content in the admin, you』ll see a lock icon indicating that an item is protected by WP Fusion.
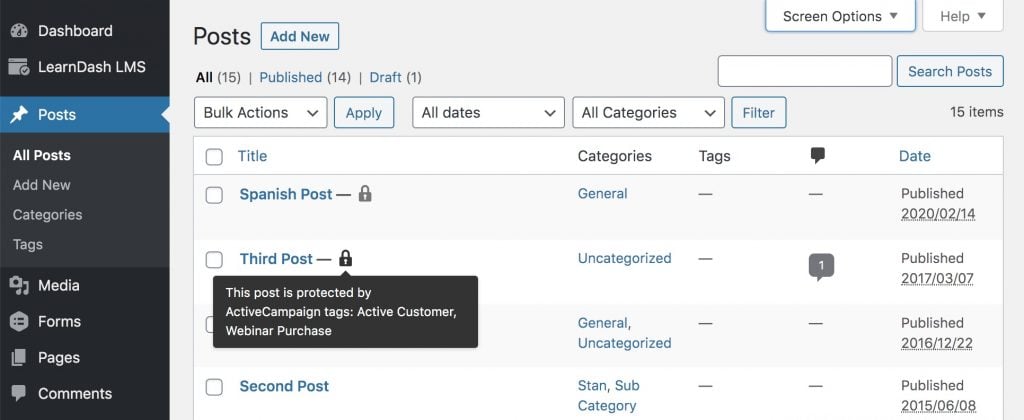
You can hover over the lock icon to display a tooltip showing the access rules for that piece of content.
#Preview with tag
The simplest method for testing access rules is to use the Preview With Tag feature in the admin toolbar.
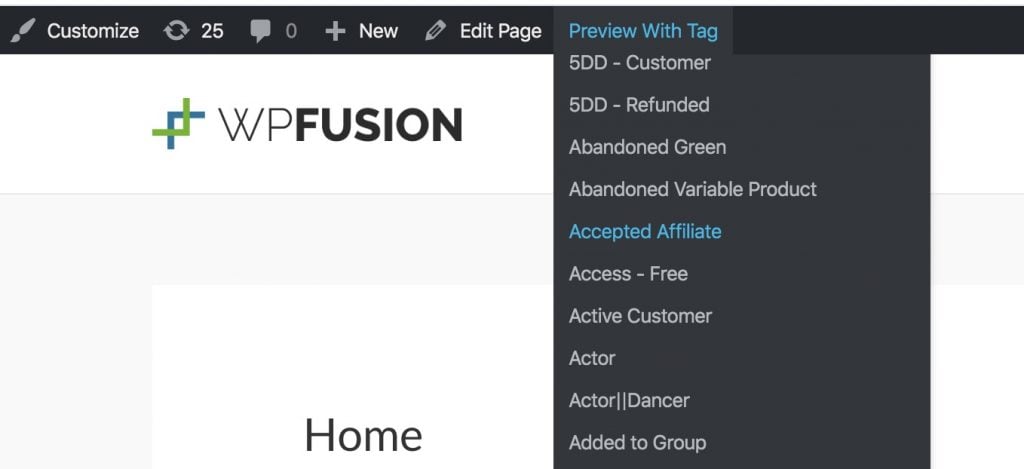
This will let you preview any page on your site as if your user currently had the selected tag. You can also select Lock All or Unlock All from the menu for additional preview options.
#Testing as a user
The most reliable way to test your site experience is to use an actual user account.
By default your admin user account is excluded from WP Fusion』s content protection rules, but you can disable this by un-checking the box for Exclude Administrators in the WP Fusion settings. Or you can use a test (non administrator) use account.
When testing with a user account, you can see and modify the user』s tags via their admin user profile.
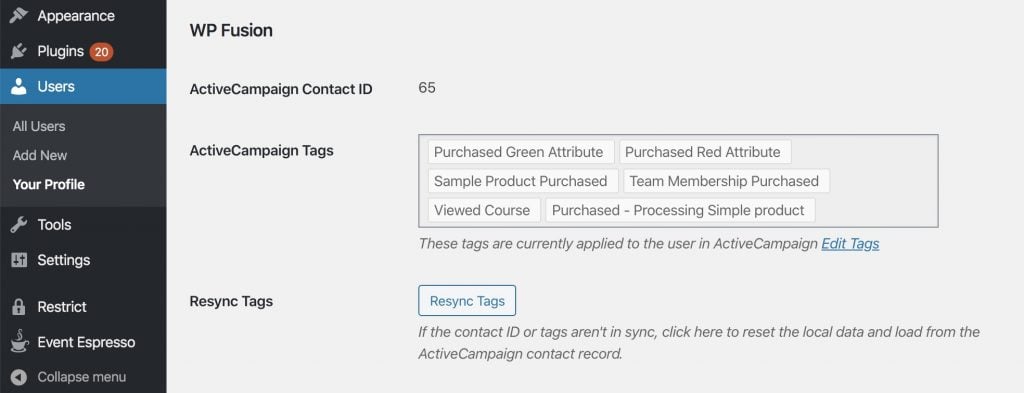
If you』ve just applied a new tag in your CRM, you may need to click Resync Tags to load the updated data into WordPress. To automate this process consider setting up a webhook.
#Was this helpful?
Let us know if you liked the post. That』s the only way we can improve.
Yes
No