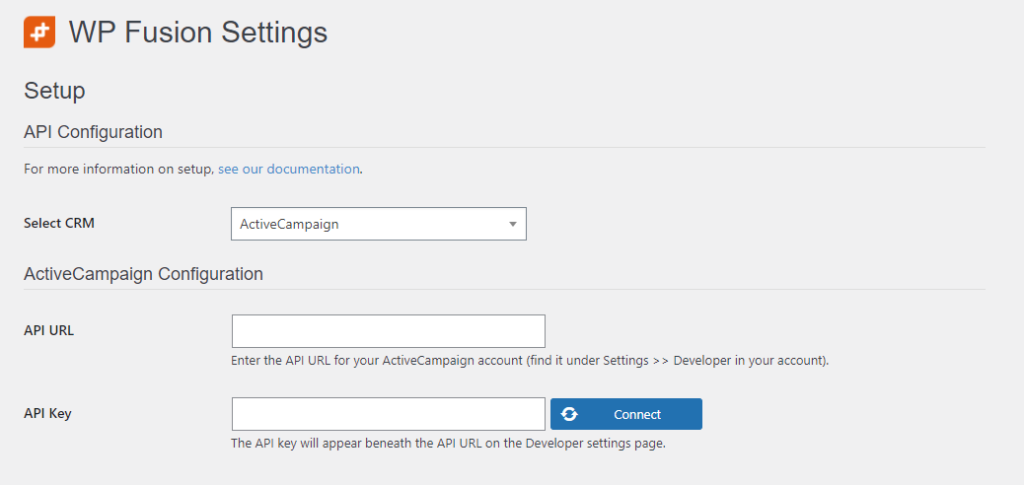
General Settings and Basic Setup#WP Fusion Settings
Once you』ve connected WP Fusion to your CRM, the settings page will reload and you』ll see the rest of WP Fusion』s settings.
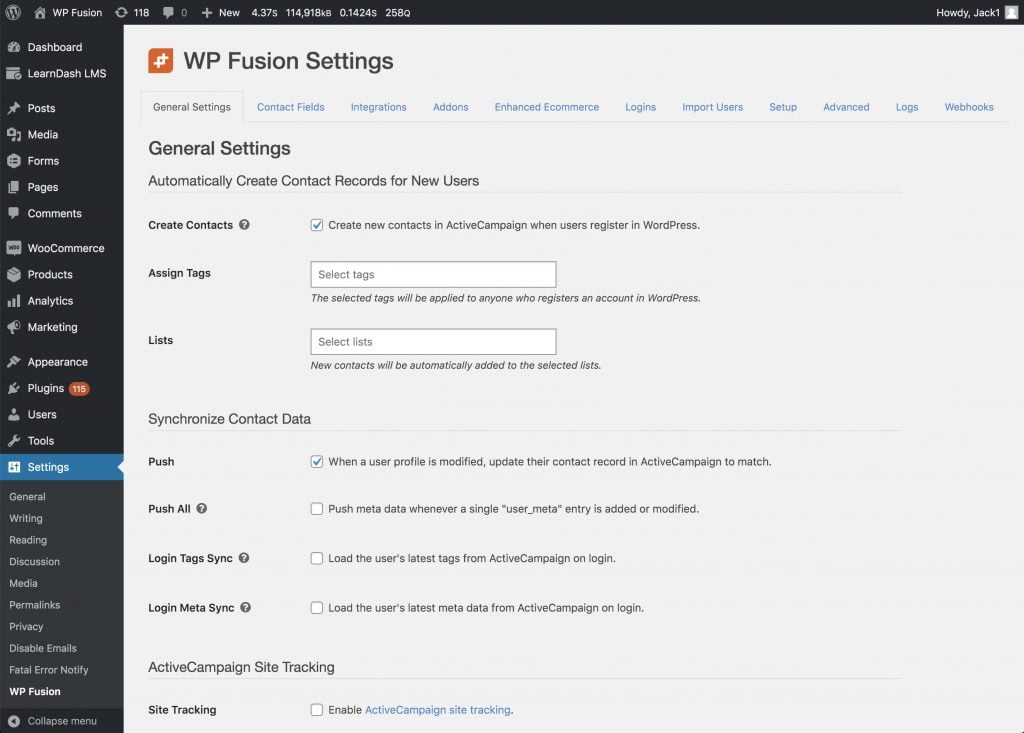
Across the top of the page are several tabs corresponding to different aspects of WP Fusion』s functionality. You may see additional tabs depending on which plugins you have installed or which addons you have enabled.
Note: As part of the setup process, WP Fusion sets default settings based on the plugins you have installed and your connected CRM. In many cases it』s not necessary to modify these default settings at all, and in some cases modifying them may lead to unexpected behavior.
#General Settings
The General settings tab lets you configure some global defaults as to when WP Fusion syncs data with your CRM, as well as some content restriction defaults.
#Automatically create contact records for new users
The settings in this section control how WP Fusion handles new users on your site. The default is to sync all new user registrations to your CRM.
The options are:
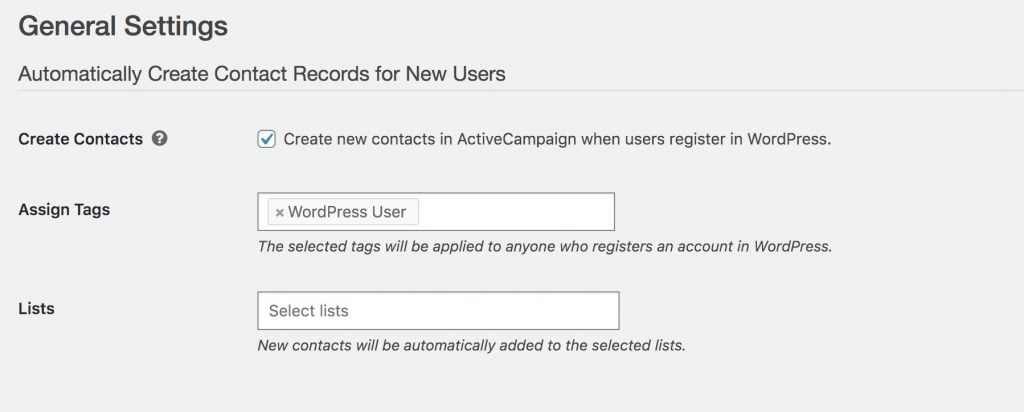
#Create Contacts
When this box is checked, new user registrations will be synced to your CRM as contact records. It is strongly recommended to leave this enabled. If it』s disabled, only profile updates from existing users will be synced with your CRM. New users and customers will be ignored.
#Assign Tags
The tags specified here will be assigned whenever a new user registers and is added to your CRM.
#Lists, Layout, Owner, etc.
You may see additional options here depending on your connected CRM, like Lists, Default List, Default Contact Owner, or Contact Layout. Any settings you specify here will apply when WP Fusion adds a new contact record to your CRM.
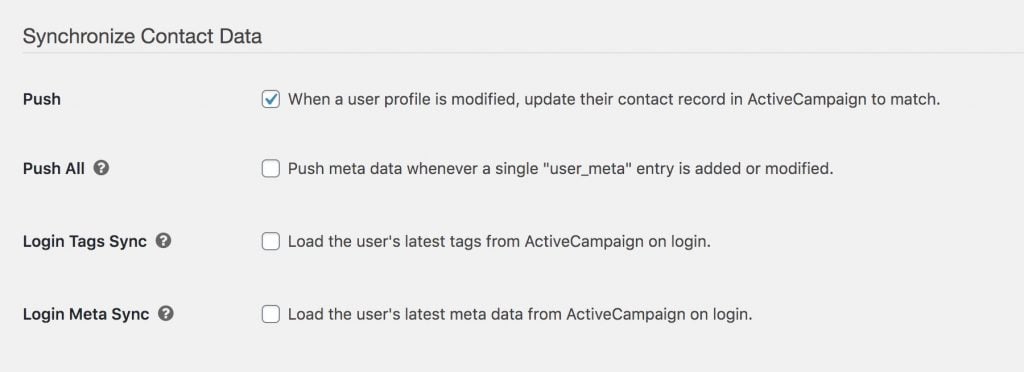
#Synchronize Contact Data
The settings in this section control how WP Fusion sends data to and loads data from your CRM.
The options are:
#Push
When this box is checked, WP Fusion will watch for user profile updates and sync any enabled fields to the corresponding fields in your CRM, via the field mapping you』ve set on the Contact Fields settings tab.
#Push All
Turning on this setting causes WP Fusion to watch the wp_usermeta database table for any changes to user meta, and sync those as the fields are changed in the database.
It』s generally not necessary to turn this on unless you』re trying to sync data from a plugin not already supported by WP Fusion. Turning on Push All may result in unexpected behavior with how fields are formatted, since values stored in the database aren』t always the same as the values entered on profile forms.
#Login Tags Sync
With this setting on WP Fusion will load a user』s updated tags from your CRM when they log in to your site.
It』s recommended to leave this off, as it will slow down your login process by a few seconds. However if your CRM doesn』t support webhooks, you can use this setting to keep the cache of tags updated each time someone logs in.
#Login Meta Sync
With this setting on WP Fusion will load a user』s updated metadata from your CRM when they log in to your site.
It』s recommended to leave this off, as it will slow down your login process by a few seconds. However if your CRM doesn』t support webhooks, you can use this setting to ensure that your users』 metadata is kept up to date with the corresponding contact record in your CRM.
#Site Tracking
If WP Fusion includes site tracking scripts for your CRM, you』ll see an option to enable them here. This is off by default.
#Content Restriction
The settings in this section establish some default behavior about how WP Fusion protects restricted content on your site. For more details on restricting access to content see the next section.

The options are:
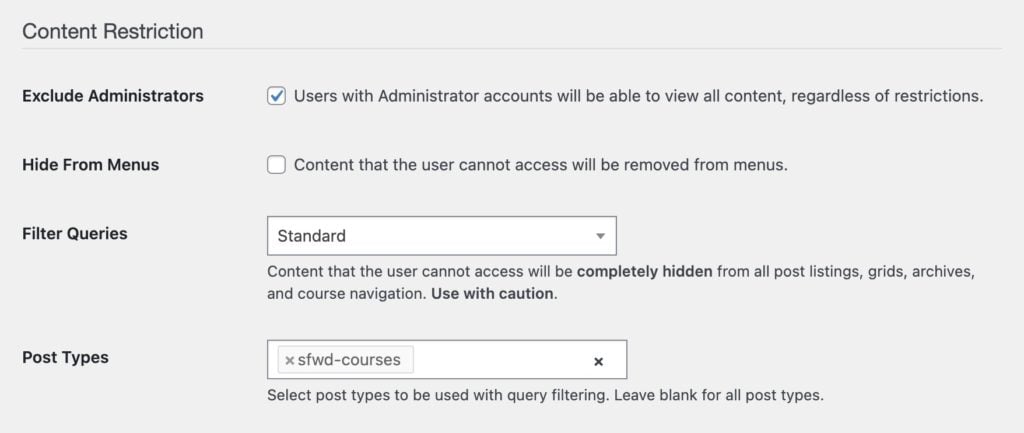
#Exclude Administrators
By default WP Fusion excludes site administrators from any content protection rules or redirects. You can un-check this box to have content protection rules apply to administrators as well.
#Hide From Menus
When this box is checked, WP Fusion will hide any menu items from your site navigation if the user doesn』t have permission to access the associated content, based on the settings configured in the WP Fusion meta box.
This can be used to make personalized menus— for example a list of courses that the user can currently access.
#Filter Queries
When this is enabled WP Fusion will modify any database queries so that posts a user doesn』t have access to are removed from the results.
This can be used to create post grids or course listings of only items a user has access to. It works with all plugins and theme builders.
There are three options:
Off: No filtering.
Standard: Restricted posts will be removed from the query results after the query is run.
Advanced: Restricted posts will be excluded from query results before a query is run. This method is slower but works better when using pagination and limits on the number of results.
Generally Standard mode is sufficient. You would only want to use Advanced mode if your restricted items are split across multiple pages (with pagination), or if you』re doing filtering on the items.
For example hiding lessons a user doesn』t have access to in the LearnDash course navigation would work great with Standard mode, but hiding restricted items in the WooCommerce shop catalog or in FacetWP search results would work best with Advanced mode.
#Filter Queries – Post Types
By default query filtering applies to all content on your site. Using this setting you can limit query filtering to just specific post types. This can improve the performance of the query filtering process.
#Default Not Logged-In Redirect
Here you can specify a URL to redirect users to when they are denied access to a piece of content on your site because they are not logged in (usually a login page).
If set, this takes priority over any redirect configured on an individual post in the WP Fusion access settings.
Normally the Default Not Logged-In Redirect would be used to redirect people to a login page if they』re denied access due to not being logged in, while allowing you to have a different redirect (for example to a sales page), if they are logged in but don』t have the required tags.
#Default Generic Redirect
Here you can specify a URL to redirect users to when they are denied access to a piece of content on your site. This will be used if the user does not have the required tags, or if the user is not logged in and there is Default Not Logged-In Redirect specified.
If a redirect is configured in the WP Fusion meta box on a specific post, it will take priority over the Default Generic Redirect.
If this setting is left blank, WP Fusion will attempt to replace the content of the post with the Default Restricted Content Message, but this does not work 100% of the time with custom post templates (such as WooCommerce products). See this page for more info.
Note that this should be a fully-formed URL, such as https://mysite.com/please-log-in/, not /please-log-in/.
#Return After Login
If a visitor to your site is denied access to a piece of content protected by WP Fusion, WP Fusion will set a cookie that records the page they tried to access.
If they log into the site within the next five minutes, WP Fusion will attempt to redirect them back to the content they were previously denied access to.
This setting is on by default.
#Return After Login Priority
Login redirects happen on a 「first come, first served」 basis. If another plugin does a login redirect, then WP Fusion』s Return After Login feature won』t run. This setting lets you adjust the priority at which WP Fusion』s login redirects run. A lower number means a higher priority.
For example WP Fusion』s Logins Addon runs its login redirects at priority 1, so if you wanted the Return After Login redirects to happen before the Logins Addon redirects, you could set the priority in this setting to 0.
#Default Restricted Content Message
Here you can set a message to be displayed to users and visitors when they don』t have permission to access a piece of content, and no redirect has been specified.
This works by replacing the 「content」 area of the page, which works well with normal posts and pages that have a single content area.
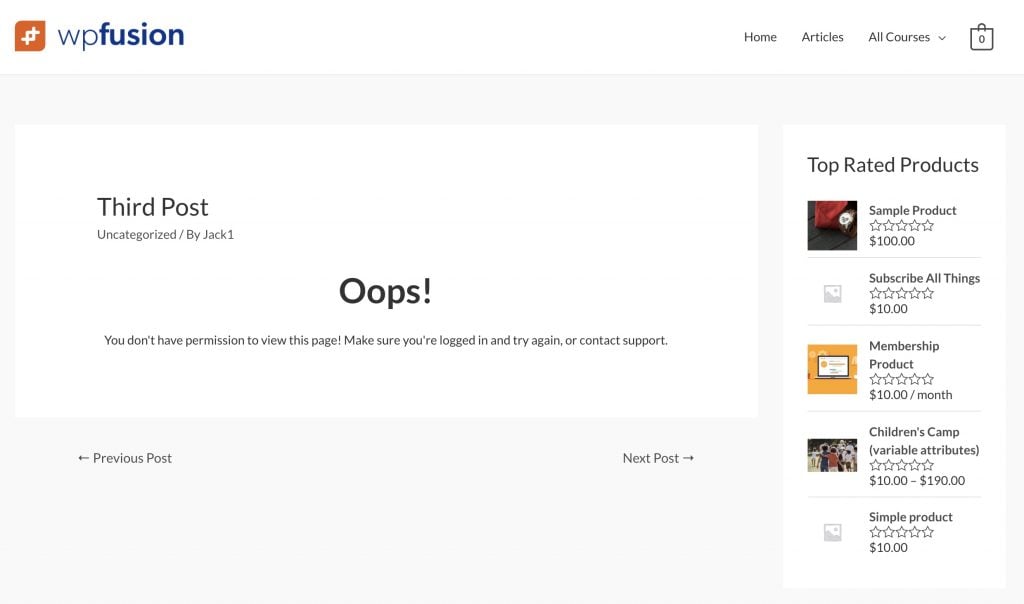 The restricted content message on a blog post.
It does not work as well on pages that have multiple content areas or customized templates, for example a product or course page.
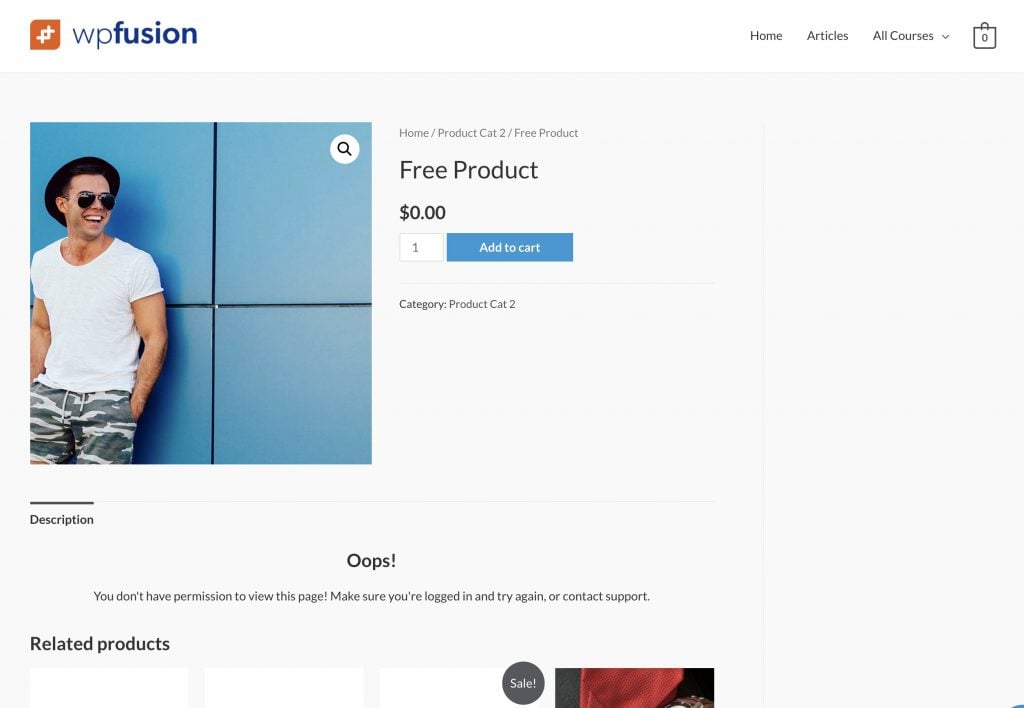 The Restricted Content Message isn』t as effective on a product page since the content area is only a small part of the layout.
In cases like that it』s preferable to set a redirect when access is denied, via the WP Fusion meta box.
#Per Post Messages
Enabling this setting will add a new metabox in the admin for every post and page on your site, where you can enter a restricted content message specific to that piece of content. If no custom message has been entered, the default will be used.
#Site Lockout
Site lockout lets you deny access to your entire website if a user is logged in and has a specific tag.
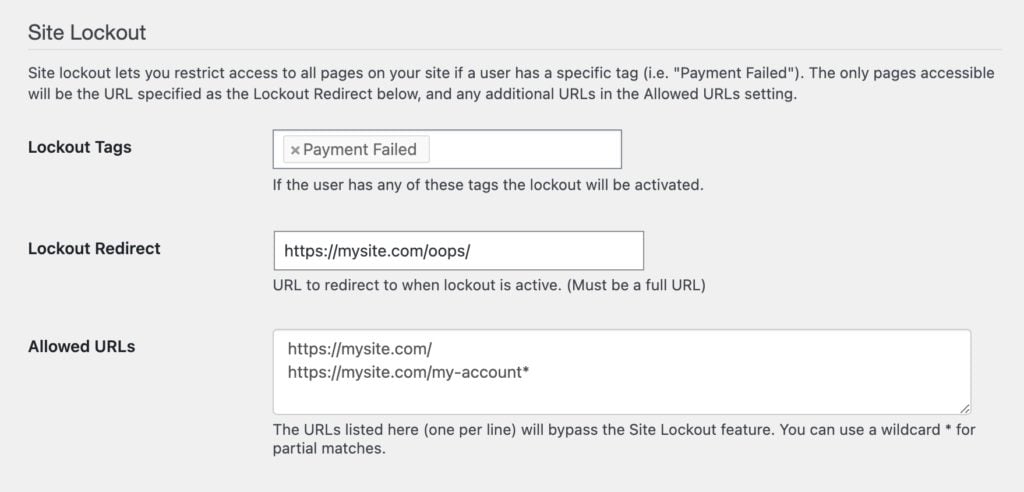
For example if you had a sales website and a separate course website, a renewal payment failure on the sales site could apply a tag Payment Failed.
If the user logs into the course site and has the Payment Failed tag, they can be redirected back to the sales site to update their billing information.
For making your entire site private (regardless of tags) we recommend the Force Login plugin.
The options are:
Lockout Tags: If the user is logged in and has any of these tags, the lockout will be activated.
Lockout Redirect: If the lockout is active, the user will be redirected to the URL specified here. This can either be a page on the same site, or a page on another site (for example a sales site, or a credit card update form at your payment provider』s site).
Allowed URLs: Here you can optionally enter additional URLs that bypass the lockout feature, for example your contact page or a product page. Enter one URL per line. You can use a wildcard * symbol to partially match a URL, for example https://mysite.com/account* will match the account page and any sub pages.
#SEO
By default your restricted content will be hidden from search engine crawlers and social sharing tools.
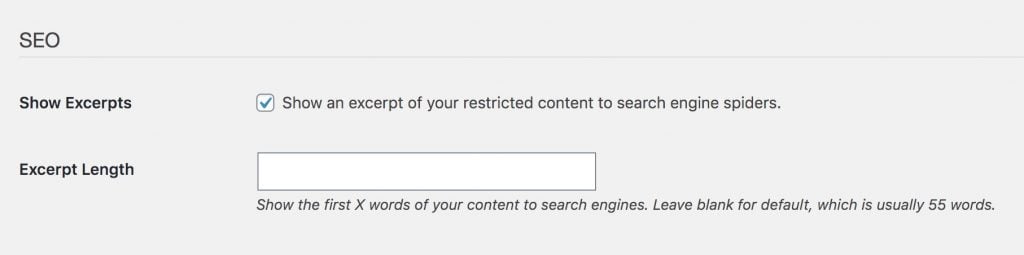
Enabling Show Excerpts will allow search engine spiders and other scrapers / crawlers to view an excerpt of your protected content. This applies to:
Google
Bing
Ask
Yahoo
Facebook
For example if you wanted to share a link to your protected content on Facebook, enabling Show Excerpts would allow Facebook to extract an excerpt of that content, instead of showing your restricted content message.
You can also optionally override the default Excerpt Length.
#Webhooks
Webhooks enable a bi-directional sync between WP Fusion and your CRM. When a contact is updated or a tag is applied in your CRM, webhooks allow the data to be loaded back into WordPress automatically. Webhooks setup for each of our supported CRMs is covered here.
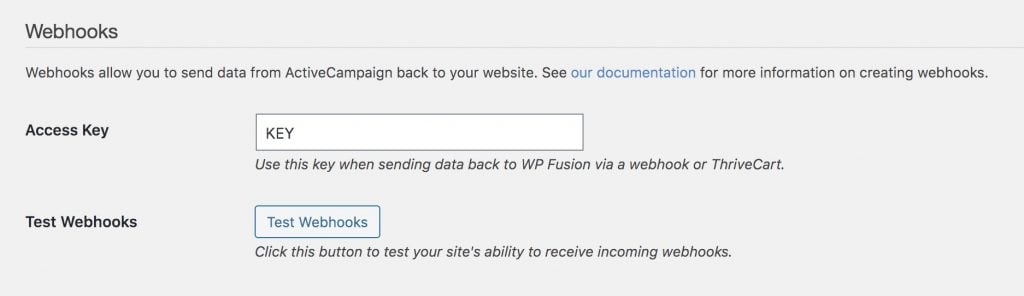
#Access Key
Your access key goes in your webhook URL, this authenticates the webhook to WP Fusion. Your access key is generated randomly when you first set up WP Fusion.
If the access key in your webhooks doesn』t match the key shown here, you will see an error message in the WP Fusion logs when a webhook is received.
You can change your access key by editing this field.
#Test Webhooks
If you click this button, a sample webhook payload will be sent to your site from our servers (on this site), to see if your site accepts or rejects the data.
This is a good way to test if a security plugin or firewall is blocking incoming webhooks, though it』s not an absolute indicator since it』s possible for your site to allow incoming data from https://wpfusion.com, while still blocking data from your CRM.
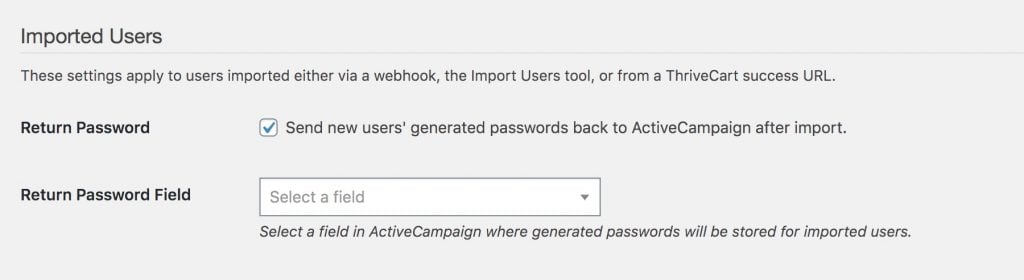
#Imported Users
These settings affect how WP Fusion handles passwords for newly imported users.
WP Fusion can import users via a webhook, via the built in import tool, or via a ThriveCart success URL.
#Return Password
When a new user is imported, a random 8 character password is generated for them. Check this box to sync this automatically generated password back to a custom field in your CRM (specified by Return Password Field).
The password will only be synced to your CRM after it has been generated by WP Fusion, future changes to users』 passwords will not be synced.
This is an easy and pretty secure way to send out a welcome email from your CRM containing the login details for a new user on your site.
#Username Format
By default WP Fusion will set the username for all newly imported users to the contact』s email address.
You may not want the username to be the email address if you』re using a plugin (such as BuddyPress) which shows usernames on the frontend of the site. In that case you can change the default behavior.
The three options are:
Email Address: Usernames will be set to the contact』s emails address
FirstnameLastname: Usernames will be a combination of the contact』s first name and last name (i.e. JaneDoe)
Firstname12345: Usernames will be the contact』s first name, followed by a 5 digit random number (i.e. Jane36808)
For more control over how the usernames are generated, see the wpf_import_user filter.
#Was this helpful?
Let us know if you liked the post. That』s the only way we can improve.
Yes
No


 The Fatal Error Notify plugin can ping you on Slack when WP Fusion encounters an API error
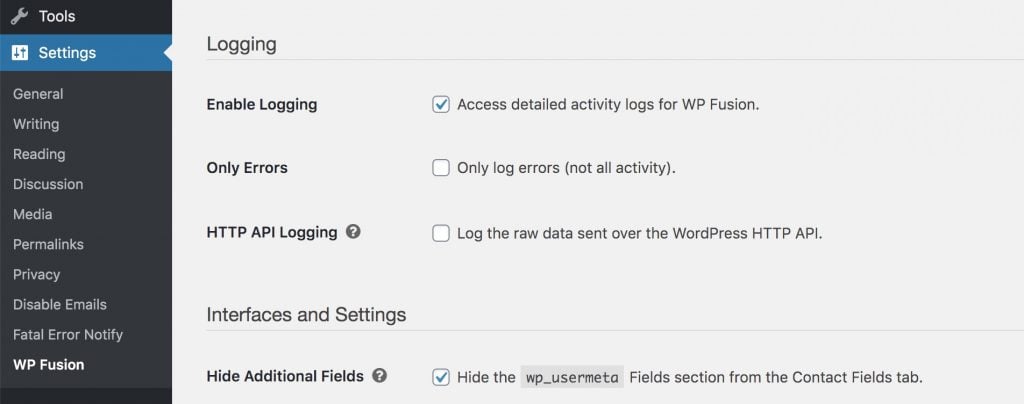
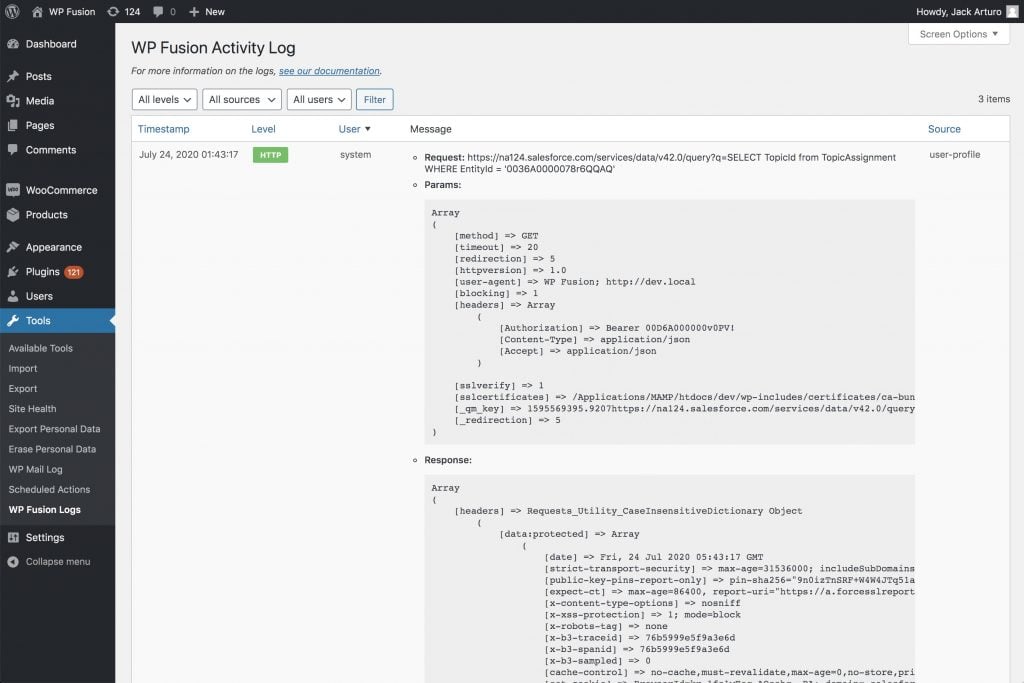 HTTP API logging records the raw HTTP requests and responses from your CRM.


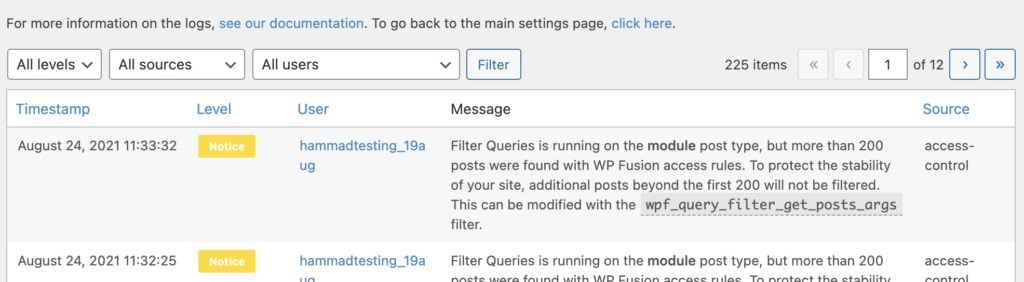 WP Fusion will log a notice if you attempt to process more than 200 posts at a time with Filter Queries in Advanced mode.
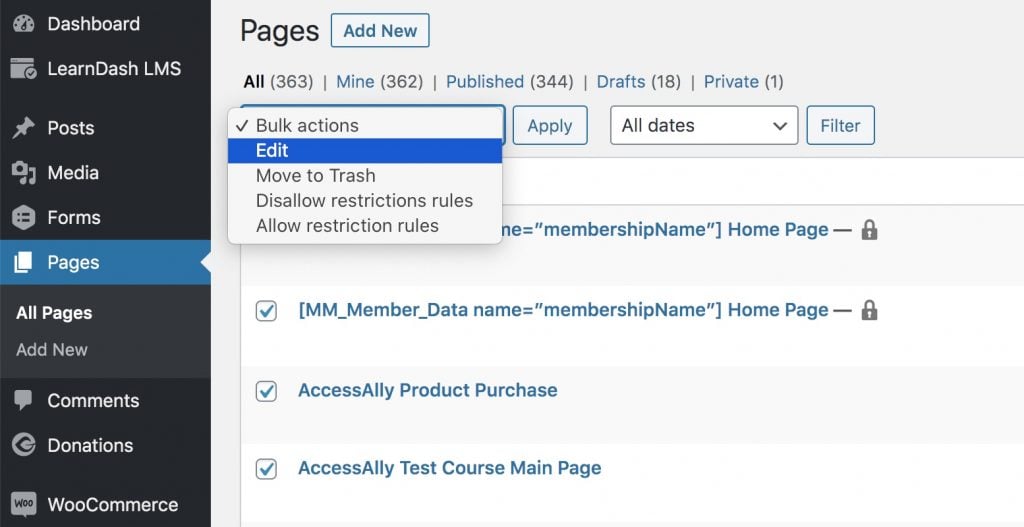 Access the bulk edit panel from the Bulk Actions dropdown